Advanced Entity Properties
There are several advanced entity properties available. With Entity selected, click  and select the property.
General
Use the options below to create, edit, attach, and view properties of an entity event handler.
 Click this button to create a new event handler for the recordset field. Use the list to select an existing recordset field event handler. The selected event handler is attached to the recordset field when you click OK.
 Click the Edit button to open the event handler in your default editor.
Click the Properties button to view event handler properties.
Immediate arrival processing
This option is available when an event handler is attached to the current entity. When available, it is disabled by default.
When immediate arrival processing is disabled, the entity arrival event for this entity is not fired while any active command list (for example, an operation) is active. All synchronization commands in the operation will first be completed so that the event handler has all patterns, attributes, and recordsets within the entity available for use.
When immediate arrival processing is enabled, an entity arrival event is fired as soon as the patterns used to recognize the entity are found and the entity is validated. An entity arrival event can start before any other commands (such as "wait" commands for synchronization) have been completed. Enable this option if you want to handle this entity as a notification or an error message, dismissing it as a "pop-up" that might prevent an operation from reaching its destination entity.
Entity description
Type a description of the selected entity. This data is included in Web Builder projects or any documentation generated using Export options. In the sample models provided with the Design Tool, a description is provided for all preconfigured operations.
Interacting with Host Application
Configure host application interaction properties for the selected entity with the following options:
-
Hidden — Select this check box to disable this entity from being used with a Host Integrator connector.
-
Cache all attribute writes — Select this option to create a temporary storage area for data assigned to attributes.
-
When data is assigned to an attribute from within the Design Tool or from a Host Integrator connector, it will be stored in this area rather than written directly to the terminal (the default). In an operation, attribute data can be assigned using write commands such as DefaultValue and TransmitToAttr or WriteVarToAttr.
-
When using a Host Integrator connector, attribute data is assigned with methods such as SetAttributes.
When Cache all attribute writes is selected, the attribute data assigned by the Design Tool or the Host Integrator connector is temporarily stored until an operation issues an UpdateAttribute or UpdateAttributes command to write the stored data to the terminal screen. Alternatively, an operation can call UpdateAttribute for each attribute in the desired order, inserting other commands in between as needed to modify cursor positioning, synchronize with the host state, or meet any other requirements for the operation.
-
Notes
- By default, an UpdateAttributes command will be inserted in each generated operation when Cache all attribute writes is selected.
- This feature is specifically designed for character mode applications as a solution for managing the order of screen updates. When attribute data assignments are arbitrarily mixed between an operation and a Host Integrator connector API, the order in which data is actually written to the terminal can be important to the host application.
- "Keep Alive" operation — Select a keep alive operation to execute on the host when an active session on the Host Integrator Server is not in use. This operation is executed periodically when the host session is idle to prevent the session from being disconnected from the host prematurely. Use the Default "Keep Alive" inactivity timeout option on the Model Properties dialog box to specify how long to allow a session to be inactive before executing the keep alive operation.
On the Host Integrator Server, you can create a pool of sessions that remain at their home entity and wait for a user to connect to them. When a session is in that state, the host may disconnect it due to inactivity.
The Design Tool lets you define an operation that performs a command that stays within the same entity but generates communication with the host (for example, you can send an Aid key to a mainframe, or you can send a space/backspace combination to a host with VT emulation). This ensures that the session is not disconnected due to inactivity.
Snapshot
With Entity selected, click > Snapshot tab.
This tab provides an image of the selected screen to be used in offline mode. To update the screen to reflect its current state, click Update.
-
The Update button is disabled during offline mode.
-
Make sure to update your screen snapshot regularly. Patterns that are configured on the Validation tab are compared to this snapshot when switching to offline mode, and if one of the validation patterns is not present on the snapshot, you will receive an error message about defined patterns not matching the snapshot.
Validation
With Entity selected, click > Validation tab.
Entity validation enables the Design Tool to verify that a terminal screen has been added to a model as an entity. This validation is checked every time you arrive at that entity from another entity. While performing operations within an entity, the validation will not be used again unless you navigate to another entity. Review entity validation with character mode hosts for specific information about character mode hosts.
Arrival validation - Configure arrival validation with the following options:
-
Wait for patterns - Select this check box to direct the model to wait to find a pattern specified in the Check box before validating the arrival at the current entity. To move a pattern from the Unused box to the Check box, use the right arrow button.
Patterns define the unique signature of a screen in the host application model. Define a pattern to be used in the entity signature by selecting the Use in entity signature check box on the Pattern tab in the Entity window. In addition, the only patterns that will appear in the Unused box will be patterns that are not considered to be a part of the entity signature.
-
Wait for cursor - Select this check box to direct the model to wait for the cursor to be at the specified row and column on the screen before validating the current entity.
When enabling the Wait for cursor check box, enter a valid cursor position only.
- Wait for condition - Select this check box to direct the model to check the specified condition iteratively until it is satisfied. If the condition cannot be satisfied, a timeout will occur. To create a condition like the one described, click the Edit button to open the Condition Edit dialog.
Tags
With Entity selected, click > Tags tab.
Click the Advanced Properties icon for the selected entity to configure advanced settings on the Tags tab. When you create tags for a particular entity, using an identifying keyword, you have the ability to search and illuminate only those entities that match the search criteria.
Creating tags
- In the New Tag field, type the keyword you want to use to identify an entity.
- Click New (or press Enter) to add the tag to the Current tag panel and continue creating other tags.
- Available tags are those that can be associated with other entities. Use the navigation buttons to move tags between panels.
- When you have finished creating tags, click Close and then on the Entity panel click Apply.
Using tags
After creating your tags:
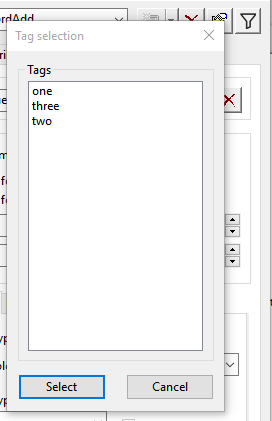
- Open the Tag selection panel using the Tag Selection icon on the Entity toolbar.
- Choose the tags you want to apply to the list of entities, click Select. Alternatively, you can select a single tag by simply double-clicking the tag.
-
The Tag Selection icon, when marked with an
X, indicates that a filter is being used. Click the icon to revert the entity list to its original state.