Additional Development Scenarios
Using existing source code in its current location
This chapter guides the user through the use of the Developer Studio with existing source.
The chapter presents a practical exercise that includes launching a workspace, creating a new project using existing source code, and developing, compiling, running and debugging the existing COBOL programs.
The New COBOL Project wizard with Use Existing Source adds project information to the selected directory containing the existing source.
Select New>Project, and then select COBOL>COBOL Project to open the Create COBOL Project Wizard.
In the Create COBOL Project Wizard, enter a new project name, project2, and select the radio button Create project from existing source.
New Project Using Existing Source
Select File>New>Project…>COBOL>COBOL Project , and click on Next to open the COBOL Project Wizard.
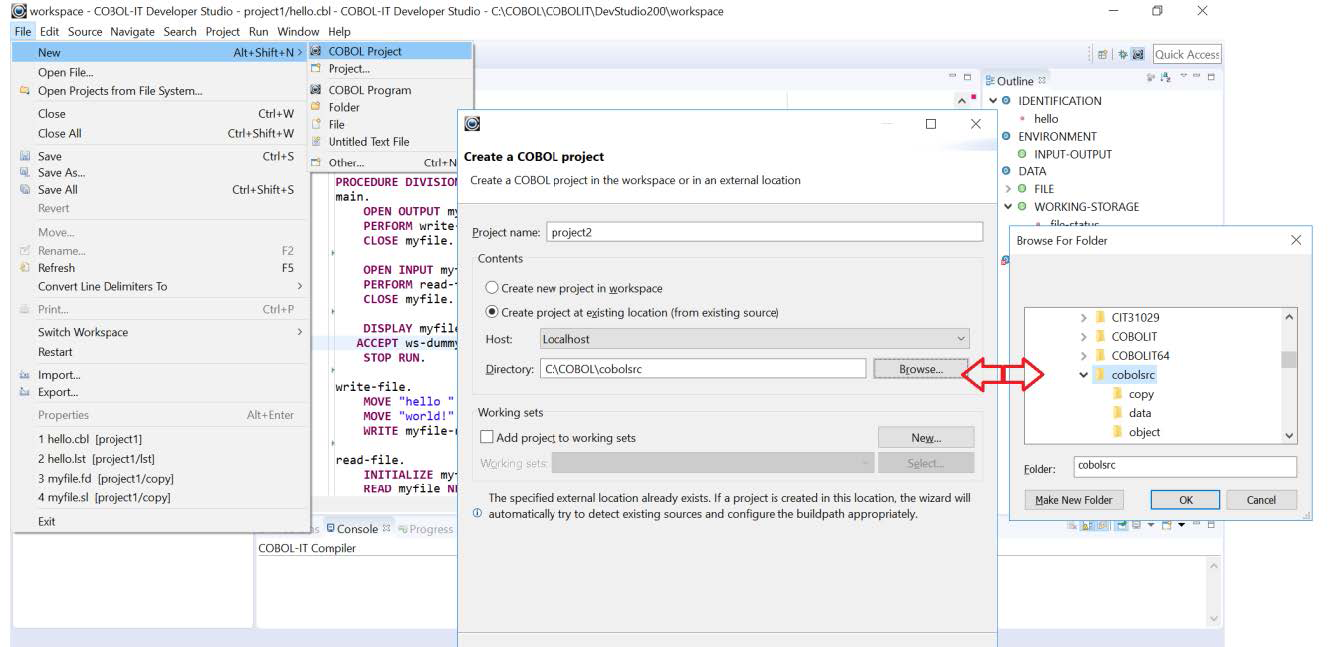
In the Create a COBOL project Wizard, enter a project name. In the example below, we create a project called project2.
Select the radio button titled Create project at existing location (from existing source).
Browse, and select the sample directory at C:\COBOL\cobolsrc.
The new project project2 will be added to the Workspace. Eclipse artifacts, such as the .project file, will be created in the existing directory. Click Finish.
Eclipse artifacts are created in the existing directory
Note
The eclipse artifacts, such as the .buildpath and .project files have been added to the existing directory as a result of having created a new Project in the existing directory.
       C:\COBOL\cobolsrc>dir
       Volume in drive C is OS
       Volume Serial Number is F4D5-6238

       Directory of C:\COBOL\cobolsrc

       12/18/2017 05:46 PM  <DIR>          .
       12/18/2017 05:46 PM  <DIR>          ..
       12/18/2017 03:52 PM         106 .buildpath
       12/18/2017 05:54 PM  <DIR>         .cobolit.tmp.10.0.0.153
       12/18/2017 04:44 PM  <DIR>         .launches
       12/18/2017 03:52 PM         512 .project
       12/18/2017 04:37 PM  <DIR>         .settings
       12/18/2017 05:49 PM  <DIR>         c
       07/13/2017 02:08 PM  <DIR>         copy
       12/18/2017 05:53 PM  <DIR>         data
       12/18/2017 05:47 PM         1,231 holidaysIX.cbl
       07/28/2017 09:08 AM         6,260 labfile2.cbl
       12/18/2017 05:47 PM  <DIR>         lst
       12/18/2017 05:49 PM  <DIR>         object
              4 File(s)     8,109 bytes
              10 Dir(s) 350,442,024,960 bytes free
Existing files and folders appear in the Navigator Window. If you add or delete folders or files here, they are added/deleted to/from the system folders. If you add or delete files or folders at the system level, they will be added/deleted in your project as well.
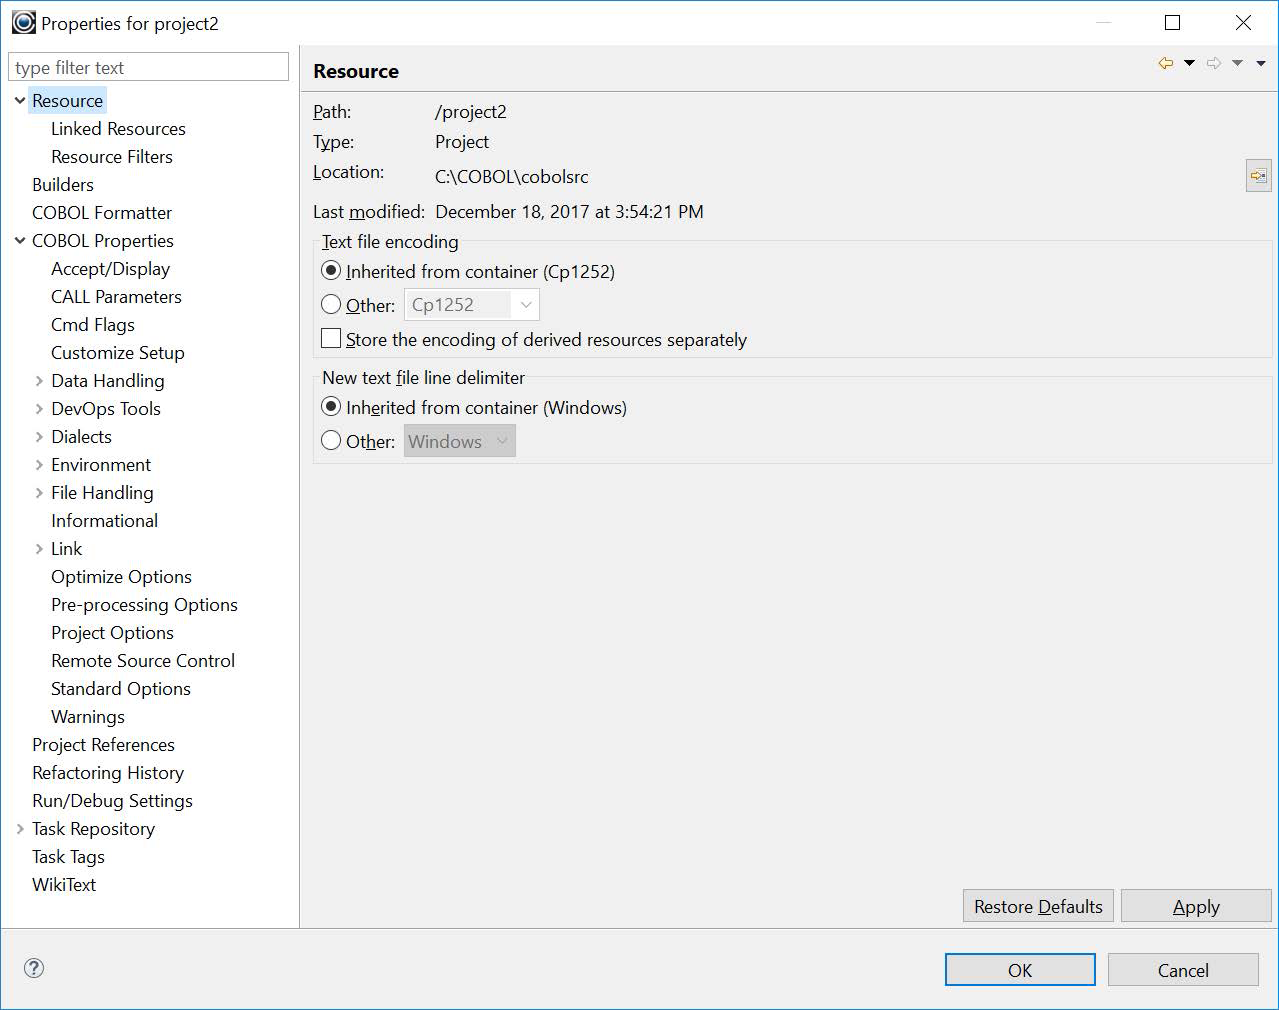
Project>Properties>Resource
Select project2 by clicking on it, then right-click, and select Properties from the right-click dropdown menu to verify that location of the Project Folder is at the location of the existing source:
Project>Properties>COBOL
Use the Project>Properties>COBOL dialog screen to check, and set compiler flags for this project. The compiler flags for project1 were set at the project level, and are not inherited by project2.
Set the –I <directory>, -t <directory>, -o <directory>, and –g compiler flags.
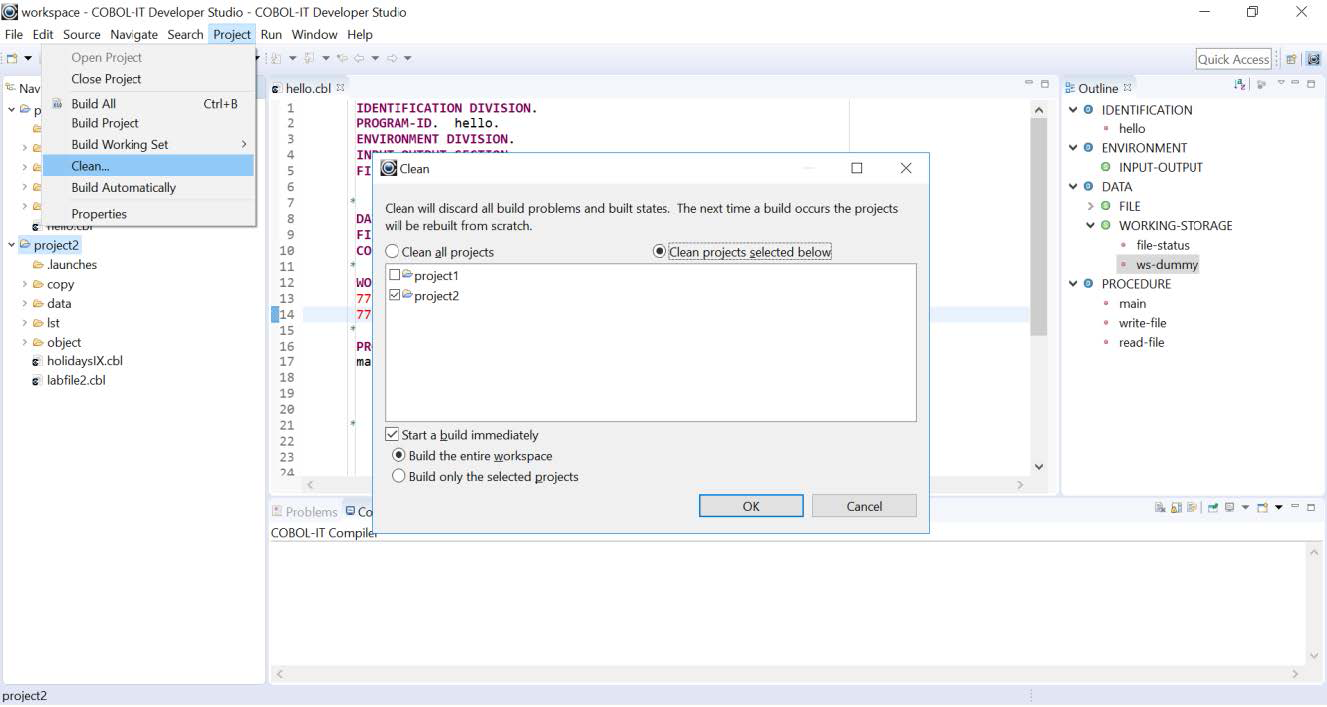
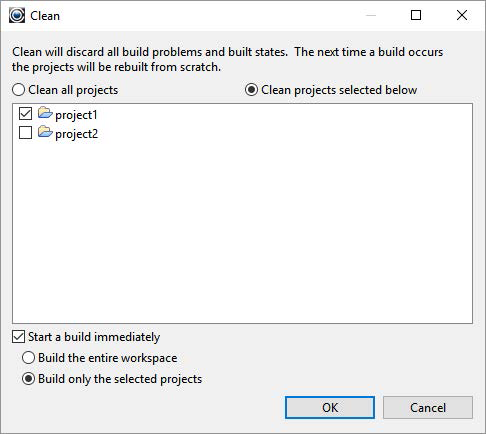
Clean and build project2
As there are now two projects in the Workspace, both the Clean and Build portions of the dialog screen contains options.
In the Clean portion of the dialog screen, select the radio-button titled Clean projects selected below, and select the checkbox titled project2.
In the Build portion of the dialog screen, select the radio-button titled Build only selected projects.
Click OK.
The Compiler Console Window
The results of the compile are in the Compiler Console Window:

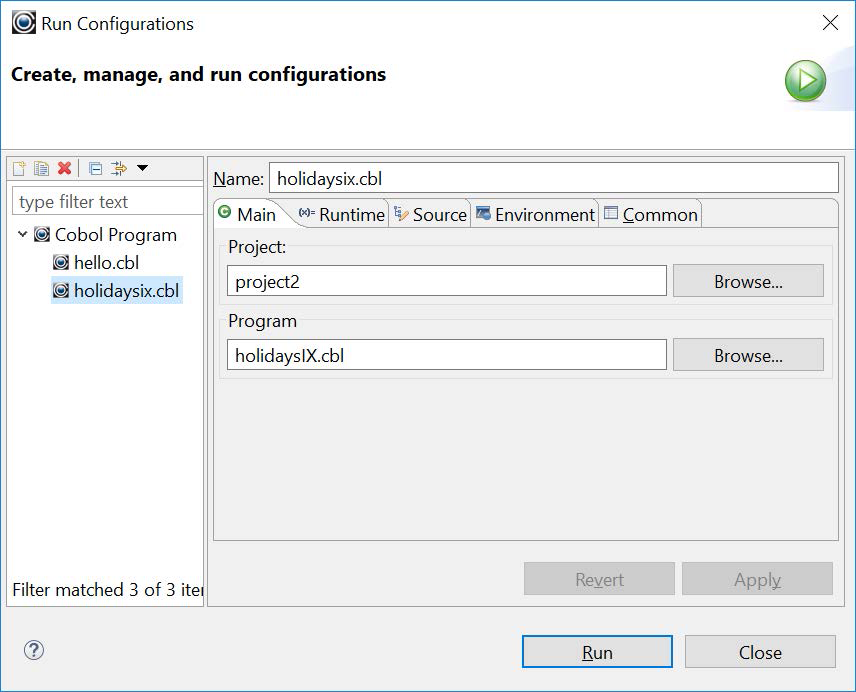
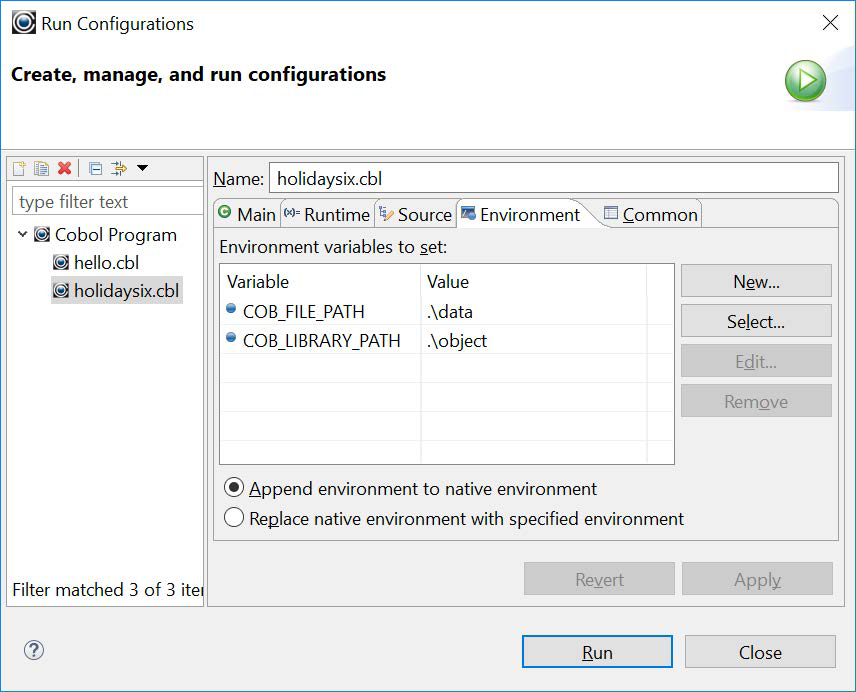
Create a Run Configuration for project2>holidaysix.cbl
Right-click on holidaysix.cbl, select Run As from the dropdown menu, and then select Run Configurations from the subsequent dropdown menu. In the Run Configurations wizard, select holidaysIX.cbl in project2 on the Main tab.
Add the environment variables
Set the Environment Variables on the Environment tab.
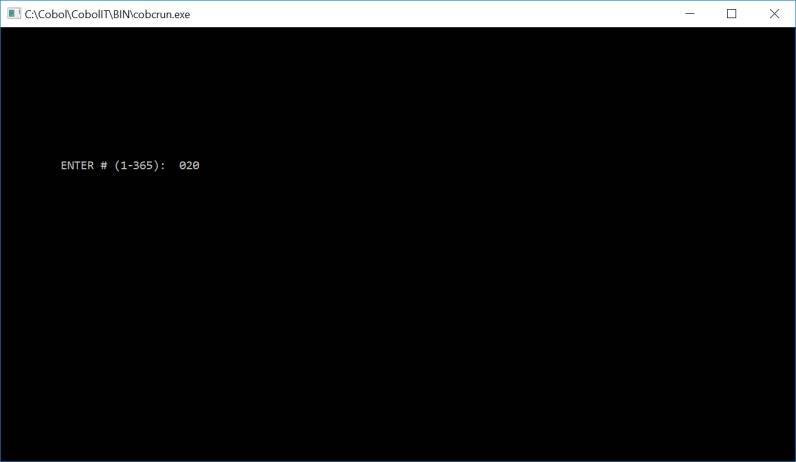
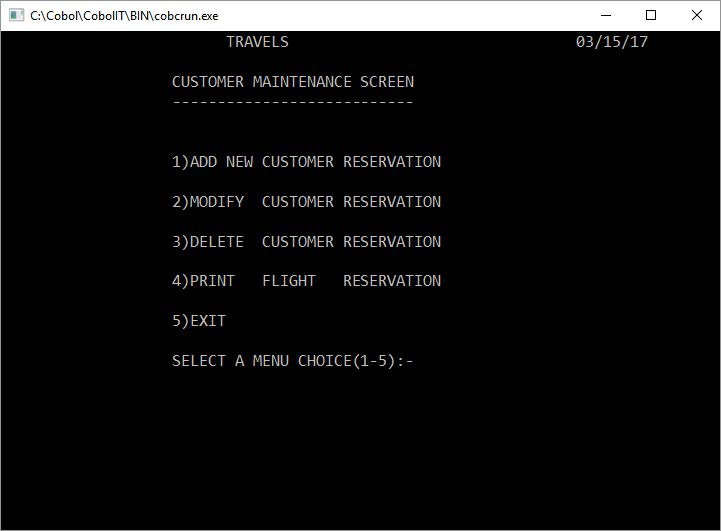
Run the COBOL program
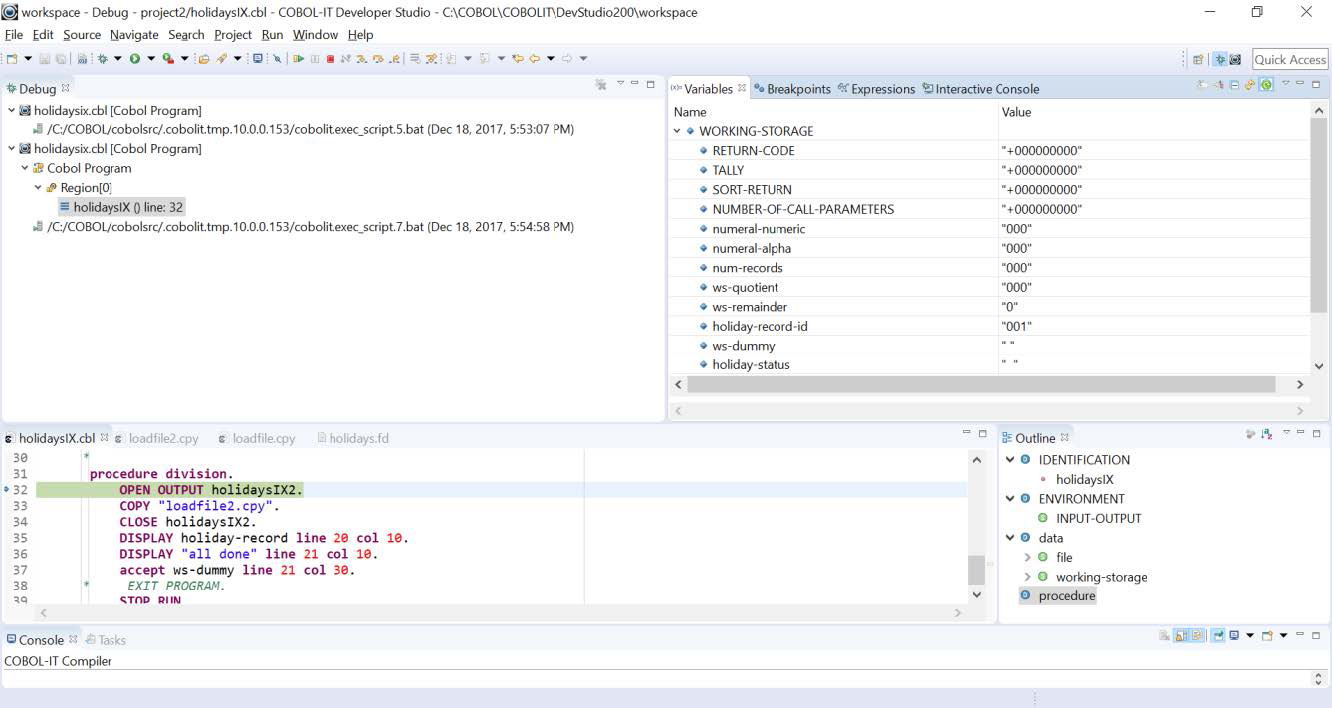
Running the COBOL program in the Debugger Perspective
Click on the Debug button on the Developer Studio toolbar to run holidaysIX in the Debugger Perspective.
Single step with the Step Into (F5) function. Run the program with the Resume (F8) function.
Details on the Debugger Perspective are contained in the Compile, Run and Debug section.
Importing existing source code into a Project structure
The COBOL Import Wizard provides a way for you to copy existing source into an existing Project Folder structure. When you import source into an existing Project, all modifications are made to the copies of the source that have been made in the existing Project locations.
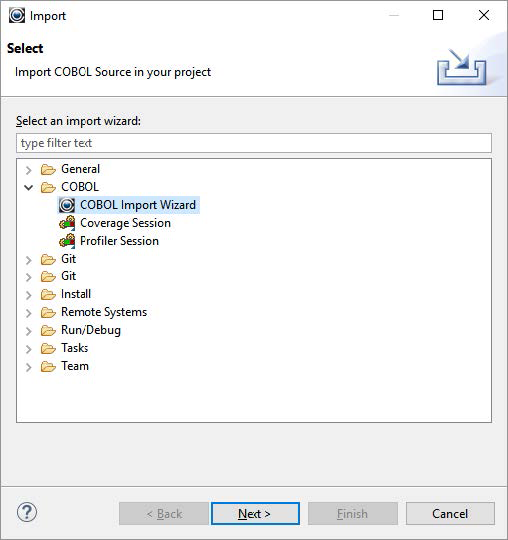
The COBOL Import Wizard
The COBOL Import Wizard requires an existing Project. In this exercise, we will import a COBOL source file from the COBOL-IT sample programs into our project1.
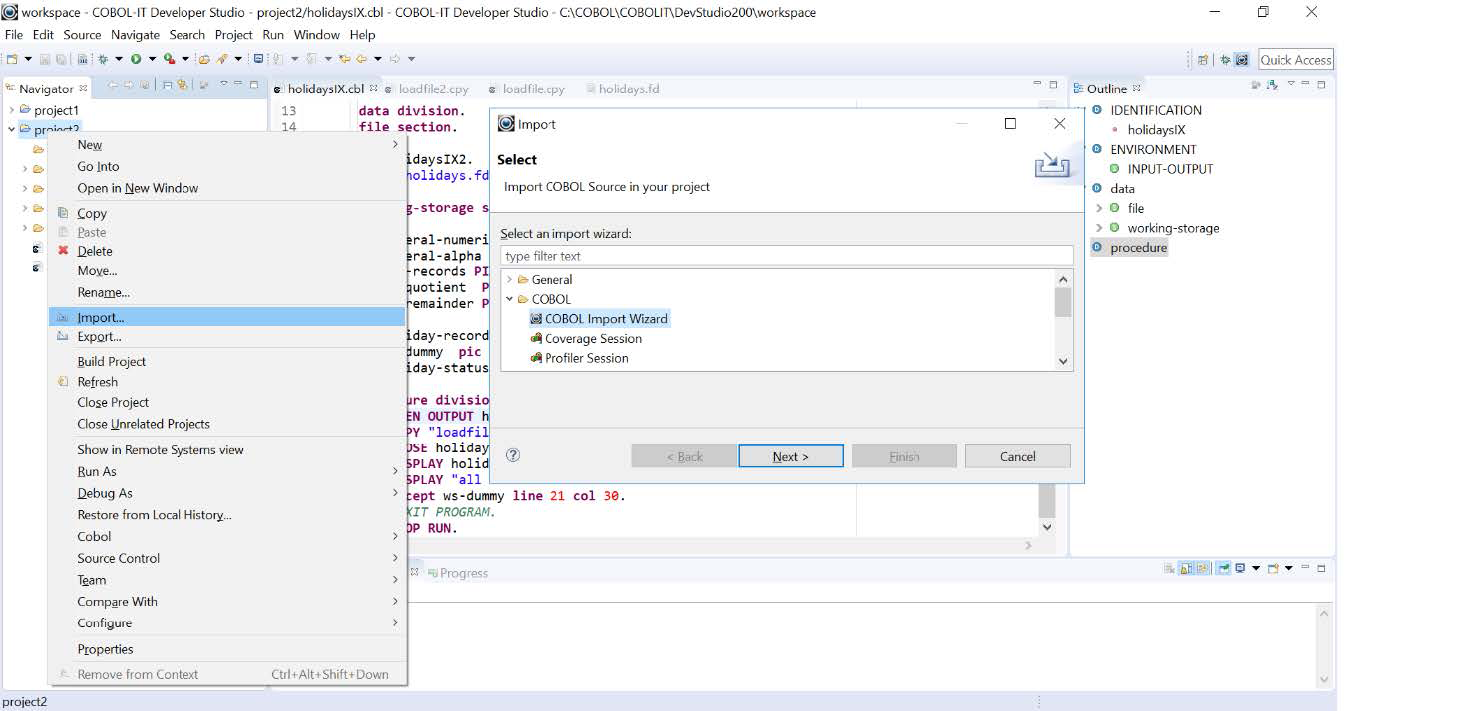
To use the COBOL Import Wizard, right-click on the Project folder, and select Import… from the right-click dropdown menu.
From the Import dialog screen, expand the COBOL folder, and select the COBOL Import Wizard, and then click on the Next button.
Select the Import Directory
In the Import resources dialog screen, begin by clicking on the Browse... button, which will open the Import from directory dialog screen. In the Import from directory dialog, select a directory, and click OK. This will cause the From directory: entry-field to be filled with your choice.

To select only the file (in this case customer0.cbl), select the checkbox in the file in the panel on the right. Click on the Finish button, to import the files into the existing project.
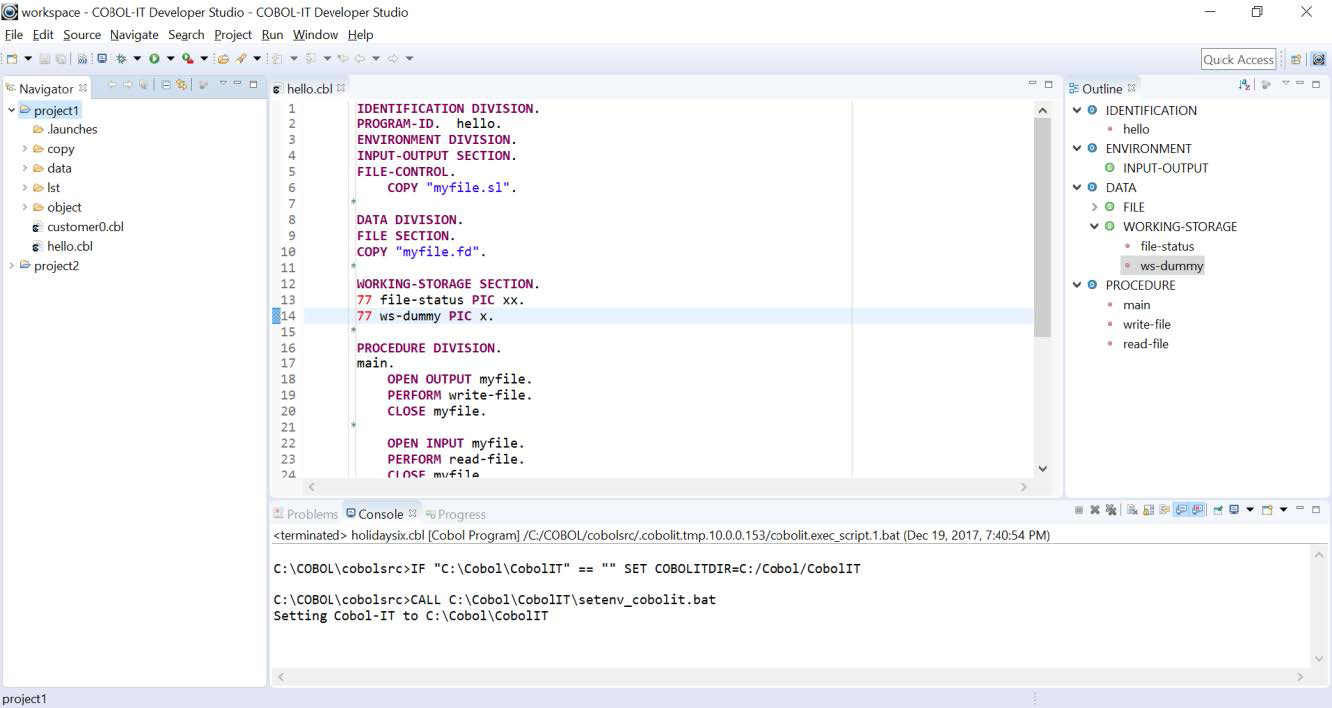
Imported files are automatically displayed in the Project Folder
The selected source file is copied into the existing Project Folder, and displayed in the Navigator Window.
Compiler Configuration
Source files imported into a Project inherit the compiler flags that have been set with Project>Properties. The program customer0.cbl that we have imported can be compiled with existing compiler flags, so no new action needs to be taken.
Create a Run Configuration for the new source file(s)
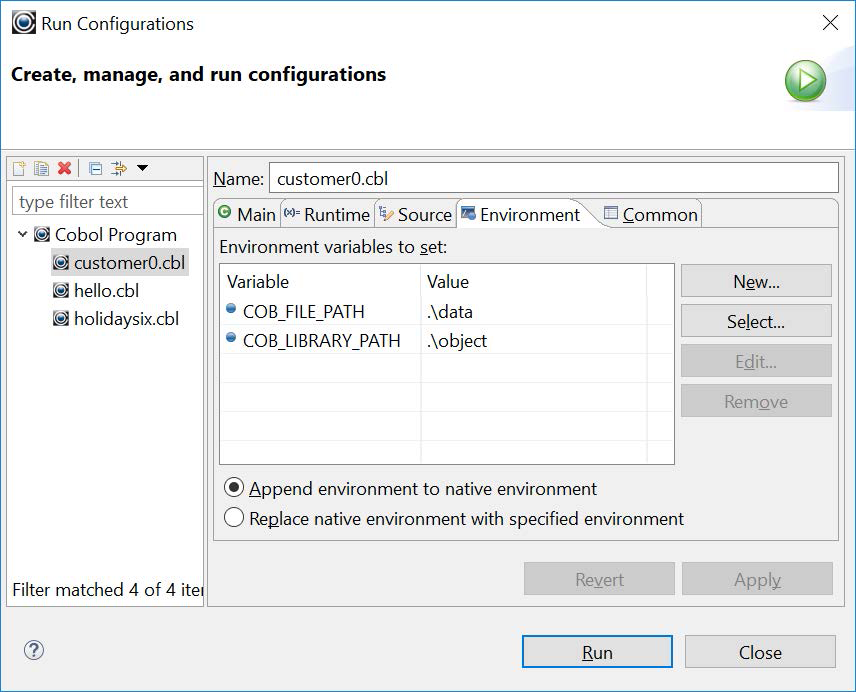
Customer0.cbl requires the COB_LIBRARY_PATH and the COB_FILE_PATH environment variables be set.
Clean and Build
Clean and Build project1, which now contains the imported source file.
Check the Compiler Console Window
This Build is successful.

Run
Click on the Run button on the Developer Studio toolbar.
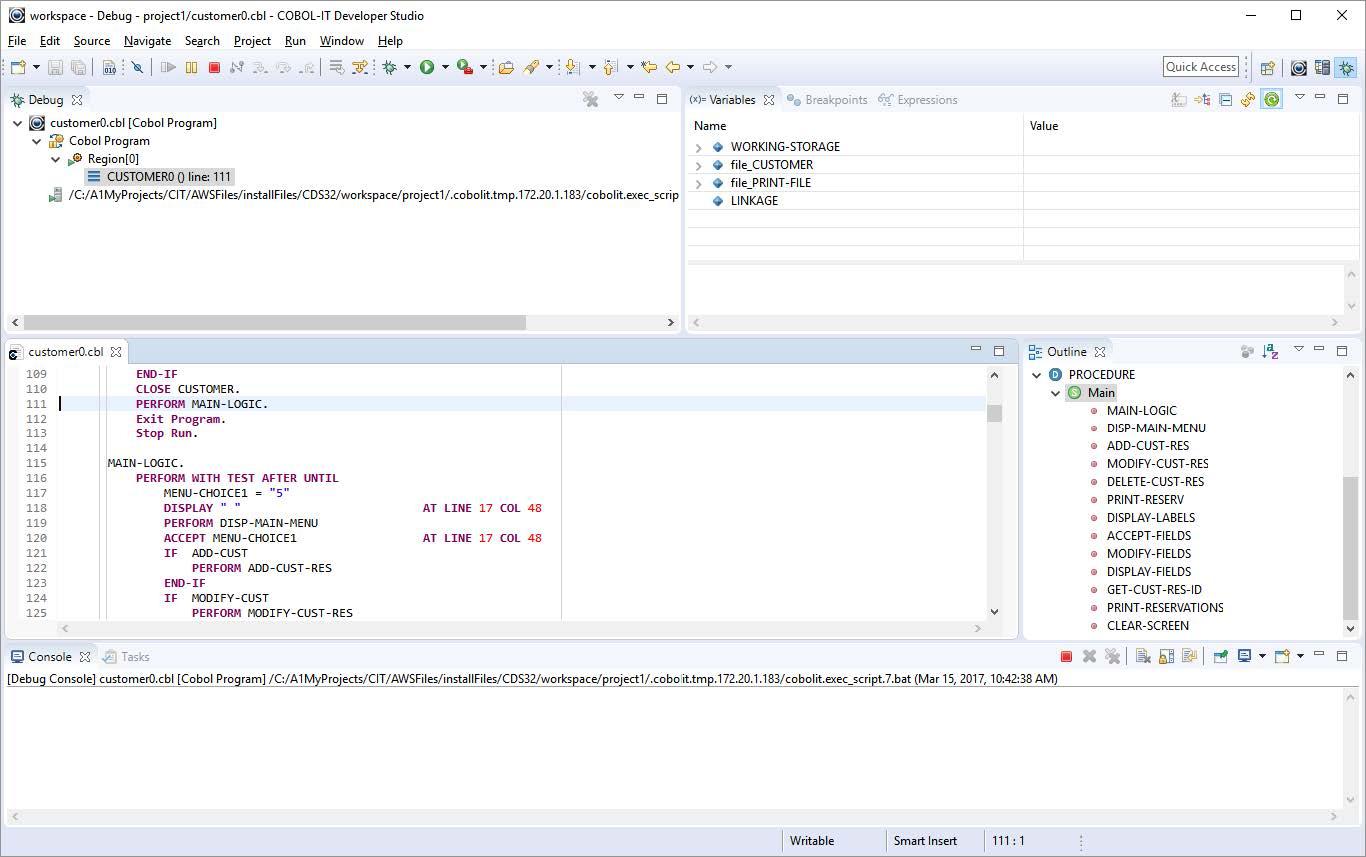
Run in Debug
Click on the Debug button on the Developer Studio toolbar. Single step through the source with the Step Into (F5) toolbar button.
Dragging and dropping files and folders into a Project
An alternative way to import files and folders into a Project is to select them, and drag and drop them onto the Project Folder in the Navigator Window. In the Windows Explorer, selected a file, or a group of files and perform a “drag and drop” operation.
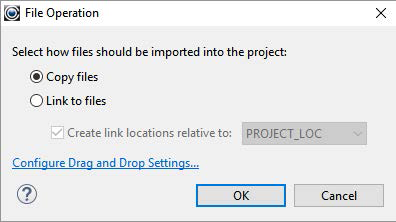
File and Folder Operation
The File and Folder Operation dialog screen provides a number of options for using existing files and folders. Select the Copy files and folders radio-button, and click OK.
Navigator Window updated
When the files have been COPY’ed into the Project Folder, the Navigator Window is updated.
Summary
- New Projects can be associated with Existing Source through the New Project wizard.
- When using Existing Source, all Eclipse file artifacts are added to the existing source directories.
- All editing is done on the files in the Existing Source directories.
- Working on multiple projects within a Workspace is possible, though you will notice how certain screens, such as the Clean and Build screen provide more options when this is the case.
- Configurations can be made at the Workspace level from within the Window>Preferences interfaces. These configuration settings are automatically applied to all Projects within a Workspace.
- Configurations can be made at the Project level, from within the Project>Properties interfaces. These configuration settings do not transfer from one project to another, as you add projects to the workspace.
- Configurations can be made at the Program level, by right-clicking on a program, and selecting Project>Properties. These configuration settings apply only to the selected program.
- Runtime configurations are useful in cases where a program requires a special configuration. However, using Standard Configurations, in which the COBOL-IT setup file is altered to include the necessary runtime environment variable settings is likely to be a more convenient solution.
- Drag-and-drop functionality from the Windows Explorer directly into the Project Folder in the Developer Studio is supported.
- The Developer Studio automatically launches the Debugger perspective when a debug operation is launched. Make sure that your programs are compiled with
–gprior to launching the Debugger perspective. - The Enterprise Edition of the Developer Studio can be used to compile, run, and debug programs in projects on remote machines.