Using RSE Git for Source Code Control
RSE Git functionality requires an RSE connection to a Server on which COBOL source code is hosted in an existing Git repository. Inside the Remote System Explorer (RSE) connection, users can create a remote project using this existing COBOL source, and have access to Git functionality.
Setup for use of RSEGit
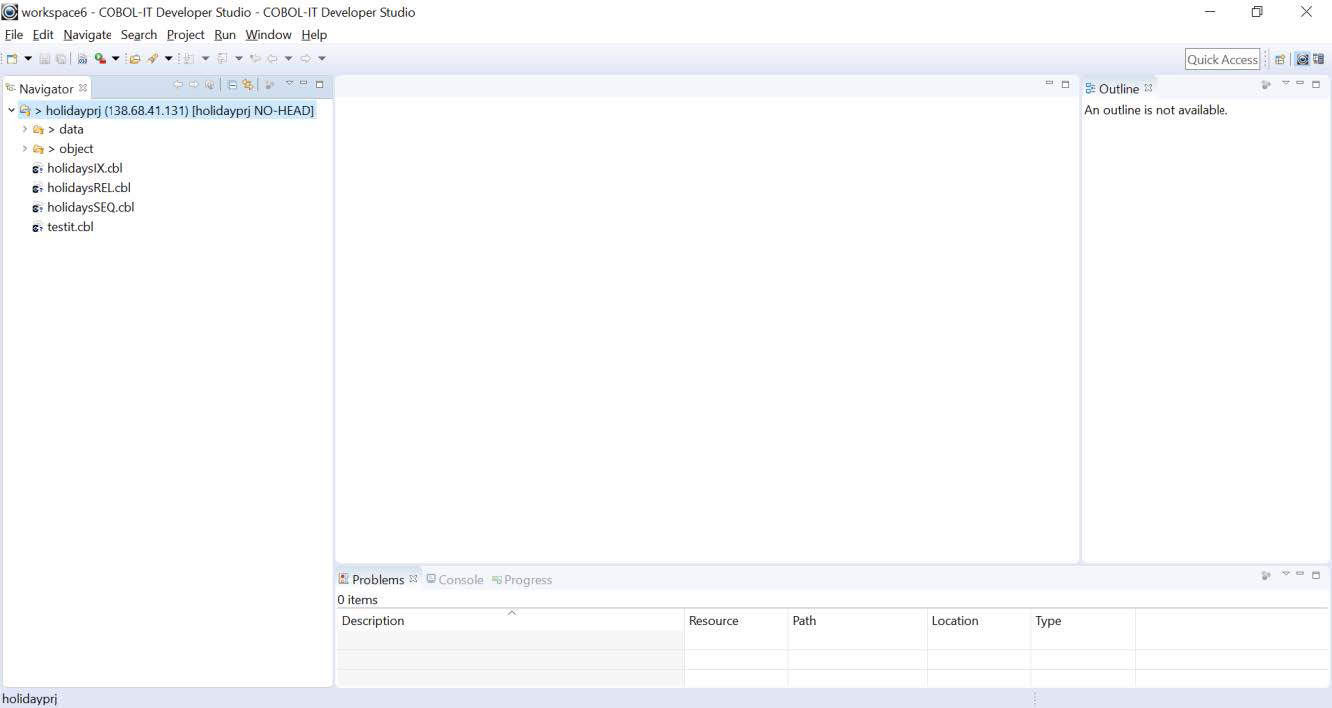
Remote Server>COBOL Source Folder
For our sample we have a COBOL Source Folder called holidayprj, in which we have folders called data and object, and we have the following source files:
holidaysIX.cbl
holidaysREL.cbl
holidaysSEQ.cbl
testit.cbl
Remote Server>COBOL Source Folder>git init
First, we will enter the COBOL Source Folder, and create and configure a git repository. We can do this by running the commands:
>git init
>git config user.email “cobol.trainer@gmail.com”
>git config user.name “COBOL Trainer”
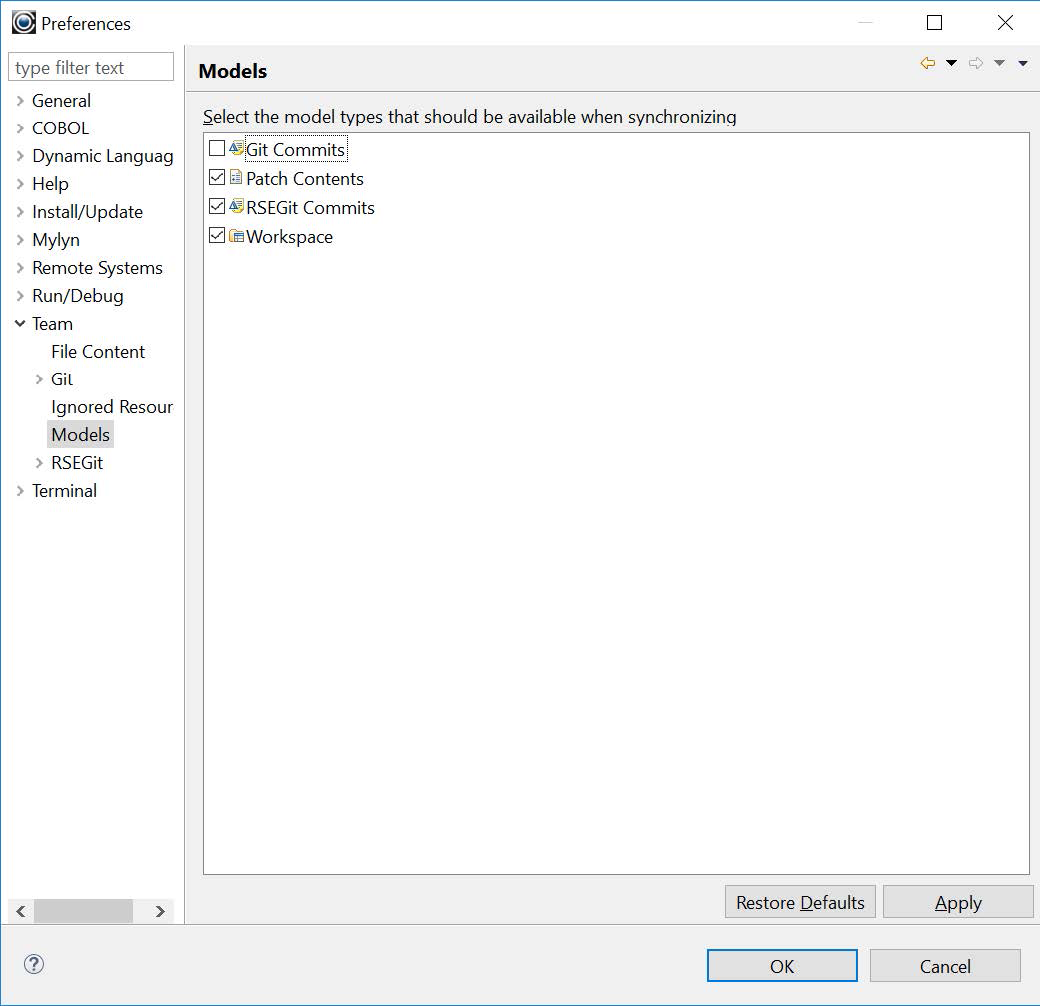
Developer Studio>Window>Preferences>Team>Models
To configure the Developer Studio for use with RSEGit, navigate to the Window>Preferences>Team>Models dialog screen. On the Models dialog screen, make sure that the Git Commits checkbox is de-selected and that the RSEGit Commits checkbox is selected.
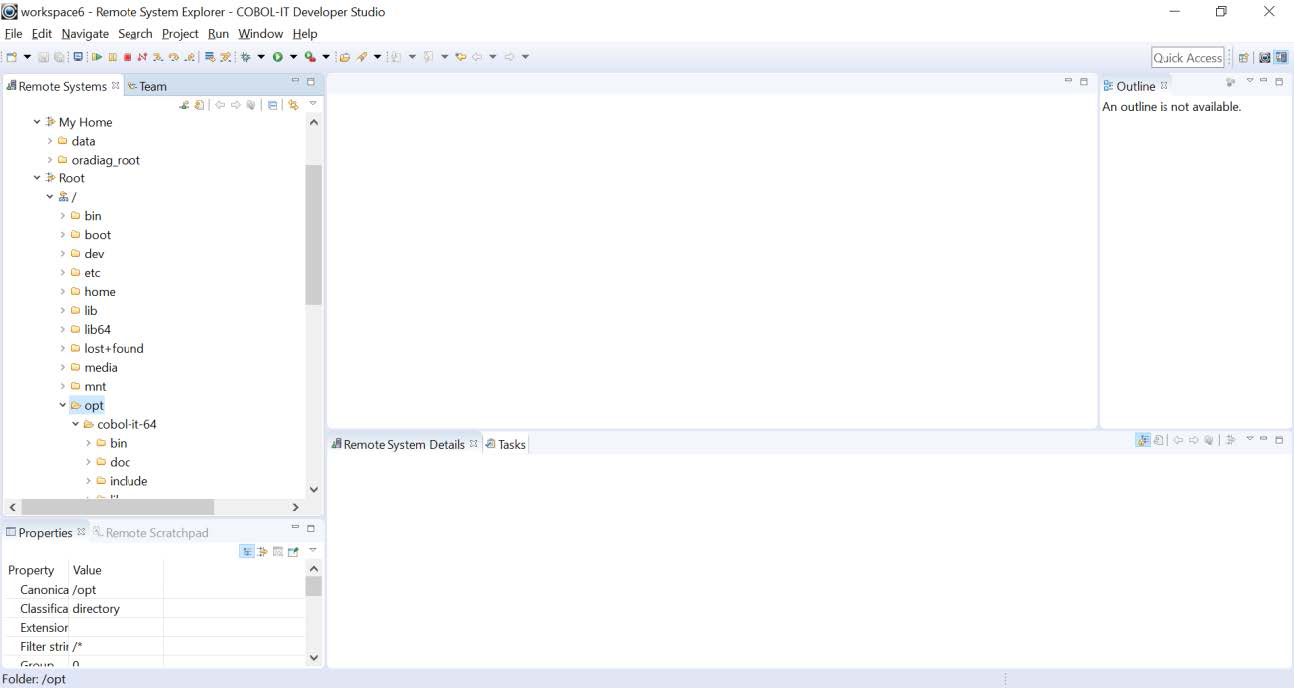
Remote System Explorer>Establish a remote connection
RSEGit provides users of the Remote System Explorer (RSE) capabilities of the Developer Studio with the ability to use Git for Source Code Control. To begin using RSEGit, first establish a remote connection through the Remote System Explorer.
Developer Studio>Create a project at existing location
In the Developer Studio Perspective, select File>New>Project. In the New Project dialog, expand the COBOL entry, and select COBOL Project. Click on the Next button proceed to the Create a COBOL Project dialog.
File>New>Project
Select File>New>Project, and then select COBOL>COBOL Project from the New Project dialog box. This will open the Create Project dialog box.
Create a COBOL Project
In the Create a COBOL Project dialog screen, name the project holidayprj. Select the Create project at existing location radio button.
Drop down the Host dropdown box and select the Remote host notation. Then, browse to the directory in which the COBOL source files are located and in which the Git repository has been created. Click on the Finish button to create the new project.
The Project is created, and Git labels are applied to the project files.

The Project is created and Git label decorations are applied to the project files.
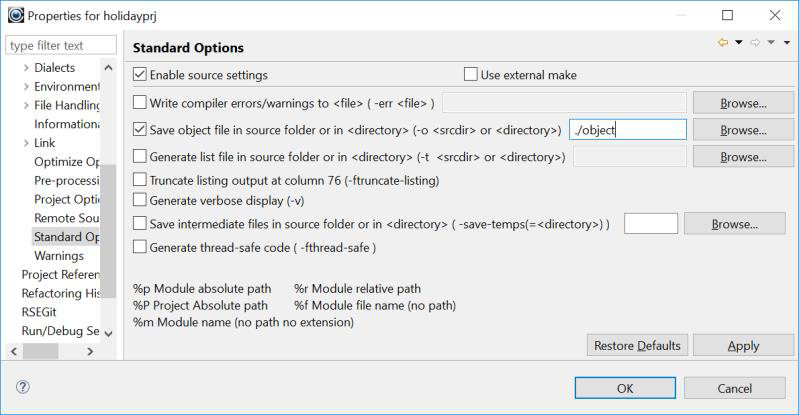
Project>Properties>COBOL Properties>Standard Options
Select the -o compiler flag option, and enter ./object into the corresponding entry-field.
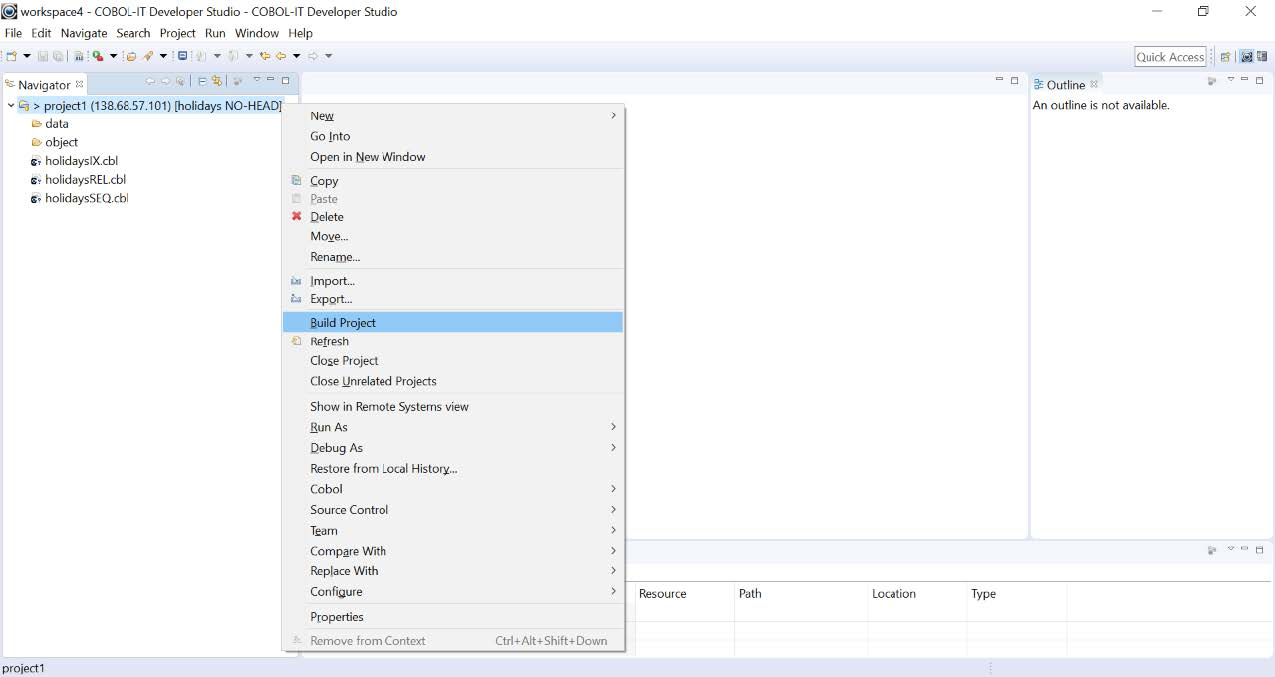
Build the Project
Select the project, and right-click to open a drop-down menu. From the drop-down menu, select Build Project to build the project.
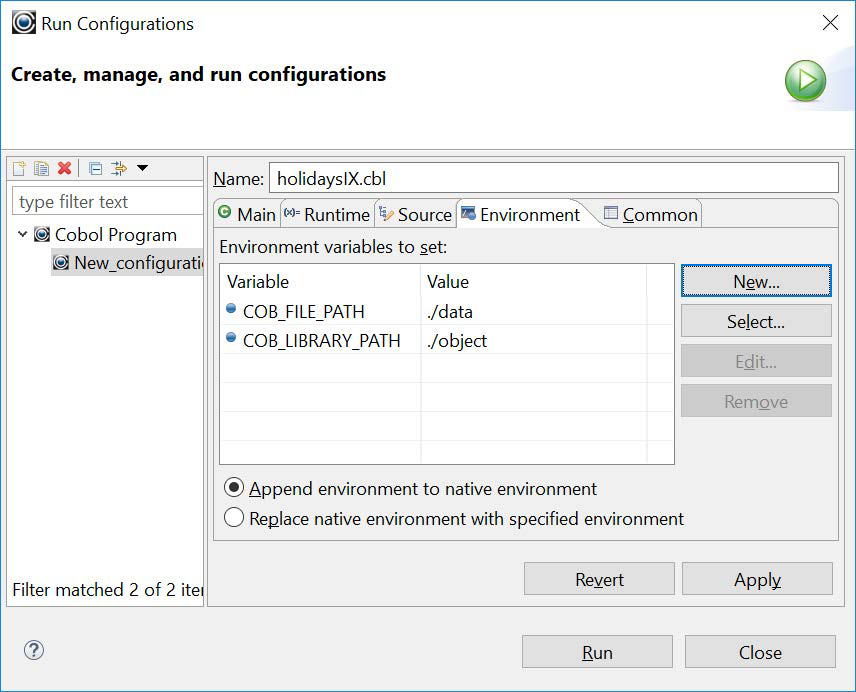
Run the Project
Select holidaysIX.cbl, right-click and select Run As… from the drop-down menu to open the Run Configuration wizard. We have named our our configuration holidaysIX.cbl. On the Main tab, verify that that holidaysIX.cbl in project1 is selected. On the Runtime tab, verify the runtime settings. On the environment tab, set COB_FILE_PATH to ./data and COB_LIBRARY_PATH to ./object. Click Apply, and then click on the Run button.
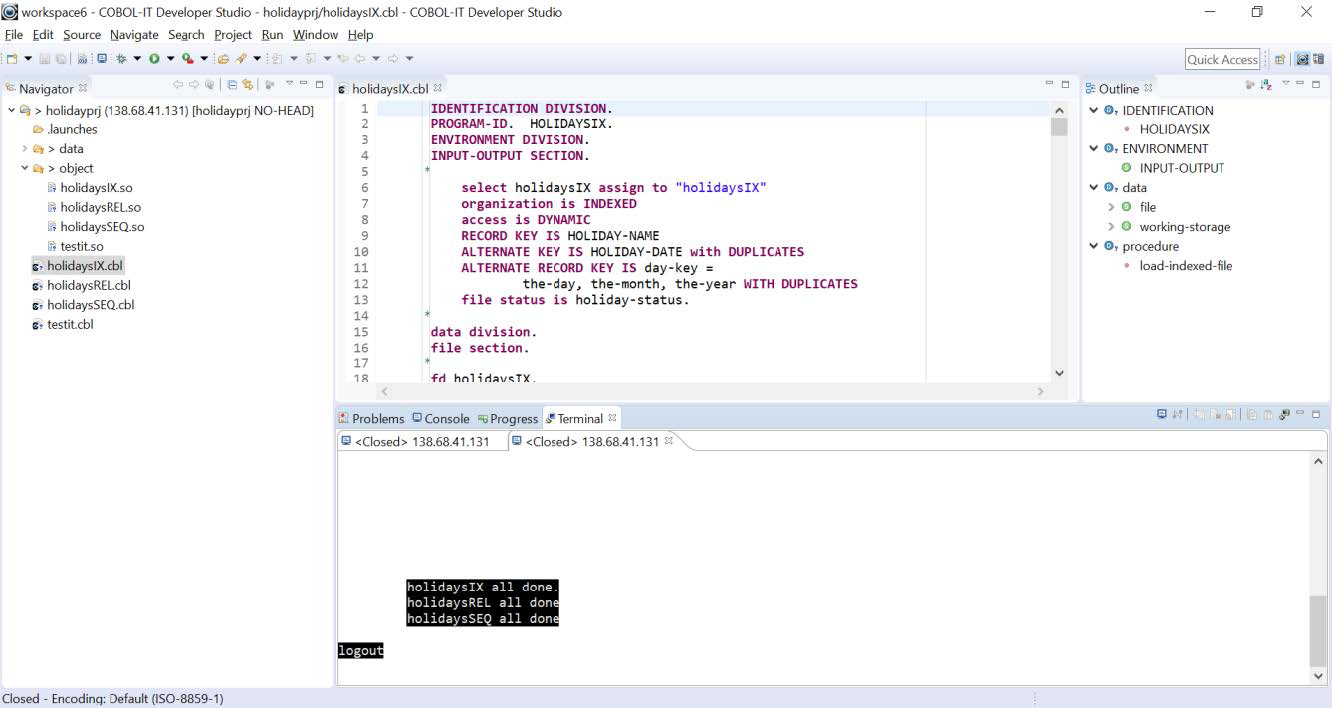
The program will run, creating indexed, relative and sequential files. We see our output in the Terminal Window.
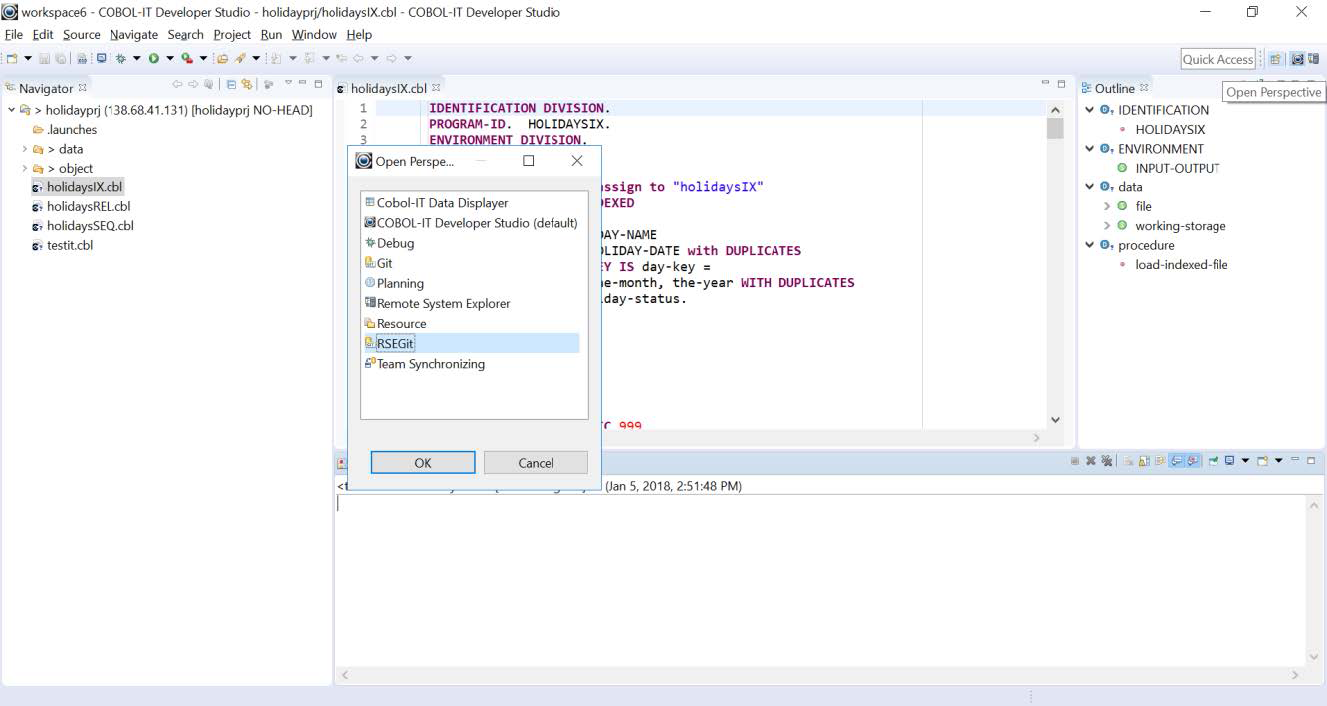
Developer Studio>Open the RSEGit Perspective
Open the Open Perspective dialog window and select RSEGit. Click OK.
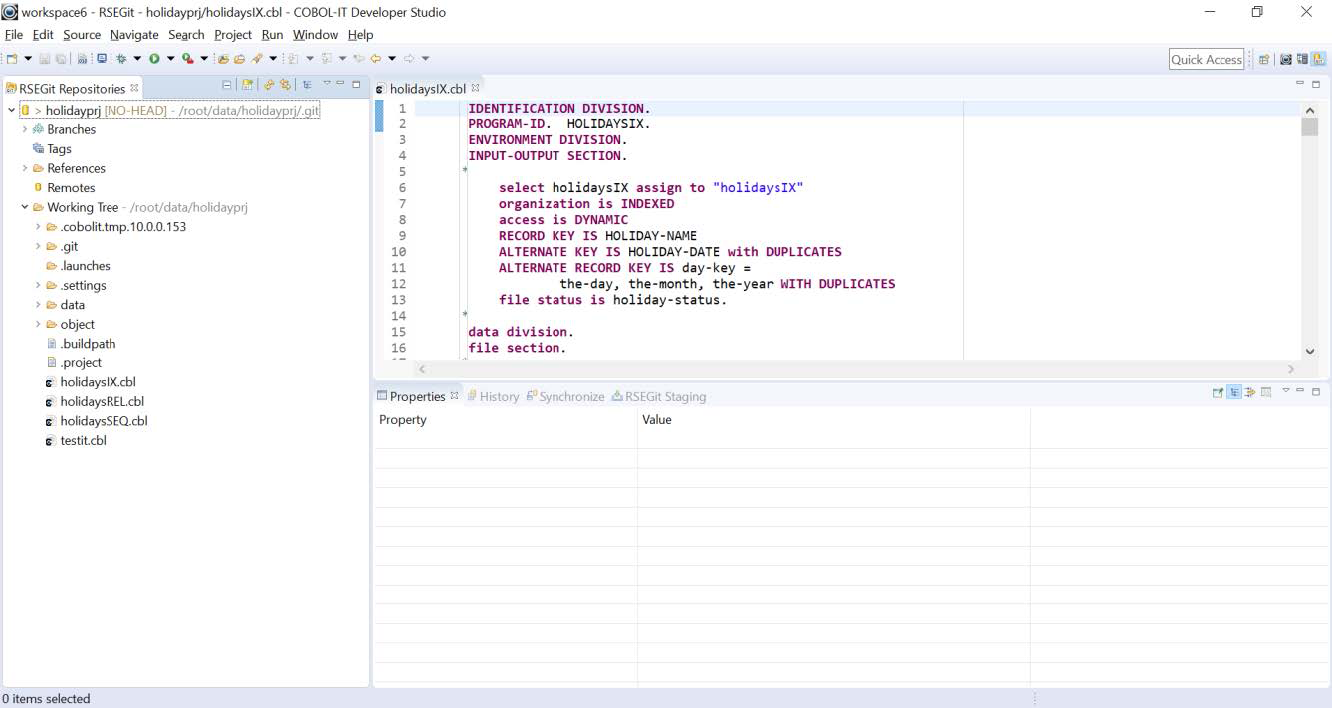
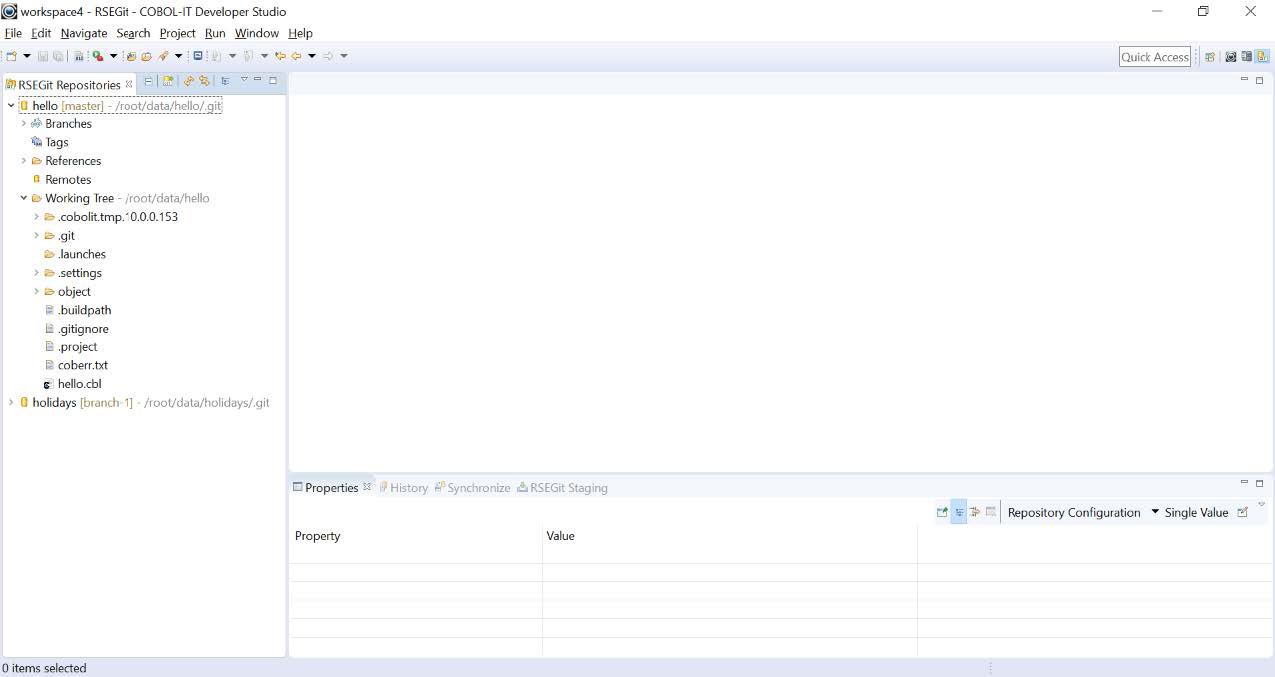
RSEGit>RSEGit Repositories View
The RSEGit Perspective opens with the RSEGit Repositories view in the panel on the left, and tabbed views for History, Synchronize and RSEGit Staging in the lower right. When the RSEGit Repositories View is empty, there is a functional link titled Add an existing Git repository, which can be used to locate and open an existing Git repository with Browse functionality.
In our case, we created a COBOL project in a source location that included a git repository, so the COBOL source files have been listed in the Git Repositories Window.
Setup is complete now, and you are ready to work in the Developer Studio using RSEGit.
Committing Files
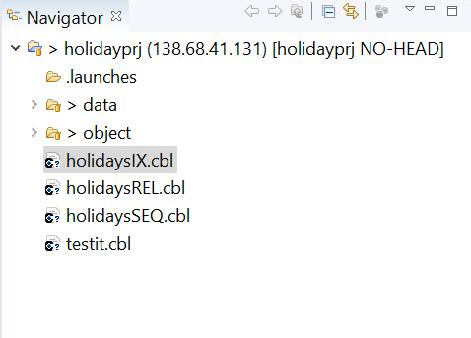
The Navigator View of the COBOL Project>Untracked text
Switch to the Developer Studio perspective. The new project is displayed in the Navigator Window, and the project is decorated with Git label decorations. The files are marked with the Untracked Text decoration. For details about Git Label Decorations, see Window>Preferences>Team>Git>Label Decorations.
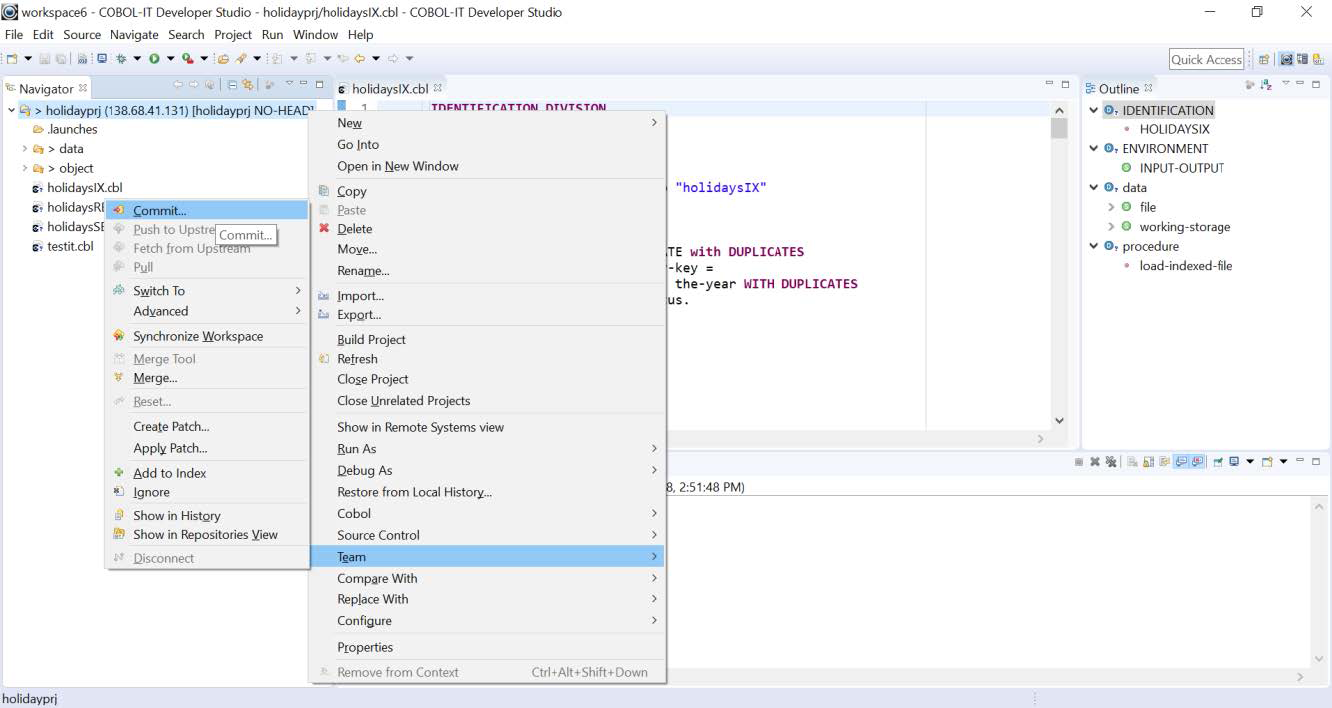
[Project]>Team>Commit>RSEGit Staging
Right-click on the project listing, select Team from the dropdown menu, and Commit… from the subsequent dropdown menu to commit your project files to the repository.
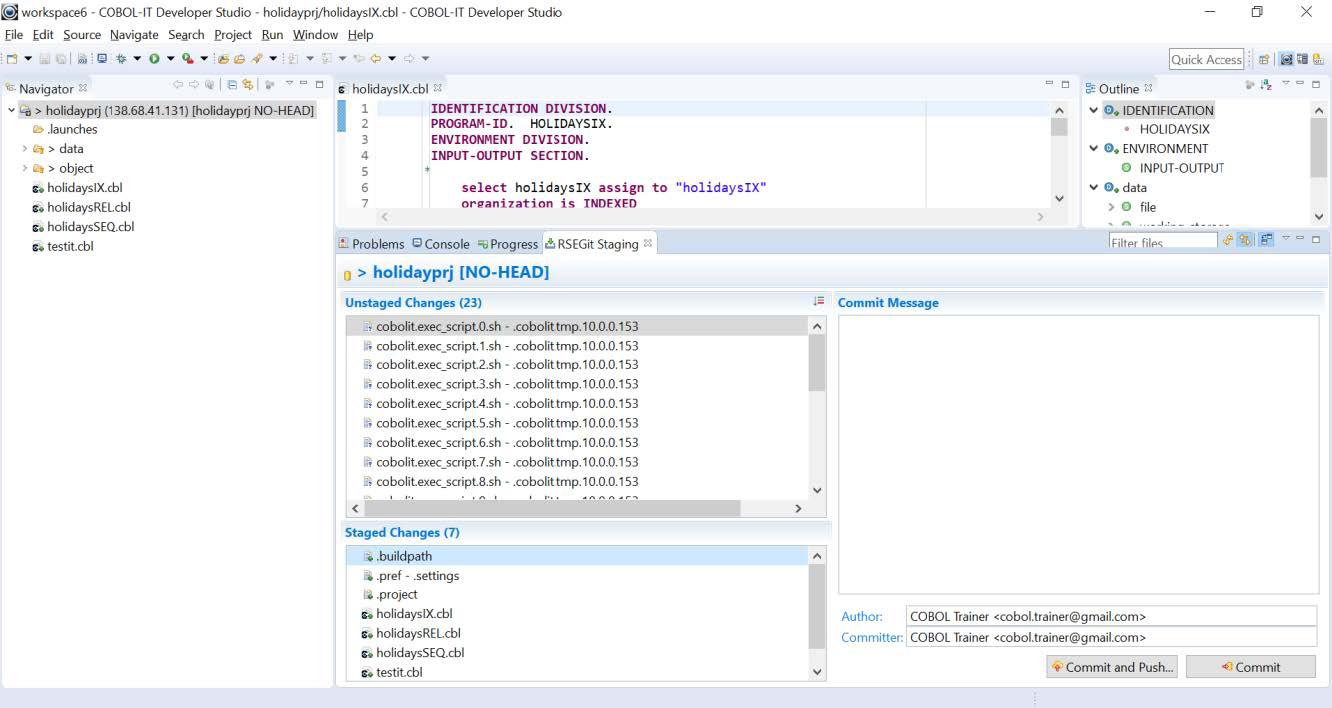
The Team>Commit function at the project level causes the project files to be displayed in the RSEGit Staging view as Unstaged Changes.
Unstaged Changes
Before committing these files, we must first advance them to the Staged Changes area using the Add to Index function. To advance these files to the Staged Changes area, select the files, right-click, and select the Add to Index function from the dropdown menu.

Unstaged Changes>Add to Index
Select the project files and the source files in the Project Folder and in the Copy Folder. Right-click, and select Add to Index.

The selected files are transferred to the Staged Changes Window.
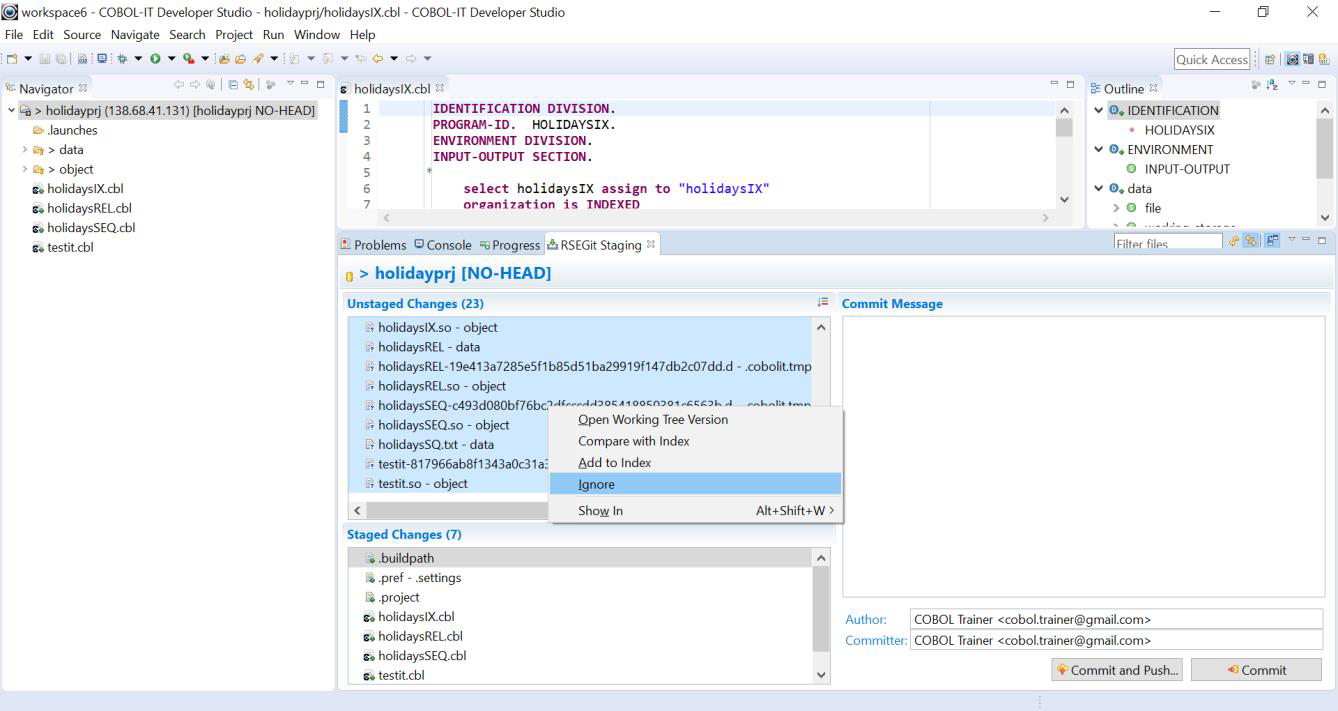
Unstaged Changes>Ignore
Select the remaining files. Right-click and select the Ignore function. This will cause the object and data folders to be labeled as gitignore folders.
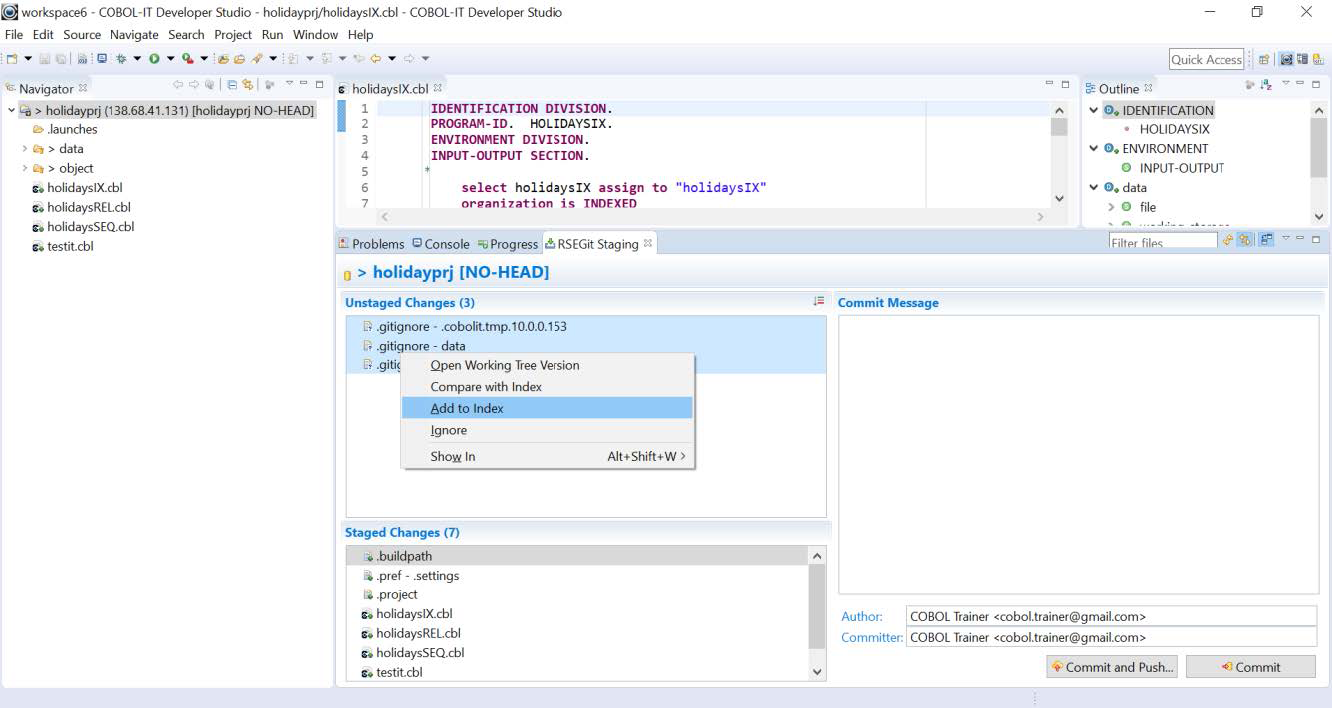
Unstaged Changes>gitignore folders>Add to Index
The data and object folders have been labeled as gitignore folders. Select the gitignore folders, right-click and select the Add to Index function to move the gitignore folders from the Unstaged Changes window to the Staged Changes Window.
Staged Changes
The Staged Changes window now contains the project files, source files, and gitignore folders. To Commit, first enter a Commit Message, then press the Commit button.

Staged Changes>Commit Message & Commit button
The Commit Message is associated with the Commit action, and preserved in the repository.
Staged Changes>Commit Results
RSEGit displays a Commit Results Window summarizing the results of the Commit.

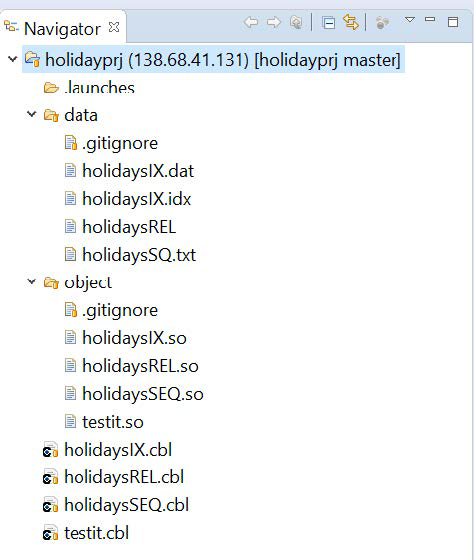
The Navigator View of the COBOL Project>Tracked text
The files are now tracked by RSEGit, and are marked with the Tracked text decoration. For details about Git Label Decorations, see Window>Preferences>Team>Git>Label Decorations.
Create a New Branch
From the RSEGit Perspective, right-click on the RSEGit Repository Folder name, and select Switch to… from the dropdown windows, then select New Branch from the subsequent dropdown window. In the Create Branch dialog window, enter branch-1 in the Branch name entry-field. Verify that the Checkout new branch checkbox is selected. Click Finish.
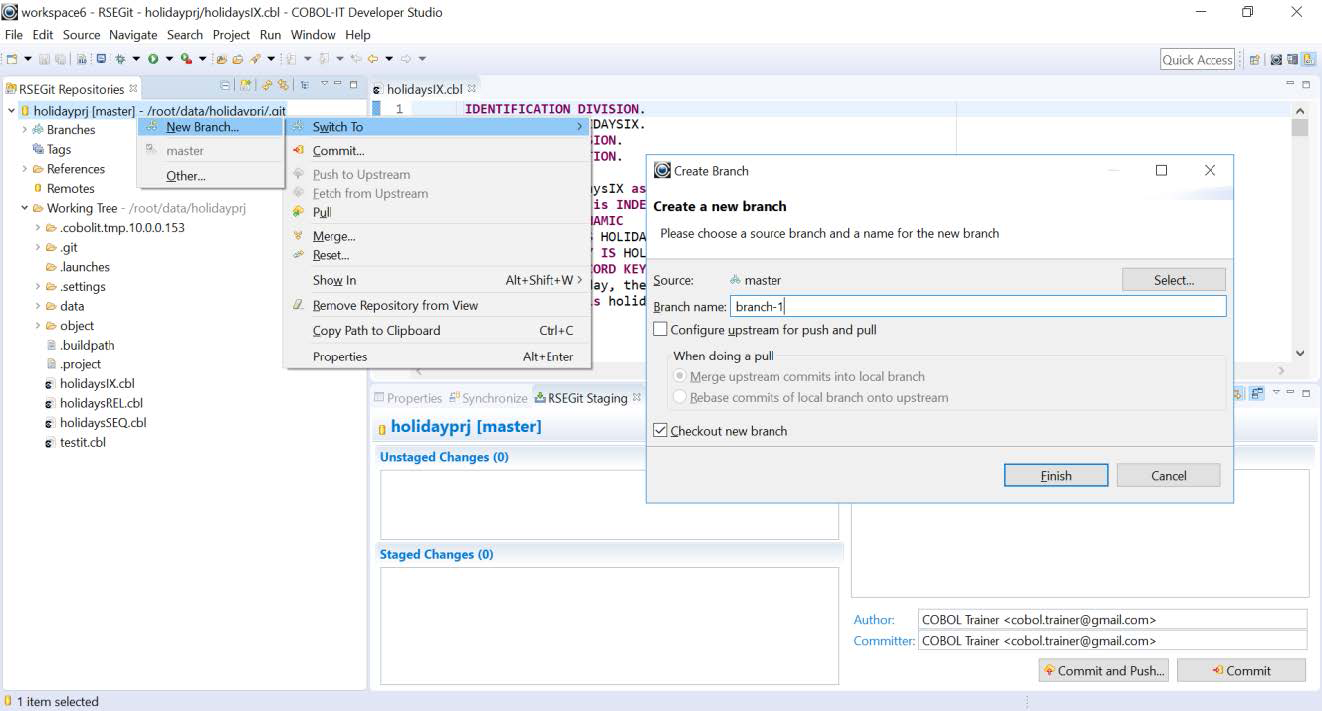
The new branch branch-1 has been created and checked out. Label decorations on your repository now include [branch-1]. You can work in this branch, and Commit to this branch, without affecting the master branch. You will notice that the [branch-1] label decoration is displayed on both the RSEGit Repositories View and in the Navigator View of the Developer Studio.
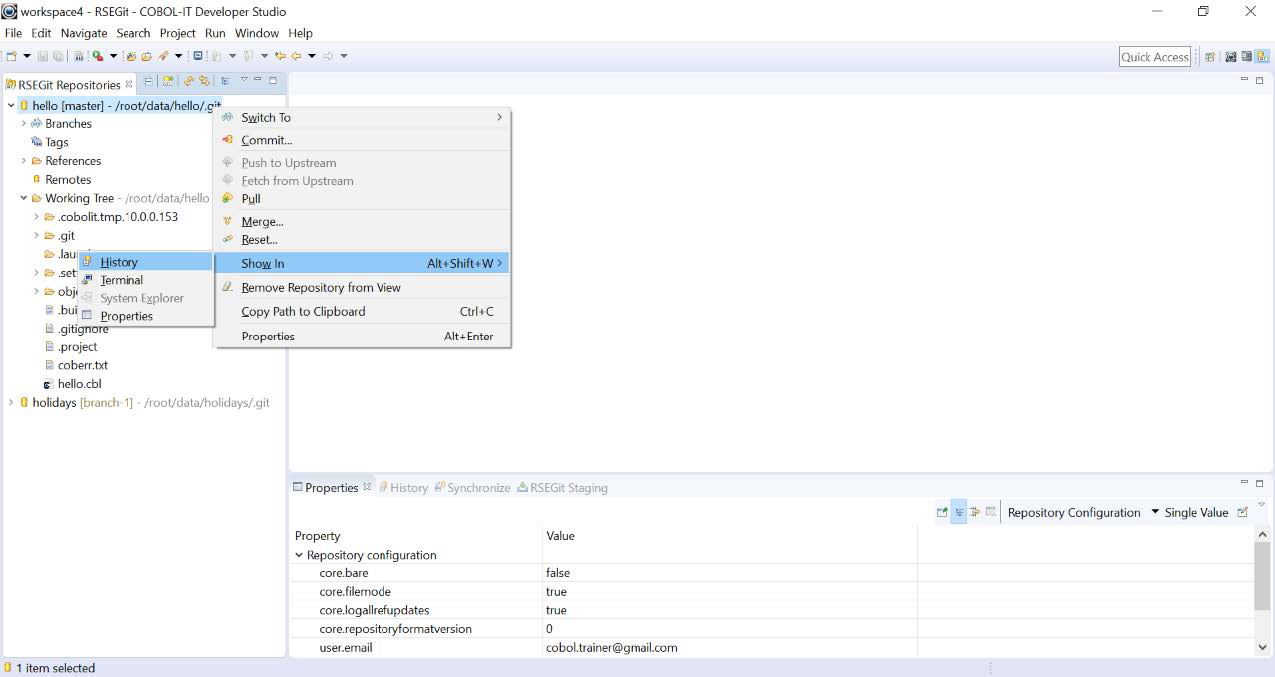
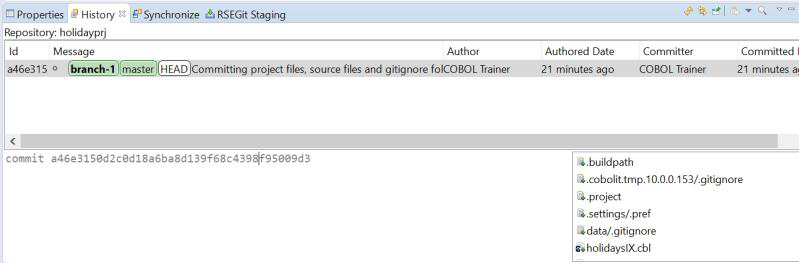
Show In History
RSEGit>Show In>History
From the RSEGit Perspective, right-click on the RSEGit Repository Folder name, and select Show In… from the dropdown windows, then select History from the subsequent dropdown window.

This opens the History View in which information about the history of the branch is displayed.
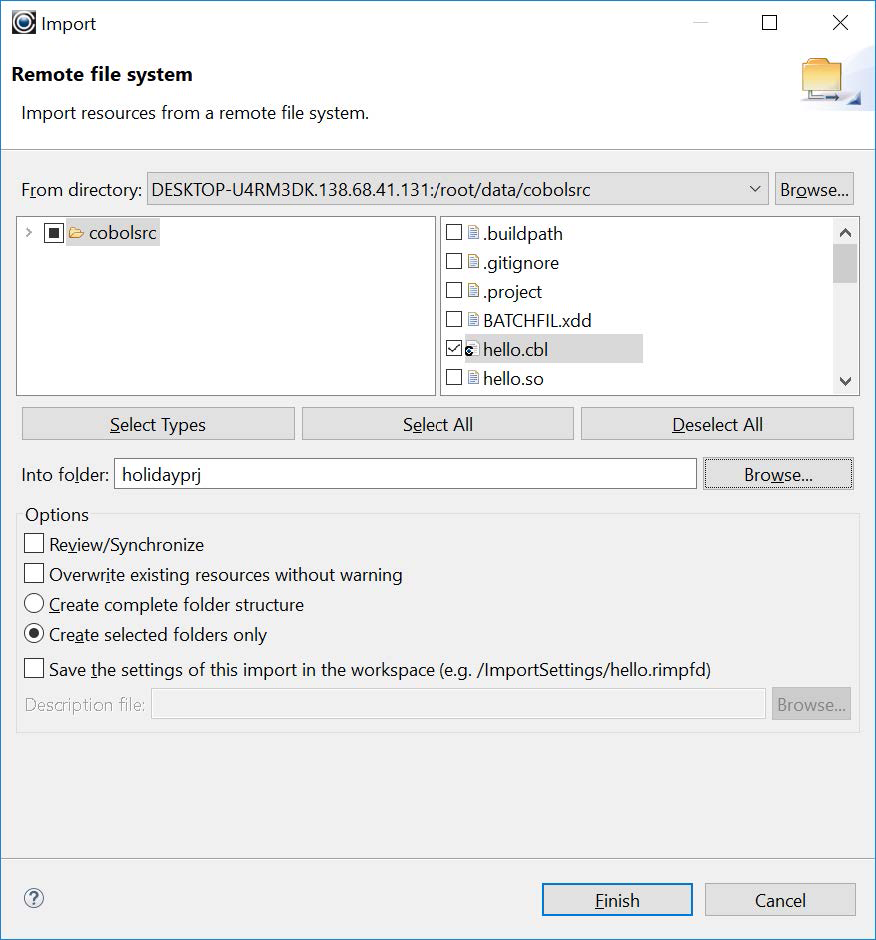
Importing Source Files into the Project
To import source files into the Project, enter the Remote System Explorer perspective, locate the source directory, right-click and select the Import to project function. In the Import dialog screen,the selected source folder is displayed.
To fill the Into folder entry-field, click on the Browse button to the right of the entry-field, and in the Import into Folder dialog, select project1 with its remote notation and Git label decorations.
Click OK to return to the Import dialog screen. Click Finish to import the selected source into the project.
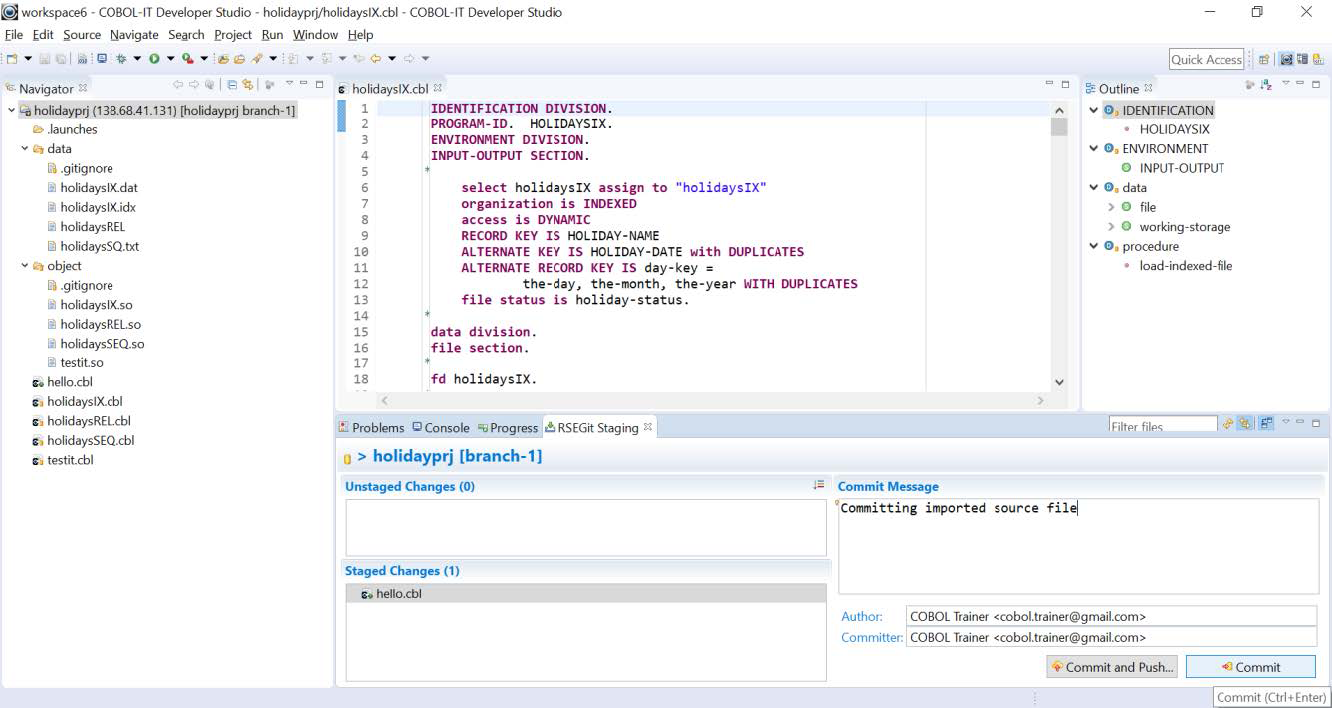
Return to the Developer Studio to see the file shown in the Project organization in the Navigator view. Note that files moved into the Project Folder are automatically staged, and the source file is displayed as an Unstaged Change.
Select the file, right-click and select the Add to Index function from the dropdown menu. This will cause the source file to be viewed as a Staged Change.
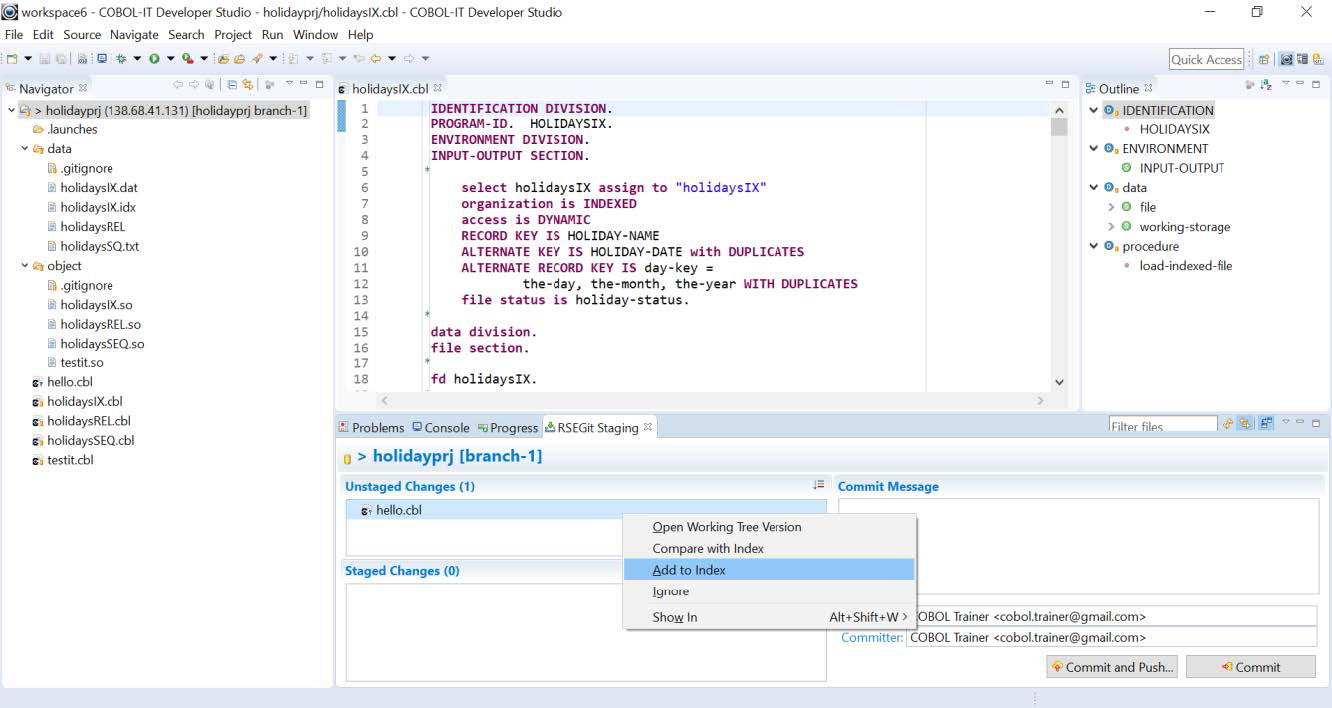
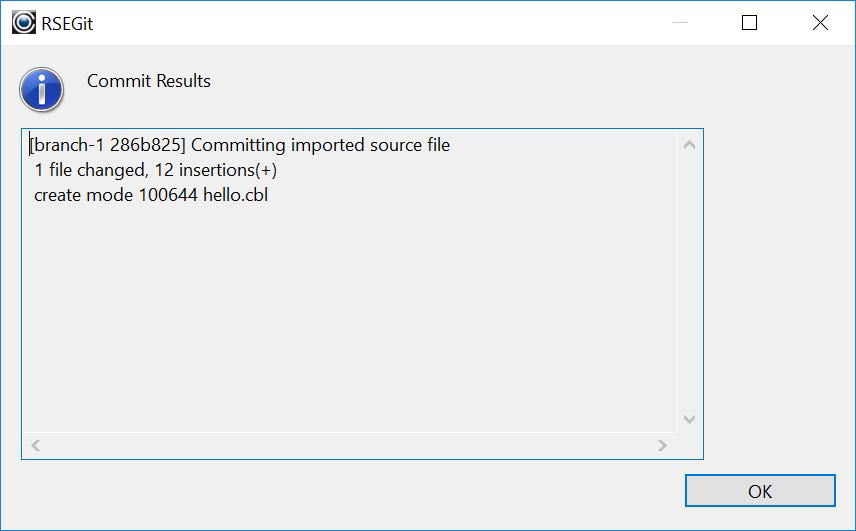
The file is moved from Unstaged Changes to Staged Changes. Enter a comment and click on the Commit button to commit the source file.
You will then see the Commit Results informative screen.
Add an existing RSEGit Repository
In the RSEGit Perspective, you can add existing RSEGit repositories to the RSEGit Repositories View. If your RSEGit Repositories view is empty, you will see a link titled Add an existing Git Repository.
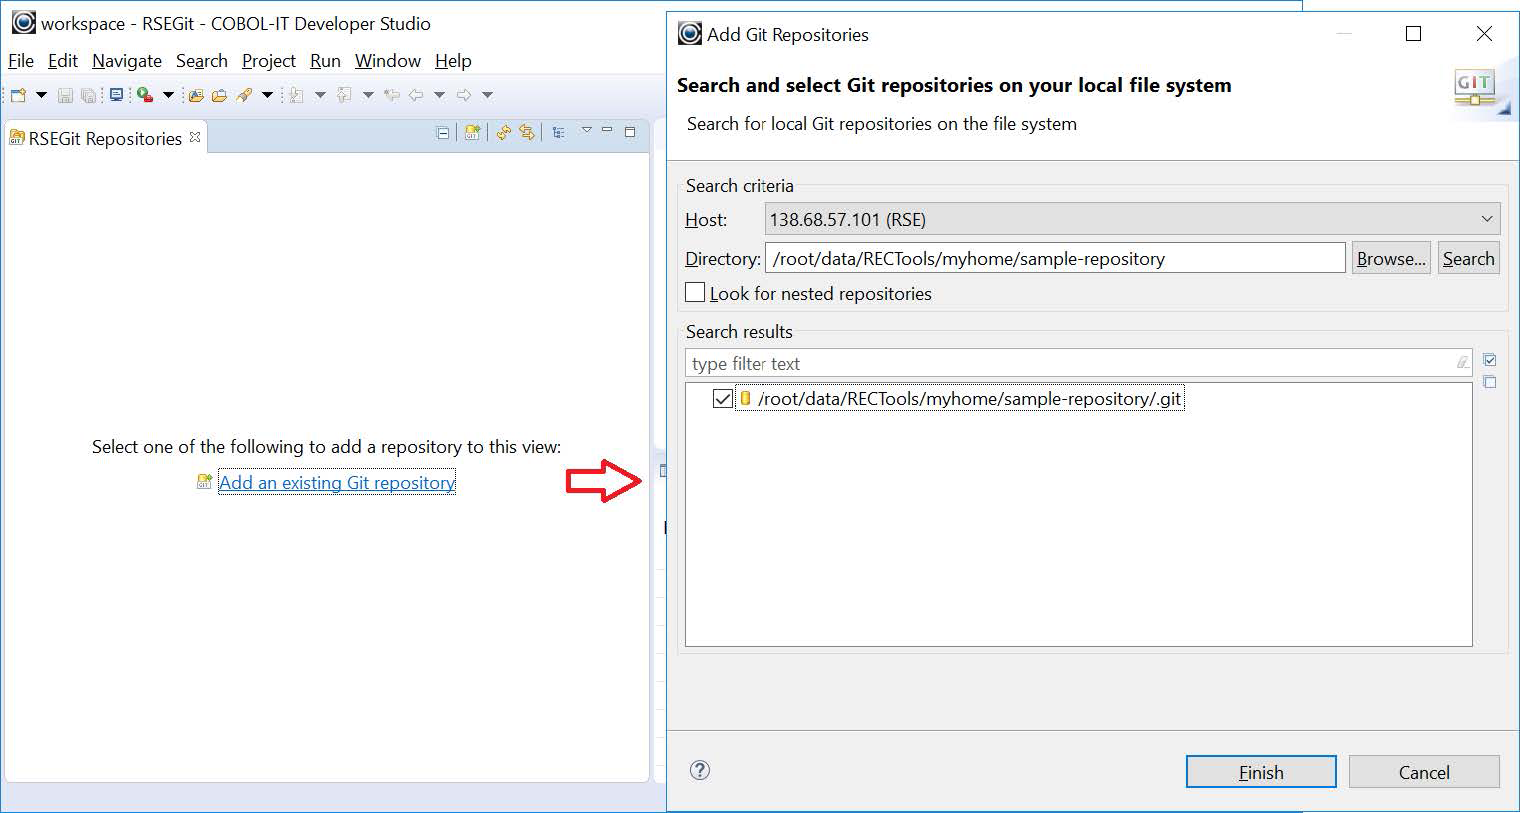
If you have an RSEGit Repository displayed in the Repositories View, you may use the toolbar button with hint Add an Existing Git Repository to this View. Set your Host to your remote machine, and then browse to a directory in which Git repositories reside. After selecting your directory, click on the Search button, and existing Git repositories are displayed in the Search Results Window. Select an existing Git repository to display it in the RSEGit Repositories View.
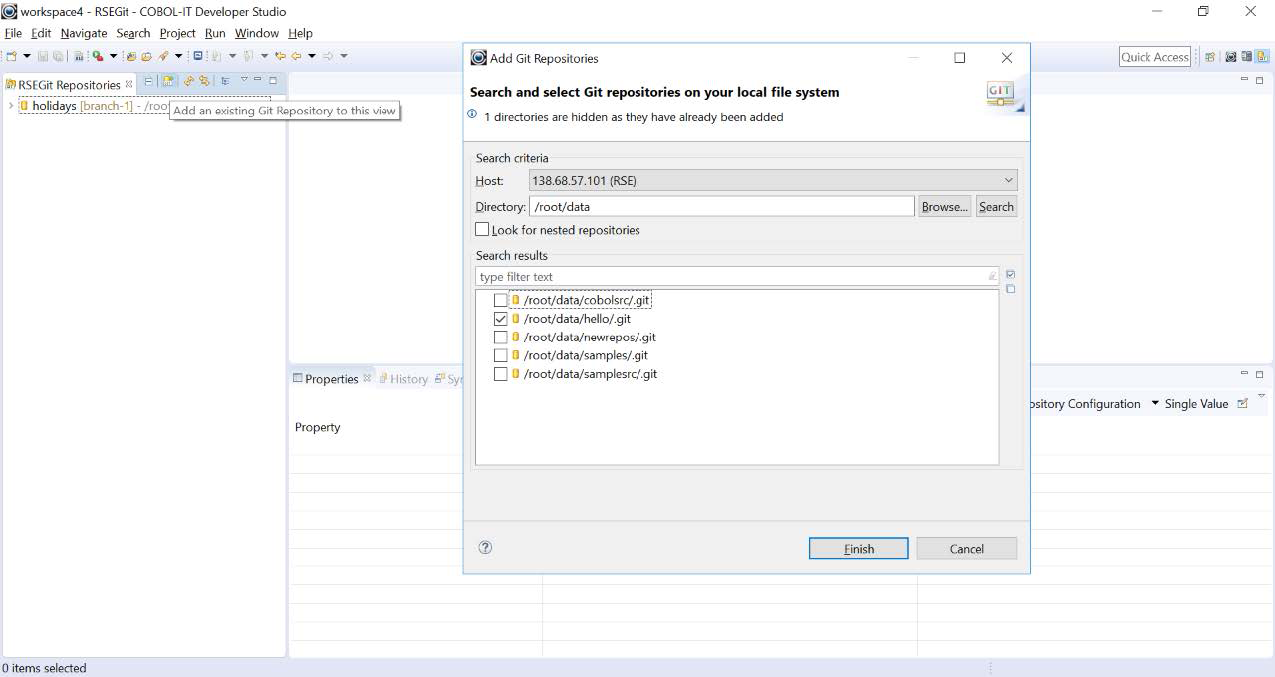
The selected repository displays in the RSEGit Repositories View.
Show In History
From the top-level dropdown menu, you now have access to a full array of Git functions. As an example, to Show the Git Repository in the History View, right-click on the top-level, and from the dropdown menu, select Show In>History.