Using Git for Source Code Control
Git is a source code control system that was first developed by Linus Torvalds in 2005 for the development of the Linux kernel. Like Linux, Git is free software, distributed under the terms of the GNU GPL 2. Git provides the ability to create a source code repository locally, or to access an existing source code repository hosted on the web. COBOL-IT enhanced Git so that users of the Remote System Explorer could access repositories created on remote servers in 2017. In 2014, the Eclipse Foundation reported that Git had become with most widely used source code management tool, with close to half of software developers reportedly using Git as their primary source code controls system.
Note
Access the full Git User Guide here.
In your Eclipse Installation Details, you will find references to the Eclipse Git Team Provider. The Eclipse Git Team Provider provides access to the Git Perspective. Configurable elements of the Git Source Code Control System can be found in Window>Preferences>Team functions.
In the Developer Studio documentation, we will provide you with Getting Started scenarios for the 3 most common cases when using Git, which are:
- You wish to create a New repository, commit source to it, and maintain it as your source code repository.
- You are using Github, and wish to clone a repository for use with the Developer Studio.
- You already have a local Git repository, and you wish to integrate it with the Developer Studio.
Configure Team Settings
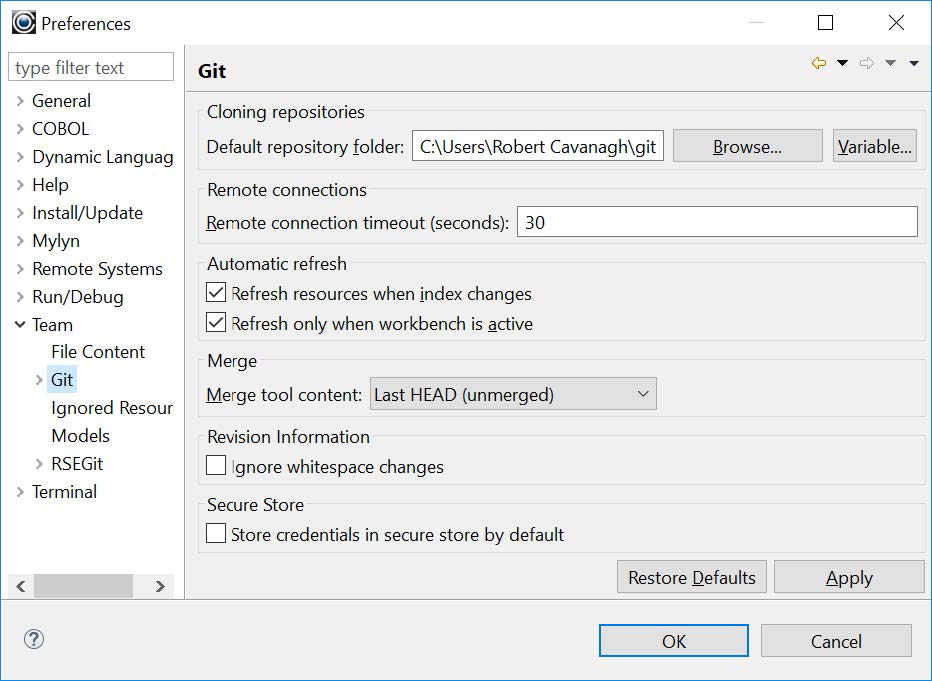
Window>Preferences>Team>Git
For purposes of Cloning repositories (see Clone a Git Repository, set the default repository folder in Window>Preferences>Team>Git.
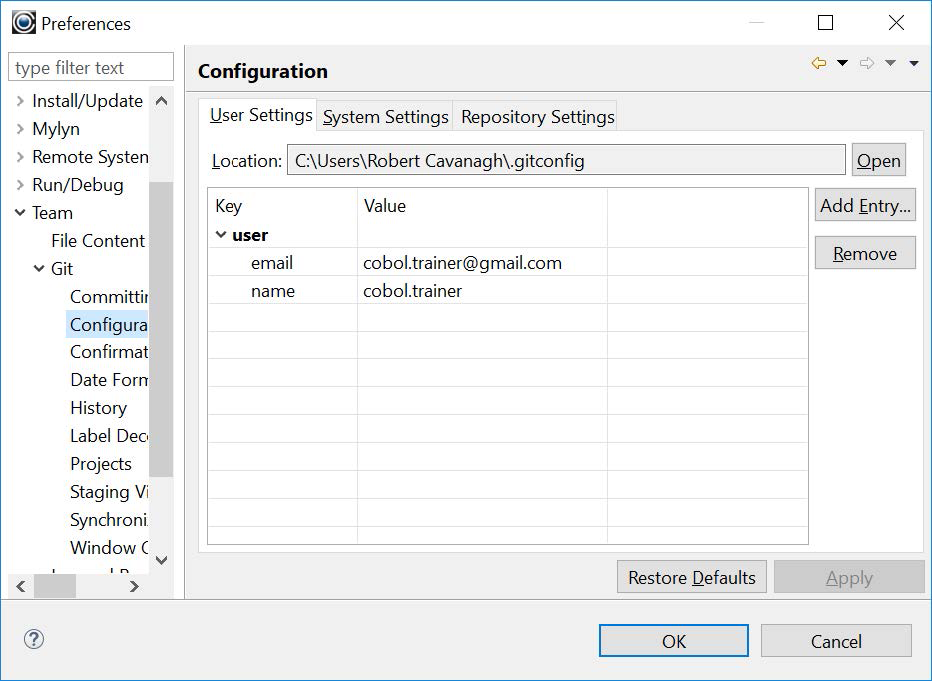
Window>Preferences>Team>Git>Configuration
In the Configuration dialog screen, add entries for user.email and user.name.
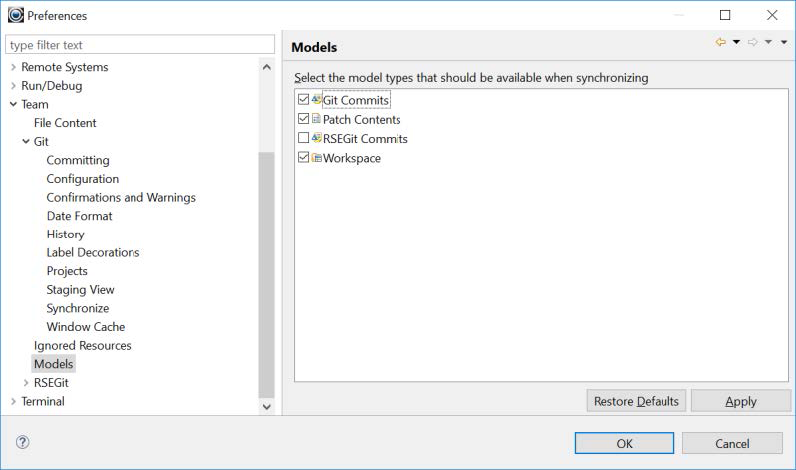
Window>Preferences>Team>Models
On the Models screen, make sure that the Git Commits checkbox is selected and that the RSEGit Commits checkbox is de-selected.
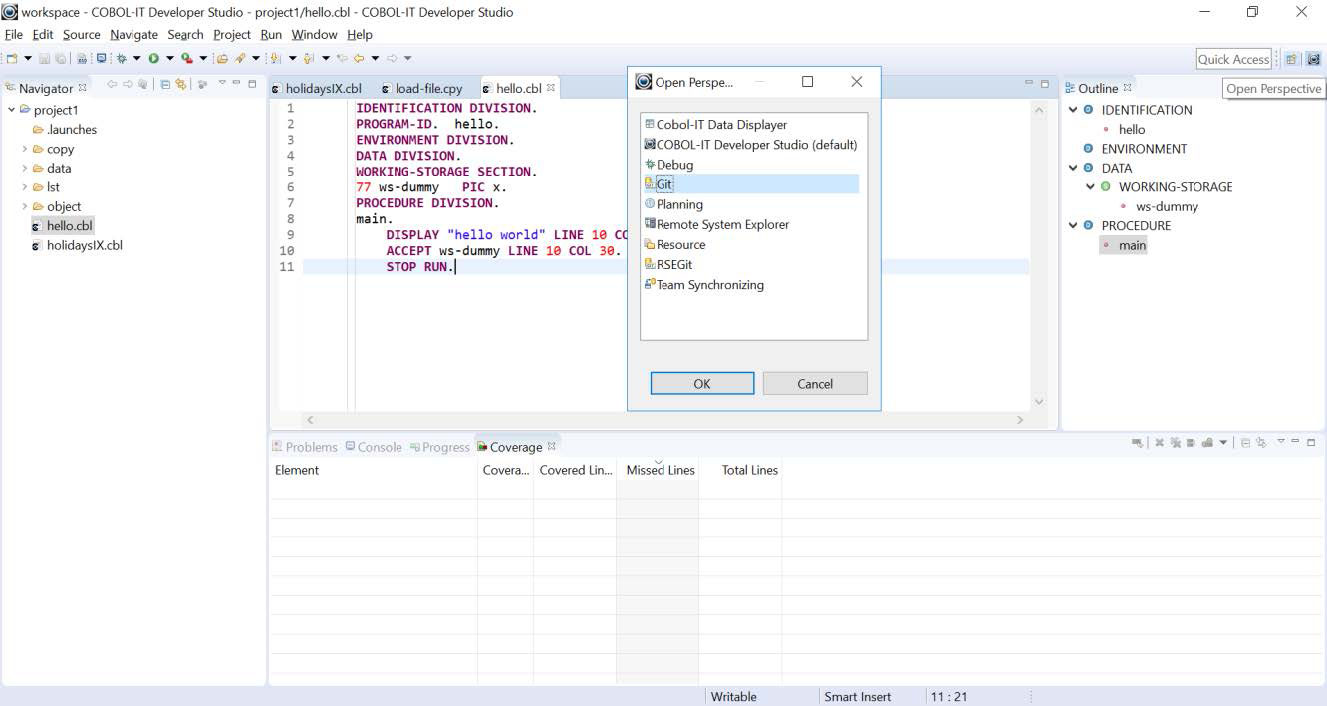
Open the Git Perspective
Click on the Open Perspective button on the Developer Studio toolbar, and then select Git from the Open Perspective window.
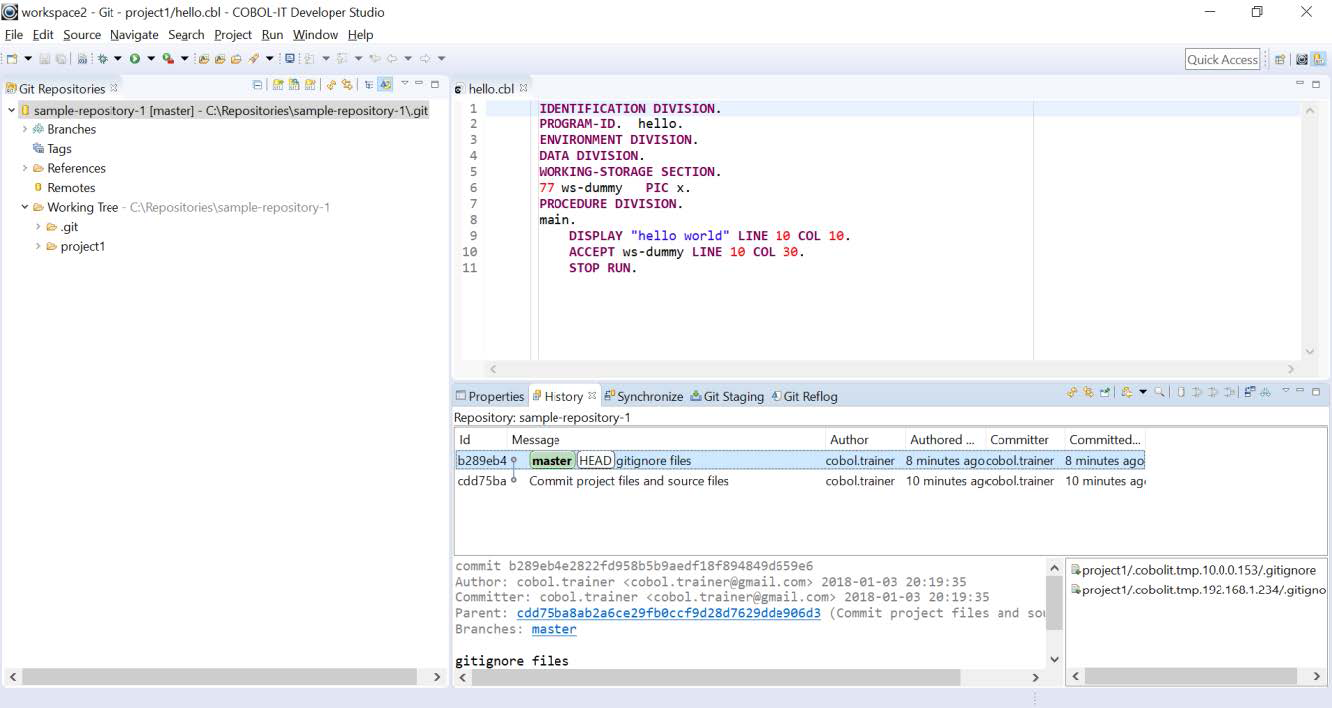
The Git Perspective
The Git Perspective consist of the Git Repositories View, in the panel on the left, and the Properties, History, Synchronize, Git Staging and Git Reflog Views in the lower right.
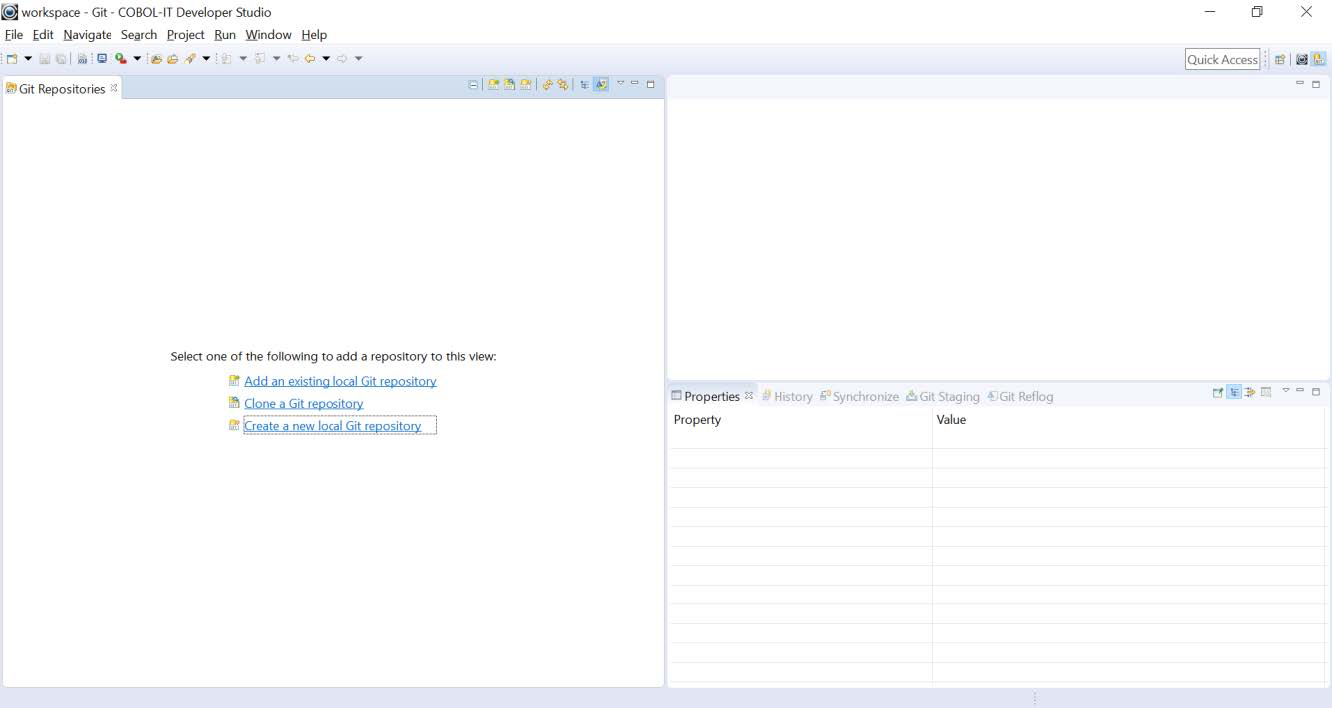
When the Git Perspective is first opened, selections exist in the Git Repositories View for adding a repository. The selections are:
| Selection | Behavior |
|---|---|
| Add an existing local Git repository | Allows use of an existing repository. |
| Clone a Git repository | Clones an existing repository. |
| Create a new local Git repository | Creates a new repository. |
In this Getting Started document, we will exercise each of these, and look at some of the more commonly used Git functions. Access the full Git User Guide here.
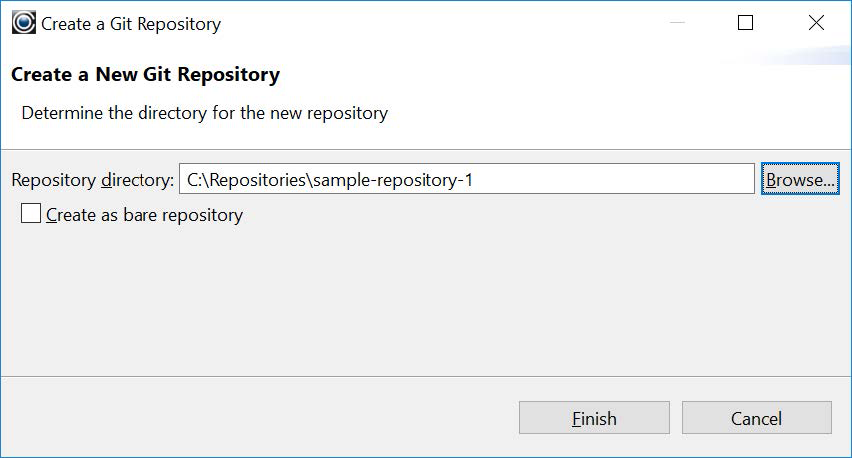
Create a New Repository
In the Git Repositories Window, select Create a new local Git repository. This will open a window titled Create a Git Repository. First, you must set the Repository Directory. In the Repository directory entry-field, enter the full path to your repository directory. In our case, we will create a subdirectory in C:\COBOL folder called sample-repository. Then, we will click on the Finish button.
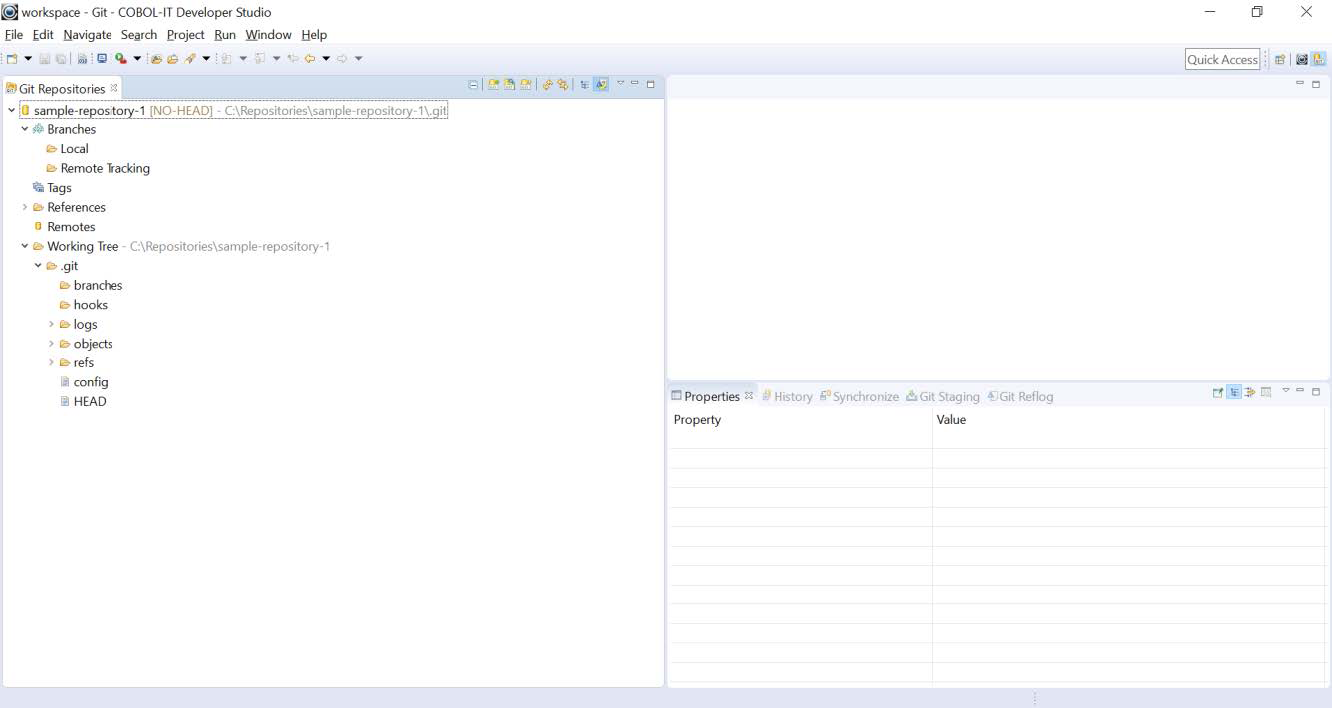
The new repository has been created.
Configure the new Git Repository
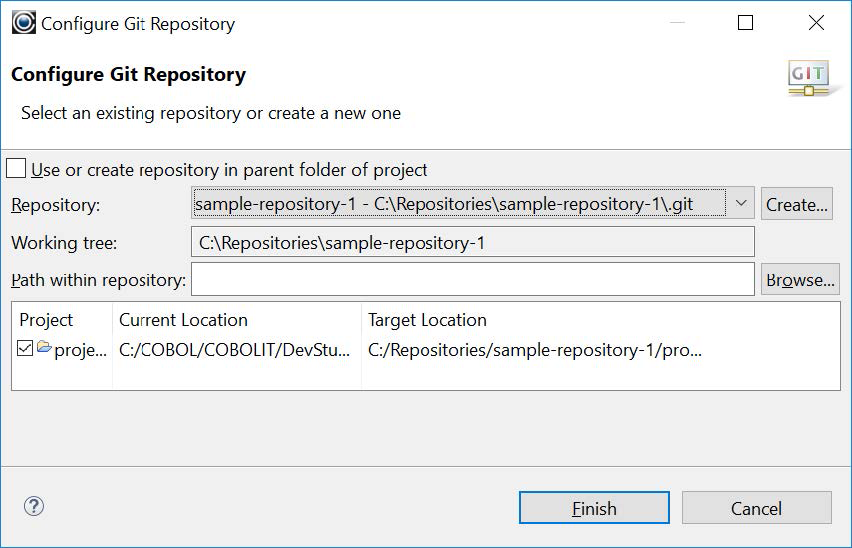
In the Developer Studio, select the project name in the Navigator Window. Right-click, and select Team from the drop-down menu. From the subsequent drop-down menu, select Share Project…. Click on the drop-down button on the Repository drop-down box and select the repository that was just created. Click on the Finish button to return to the Developer Studio.
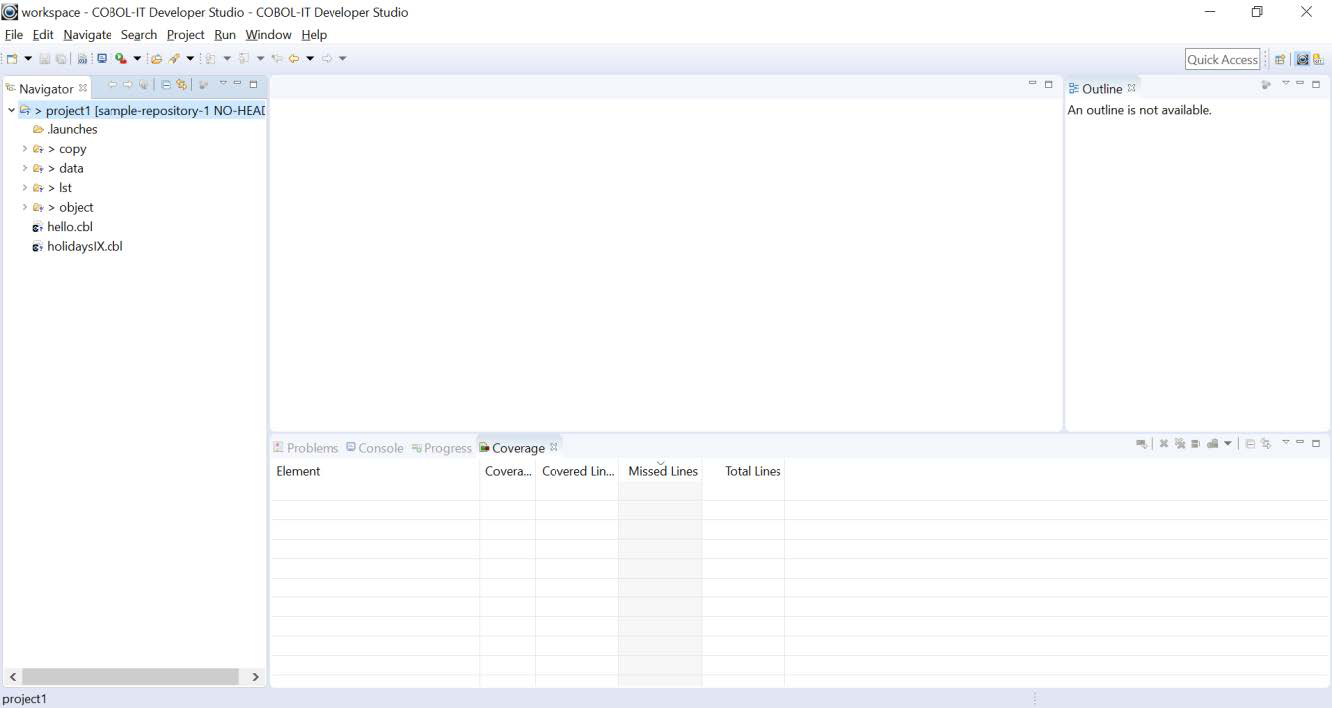
Your project has now been marked as being shared with our Git repository. At the project level, the label [git NO-HEAD] has been added. The Git icon has been added to the Project tree.
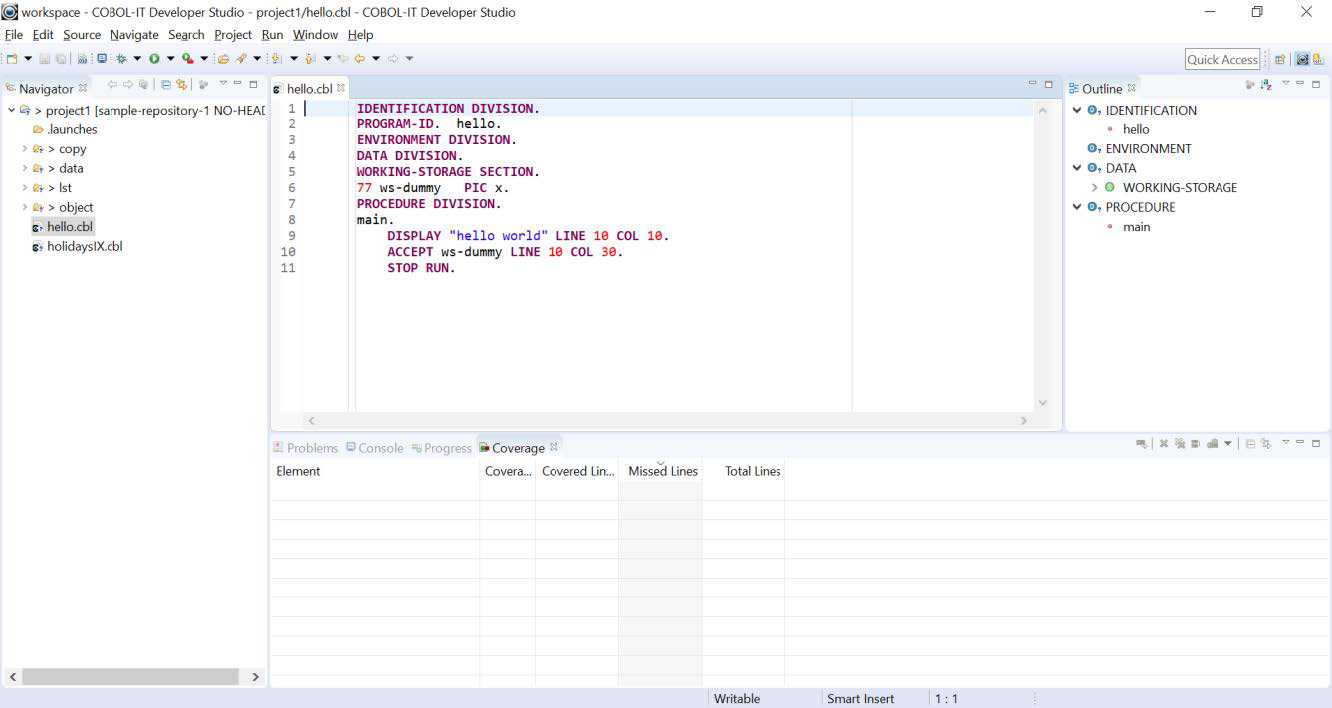
Your Project in the Developer Studio Perspective
You will see label decorations on your source files and project in the Developer Studio Perspective. For details about the Git decorations, see Window>Preferences>Team>Git>Label Decorations.
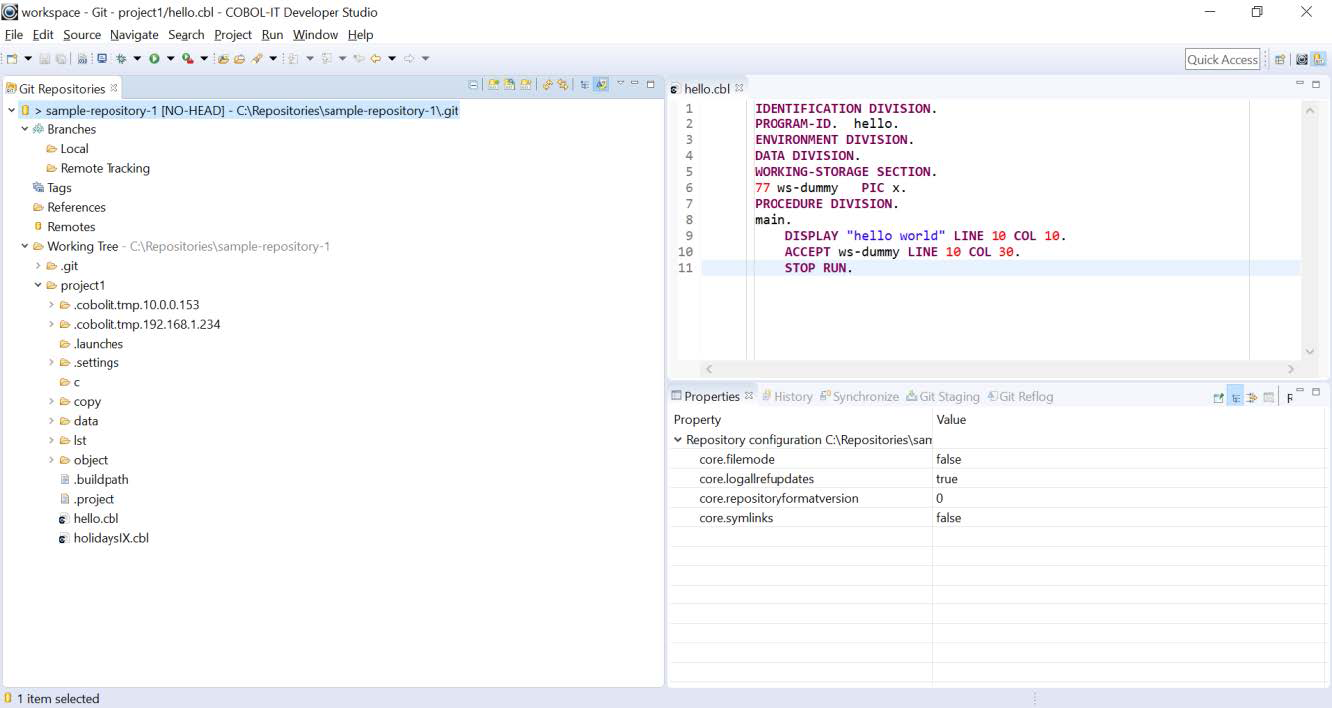
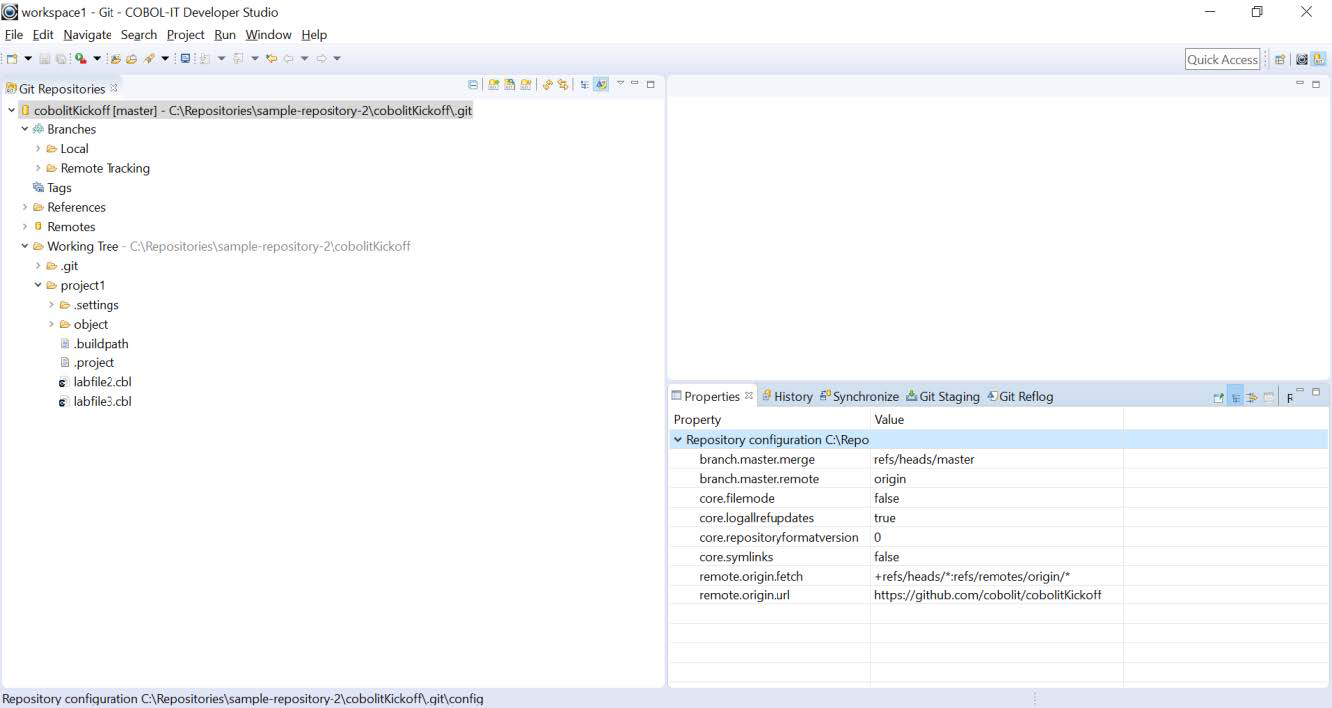
Your Project in the Git Perspective
Project1 is now stored in the Git Perspective. It can be imported into an empty workspace.
It can be shown in the Properites, History, Synchronize, Git Staging and Reflog views.
Clone a Git Repository
In the Git Repositories Window, select Clone a Git Repository. This will open a window titled Clone Git Repository. Select the Clone URI option. Then, click on the Next button.
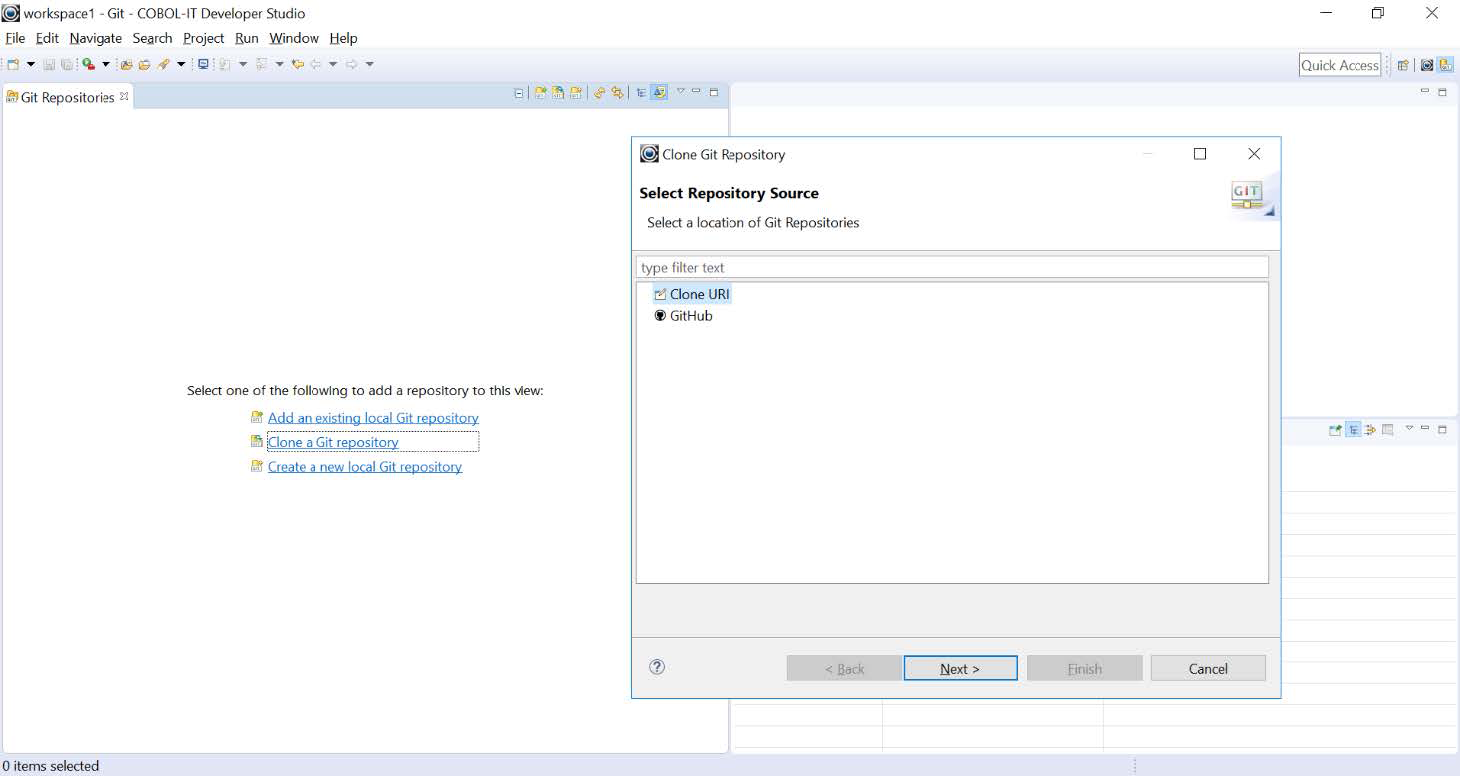
This will open the Source Git Repository Dialog.
Source Git Repository
In the Source Git Repository Dialog Window, enter the URI, Host, and Repository Path.
In our example, we are hosting a Repository on github.com with a Repository path of /cobolitcobolitKickoff.
In order to access this repository you have to go through an authentication which involves entering a User name and Password.
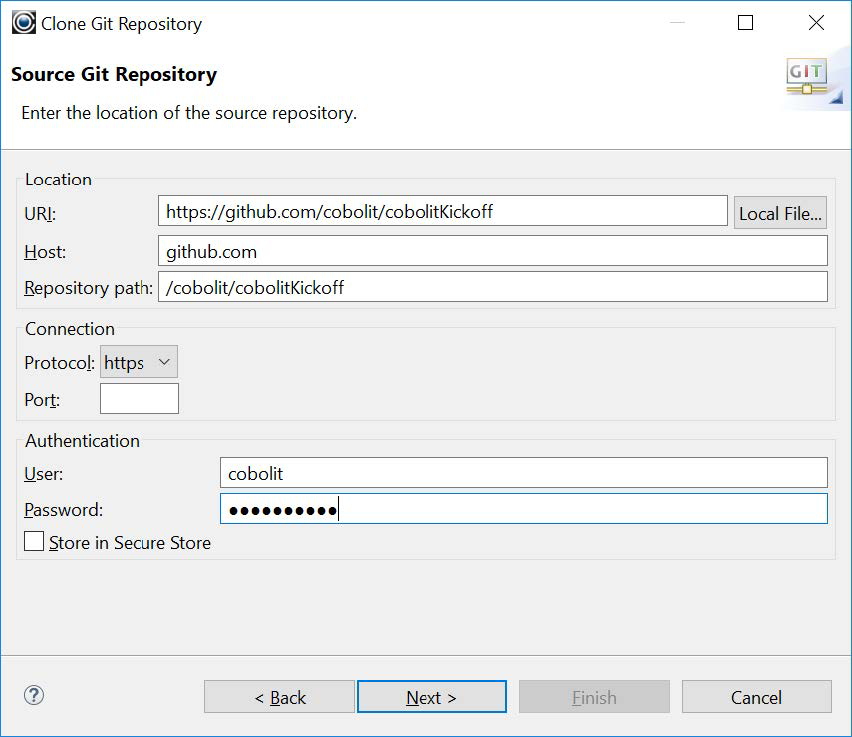
From here, you will select a Branch to Clone, and select a location for the cloned repository. Then, we will use an Import wizard to import the project into the Developer Studio. Click on the Next button to advance to the Branch Selection screen.
Branch Selection
On the Branch Selection screen, select branches to clone from the remote repository. Remote tracking branches will be created to track updates for these branches in the remote repository.
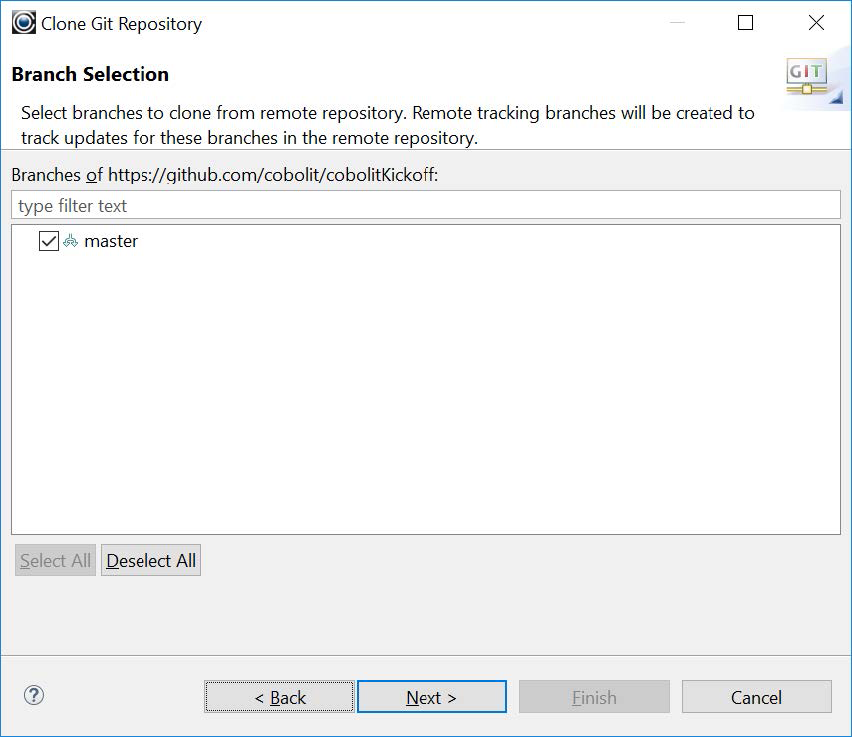
In our example we select the master branch. Click on the Finish button to proceed to the Local Destination dialog window.
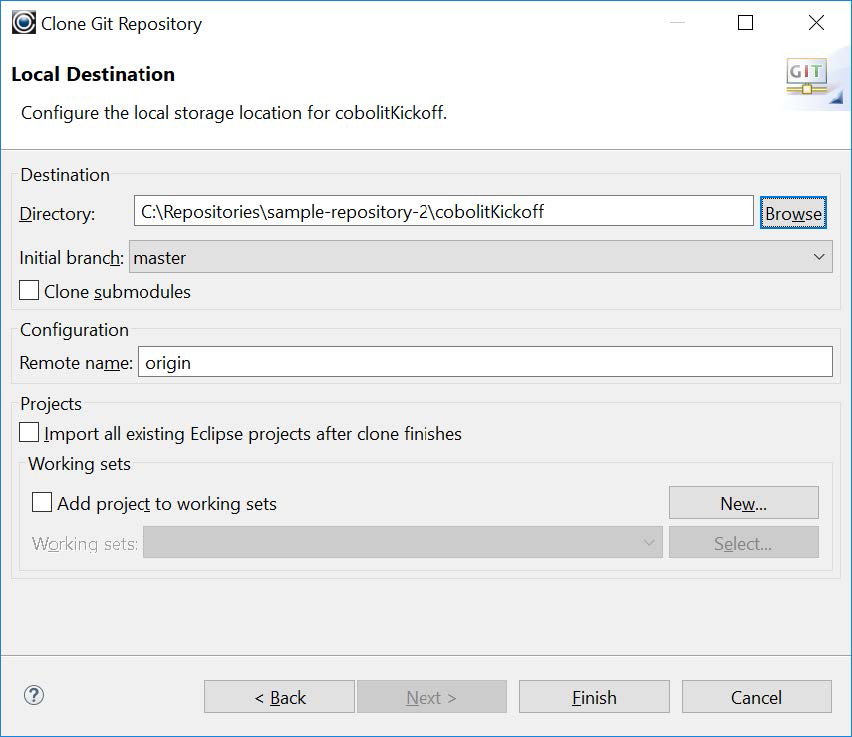
Local Destination
In the Local Destination dialog window, enter the local directory where the repository will be cloned. The Local Destination dialog window contains the name of the Initial branch that has been previously selected. Click on the Finish button to update the Git Repositories Window.
The Cloned project in the Git Perspective
The project has been cloned in the default folder for cloned repositories.
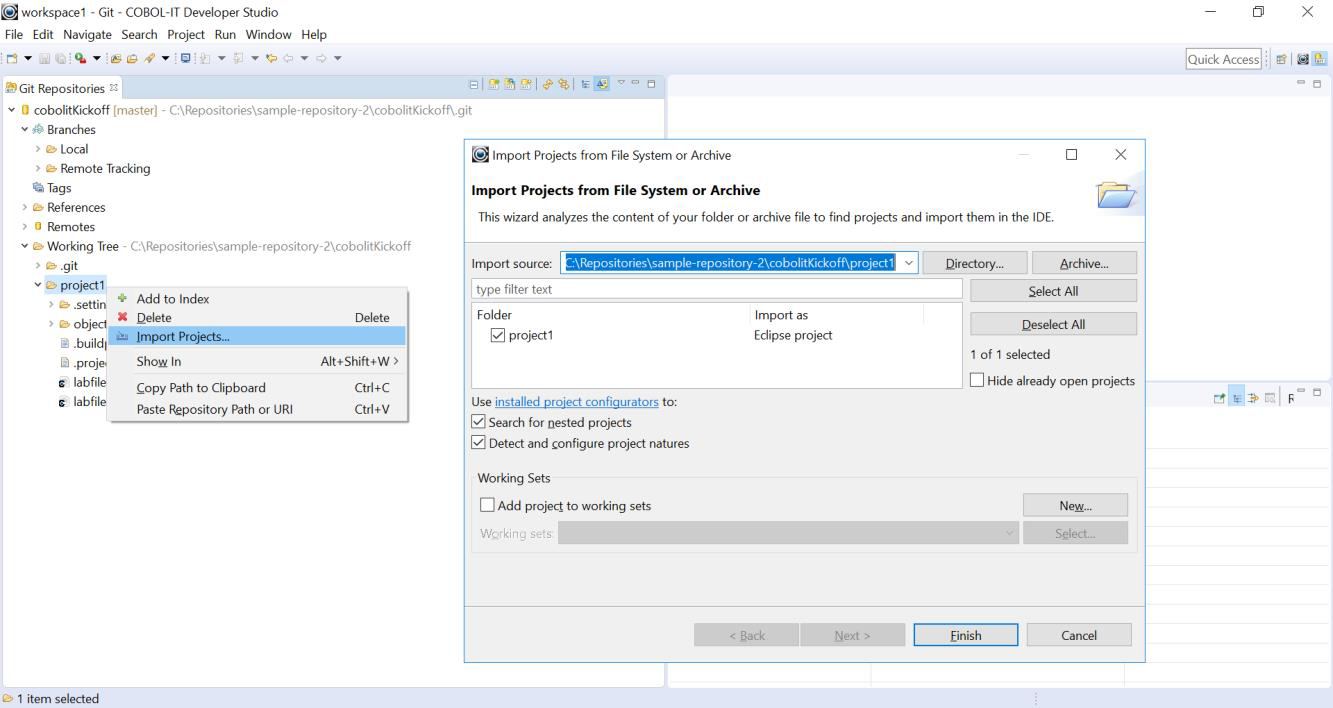
Git Repositories>Import Project
In the Git Repositories Window, right-click on the cloned project and select Import Projects… to open the Import Project Wizard. First, you must select a wizard to use for importing projects. Select Import existing Eclipse projects. Then, select the project and click on the Next button to advance to the Import Projects Window. You will see the project in the Import Projects Window. Click on the Finish button.
After clicking on the Finish button, open the Developer Studio Perspective, to access the Project and begin work.
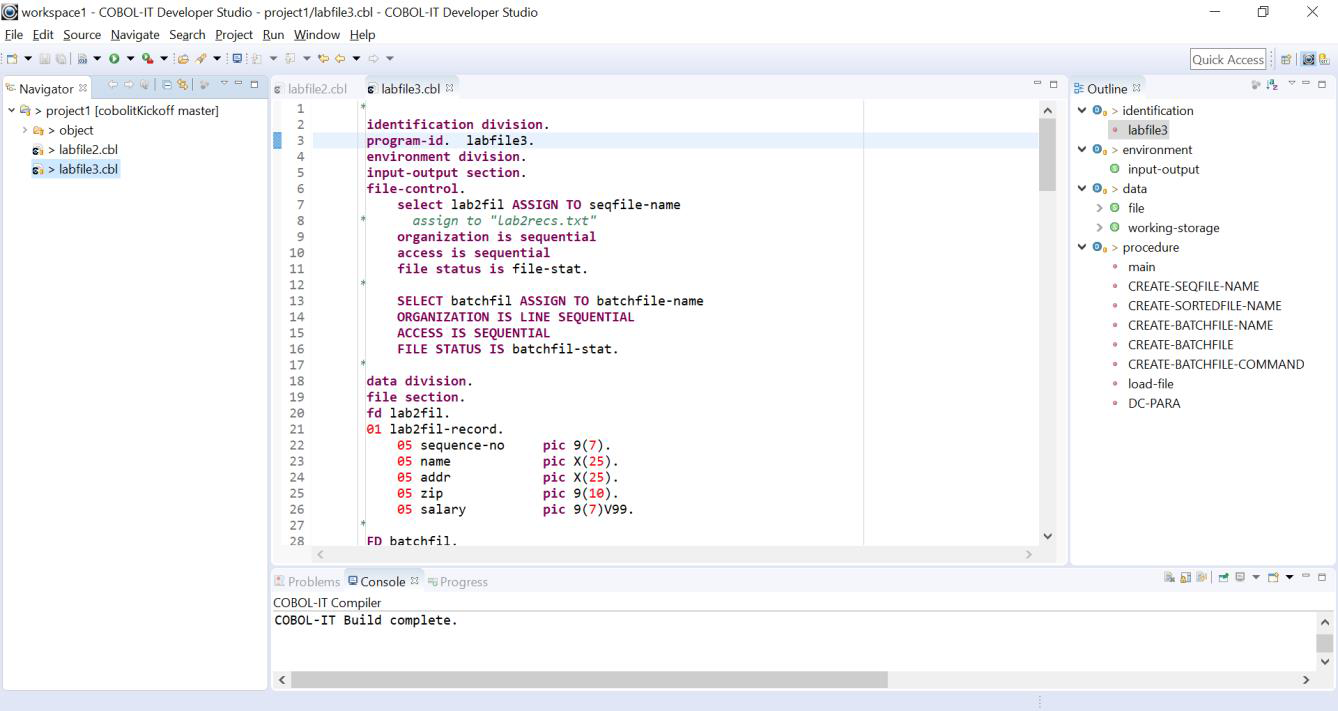
Access the Project in the Developer Studio Perspective
In the Developer Studio Perspective, you will see the Project Resources in the Navigator Window.
Now you can make a change to your source file, save the changes, and commit that change to the repository. To commit a source file to the Git Repository, right-click on the source file, and select Team from the dropdown menu. Then, click on the Commit function on the subsequent dropdown menu. This will open the Git Staging View, and you will see the source file you have changed listed as an Unstaged Change.
Right-click on the source file name, and select Add to Index. The source file is now listed as a Staged Change. Enter a Commit message, and press the Commit button to commit the source code to the repository.
Add an existing Git Repository
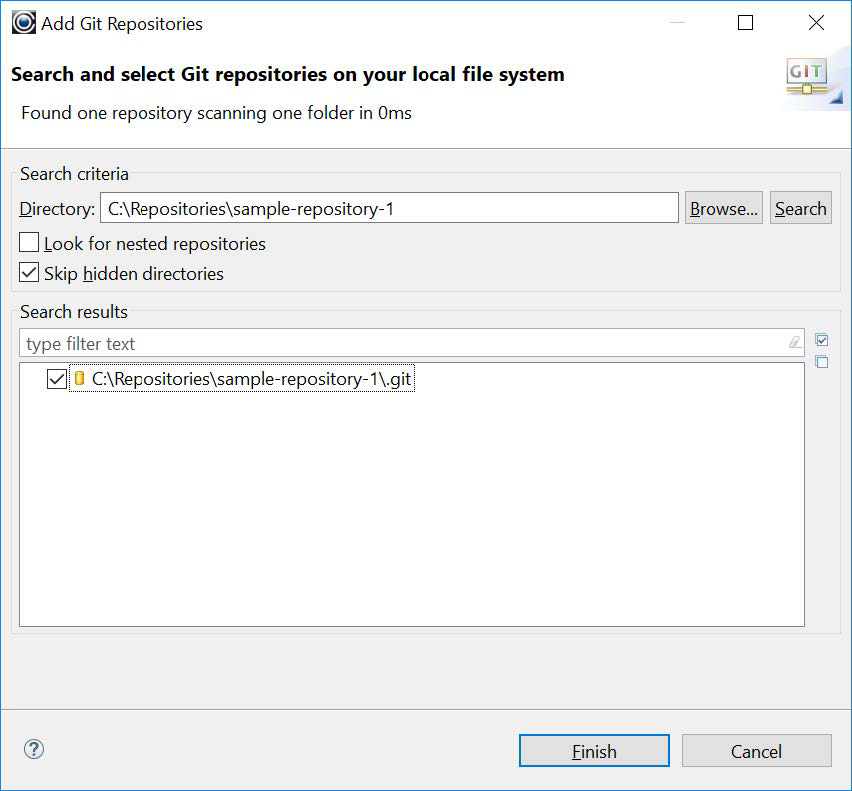
In the Git Repositories Window, select Add an existing local Git Repository. This will open a window titled Add Git Repositories.
First, you are prompted to Search and select Git repositories on your local file system. First, enter a root directory that you wish to be searched for Git repositories. Click on the Search button to populate the Search Results listbox. Our search has located an existing Git Repository. Select the existing Git Repository by clicking in the checkbox to the left of the located repository. Then, click on the Finish button.
After clicking on the Finish button, you will return to the Git Repositories Window, from which you can import the project into your Developer Studio.
Git Repositories View>Import Project
In the Git Repositories View, right-click the cloned project and select Import Projects…. From the dropdown menu select Import Projects… to proceed to the Import Wizard.
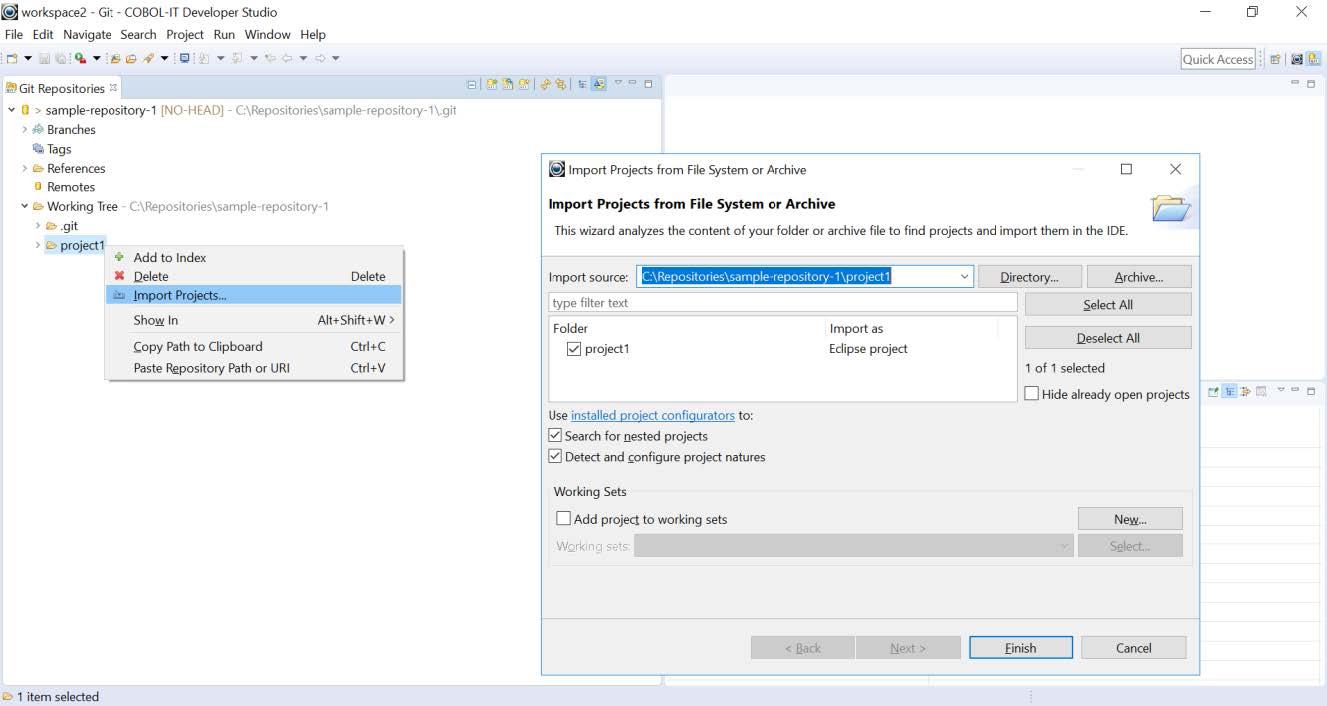
Click on the Finish button, open the Developer Studio Perspective, to access the Project.
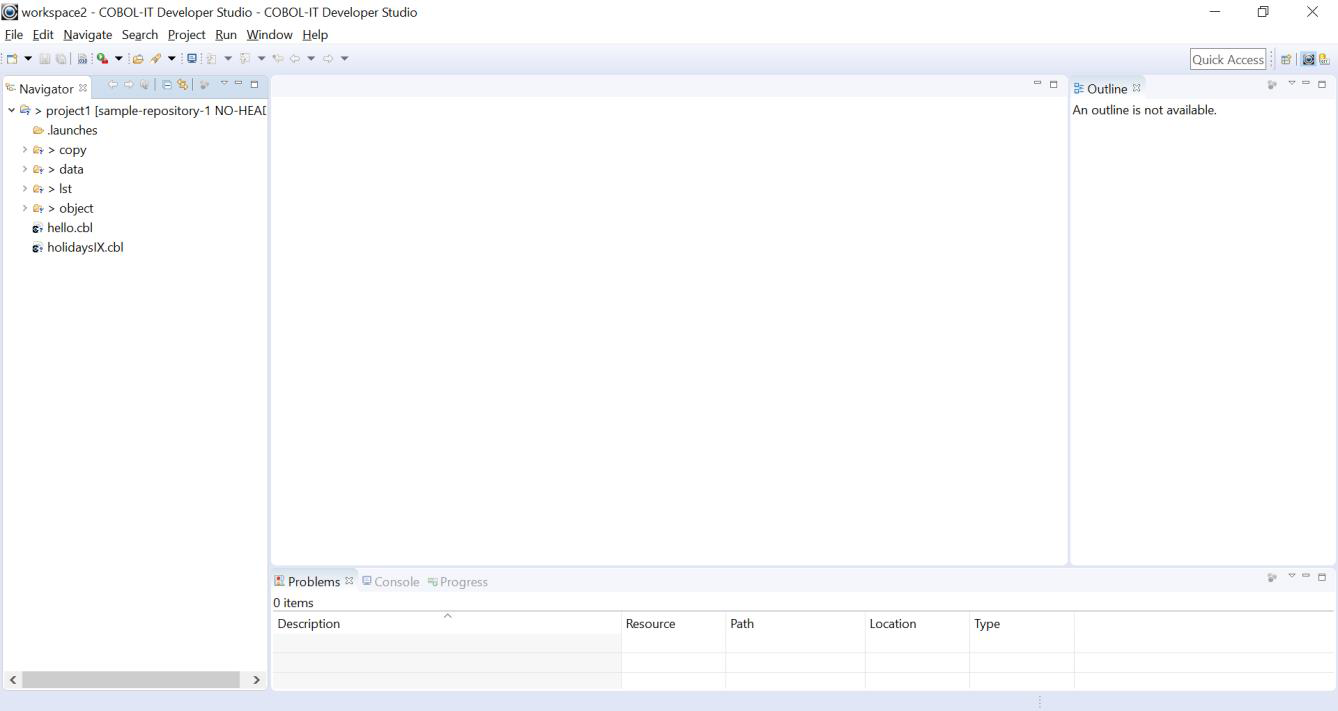
Access the Project in the Developer Studio Perspective
In the Developer Studio Perspective, you will see the Project Resources in the Navigator Window.
Now you can make a change to your source file, save the changes, and commit that change to the repository.
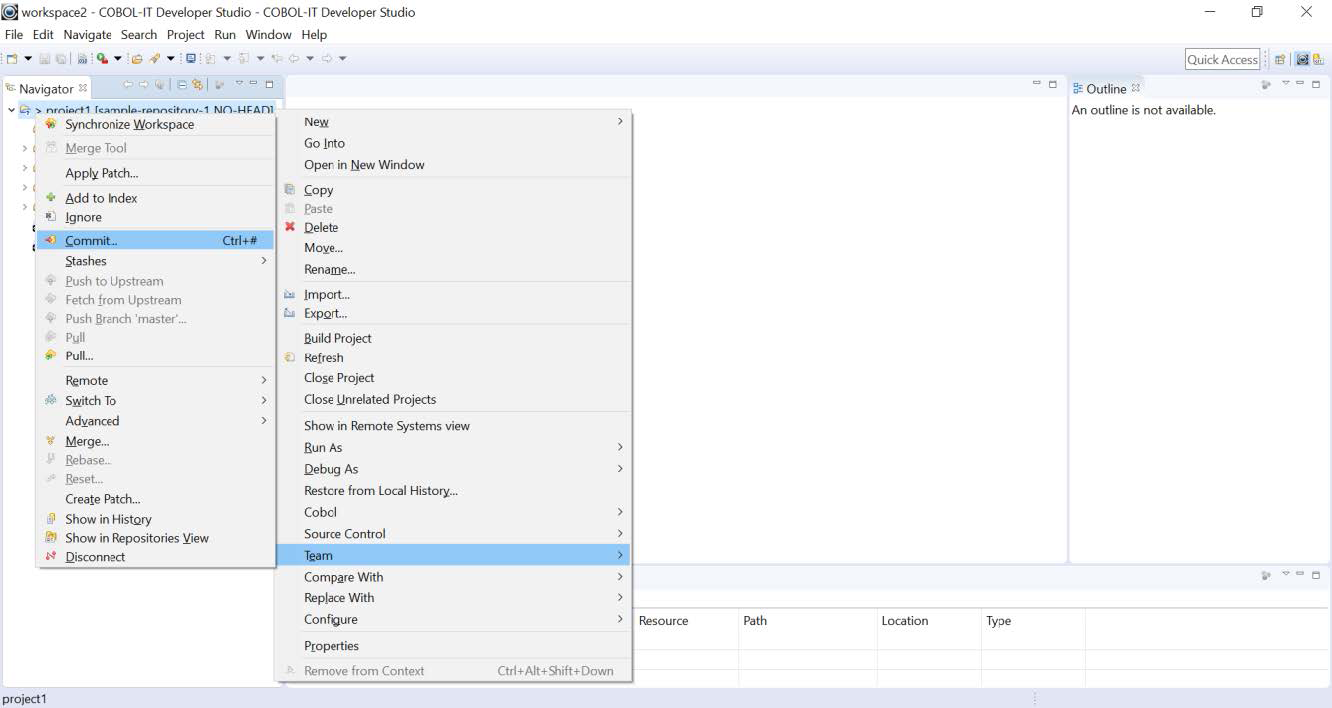
Team>Commit
Commit Code to the Repository
To commit your project files and source file to the Git Repository, right-click on the project, and select Team from the dropdown menu.
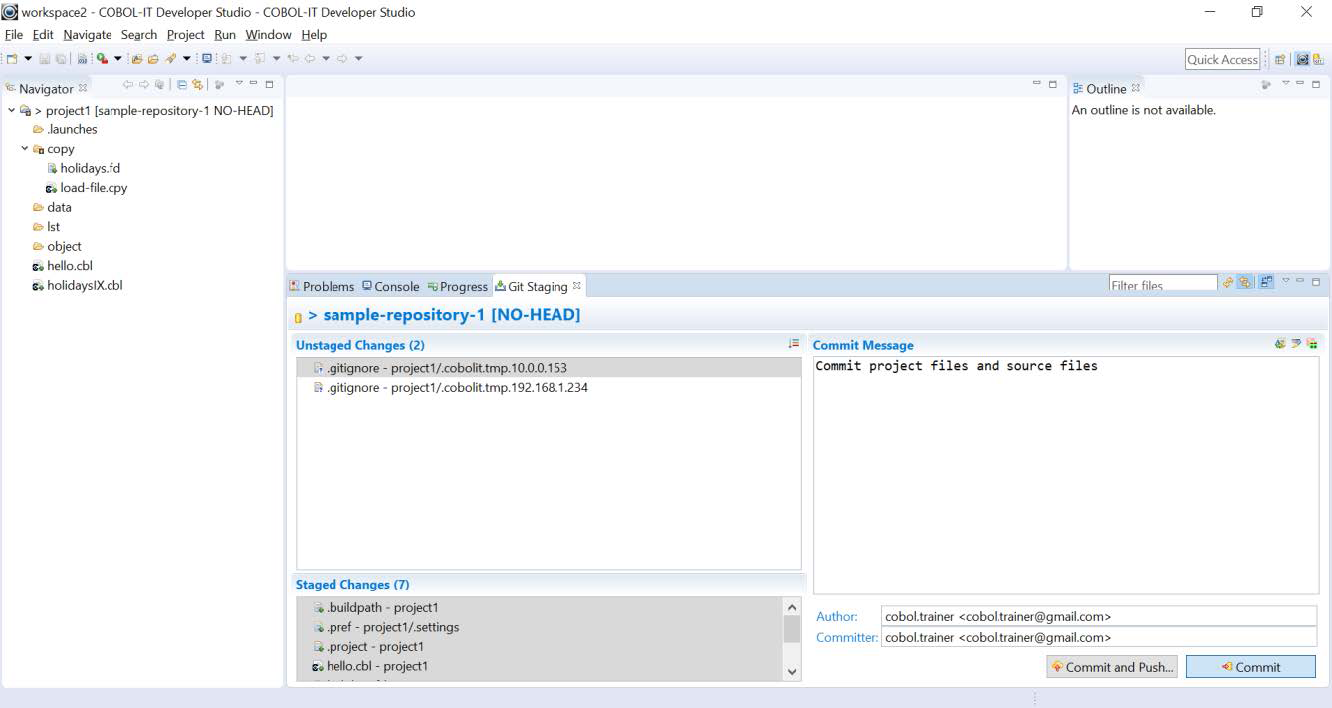
Git Staging
This will open the Git Staging View. Your project files and your source file you have changed listed as an Unstaged Changes. Select the files, right-click, and select Add to Index.
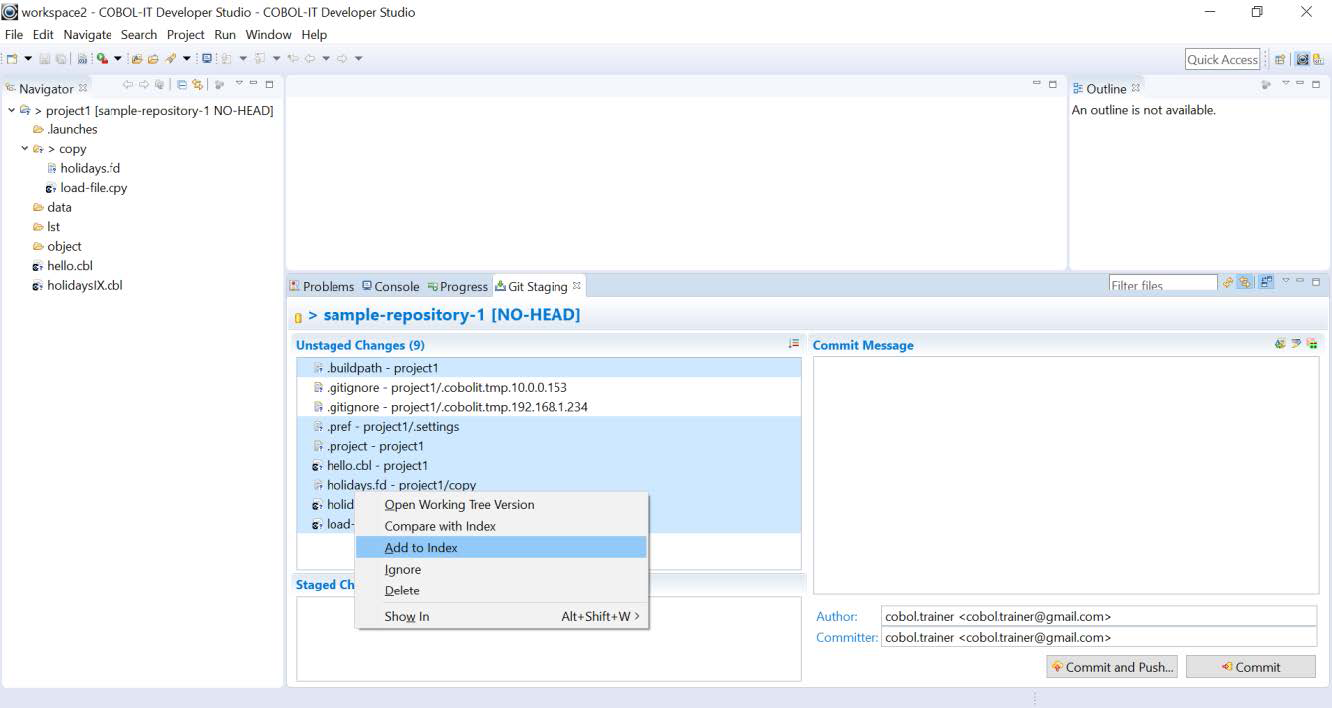
The files are now listed as Staged Changes. Enter a Commit message, and press the Commit button to commit the source code to the repository. If you are working with a Cloned Repository, and wish to Commit changes back to the Origin, click on the Commit and Push button.
Git Repositories View
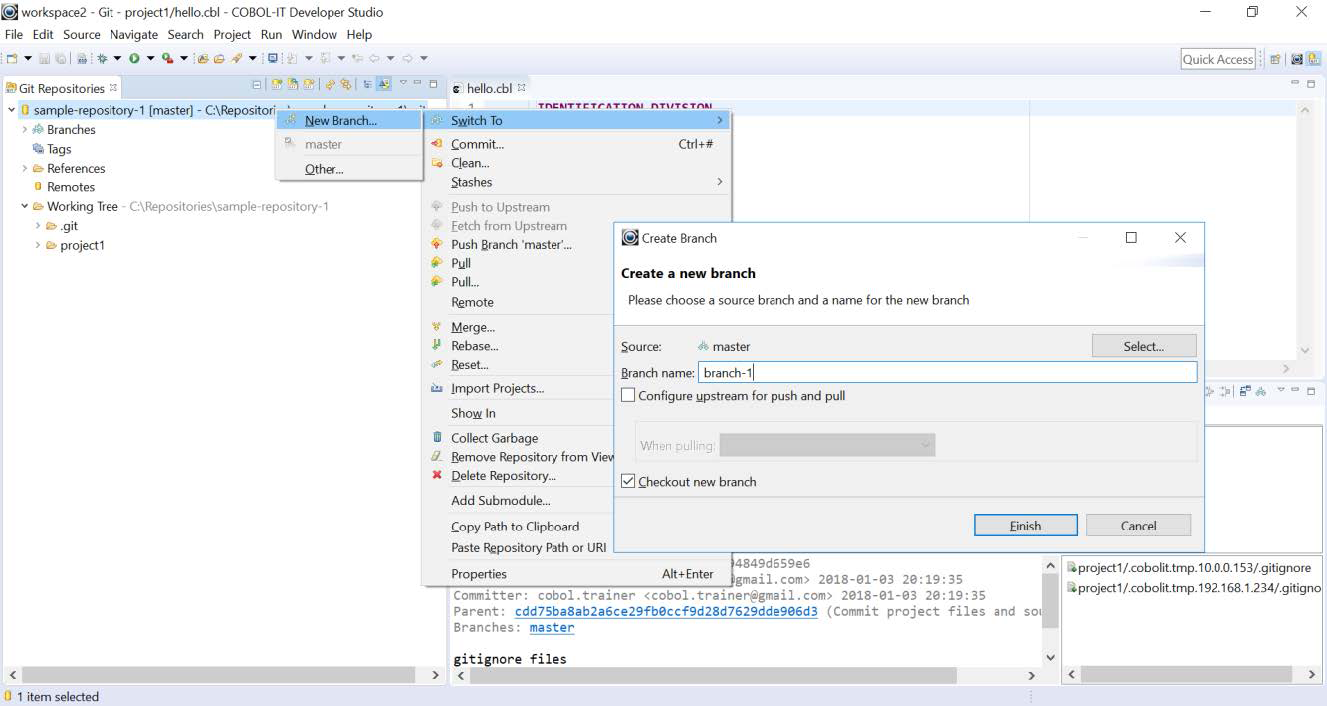
Switch to>New Branch
To Create a New Branch, or Switch to a Branch, select the Repository in the Git Repositories View, right-click, and select Switch To from the dropdown menu and New Branch from the subsequent dropdown menu.
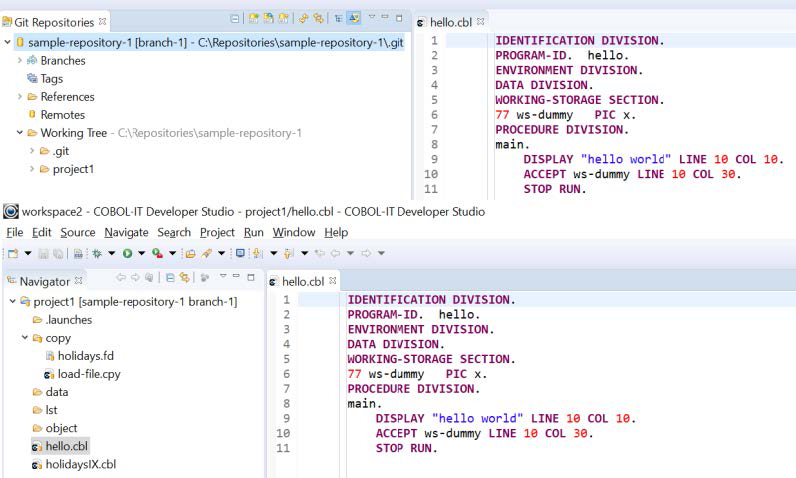
The interface creates branch-1 and performs a checkout on branch-1. The Git decorations in the Git Perspective and in the Developer Studio Perspective include the branch-1 label:
Show in > History View
To view the Repository in the History View, select the repository by clicking on it, then right-click and select Show In from the dropdown menu, and History from the subsequent dropdown menu.
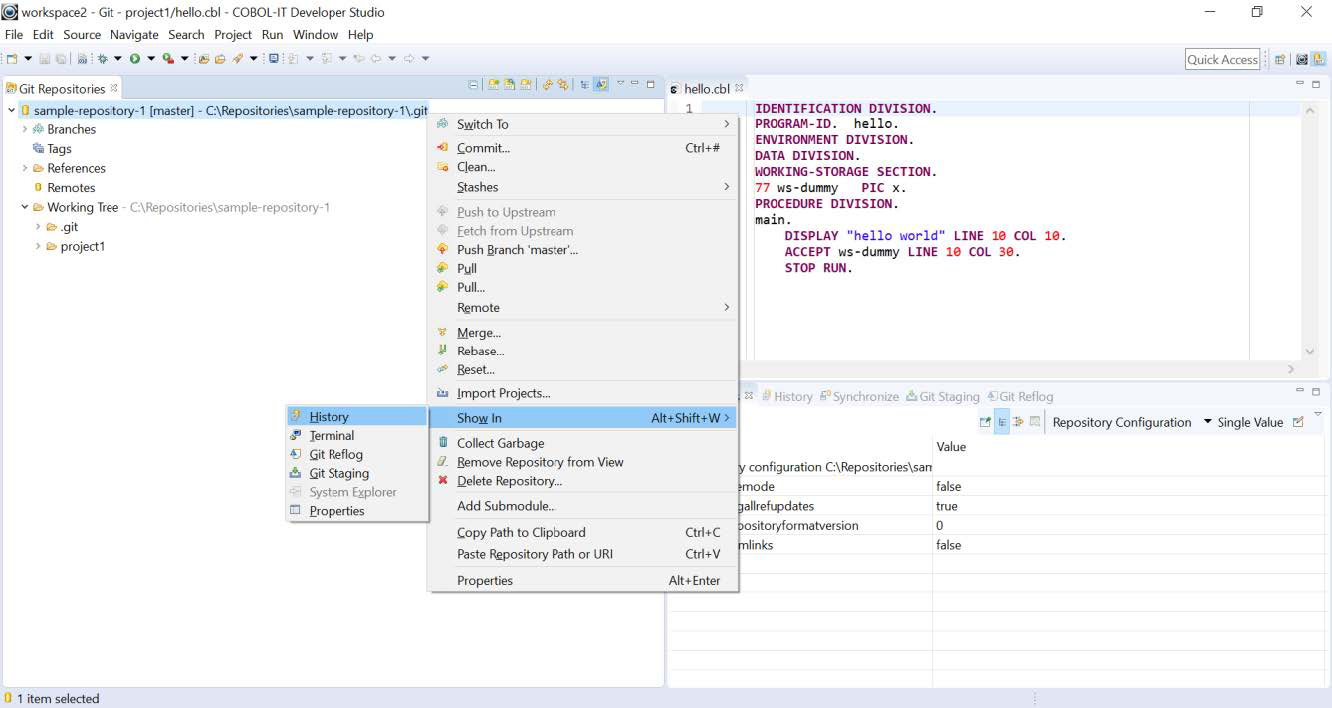
The Repository is shown in the History View: