Using “Views” in Eclipse
Key Concepts
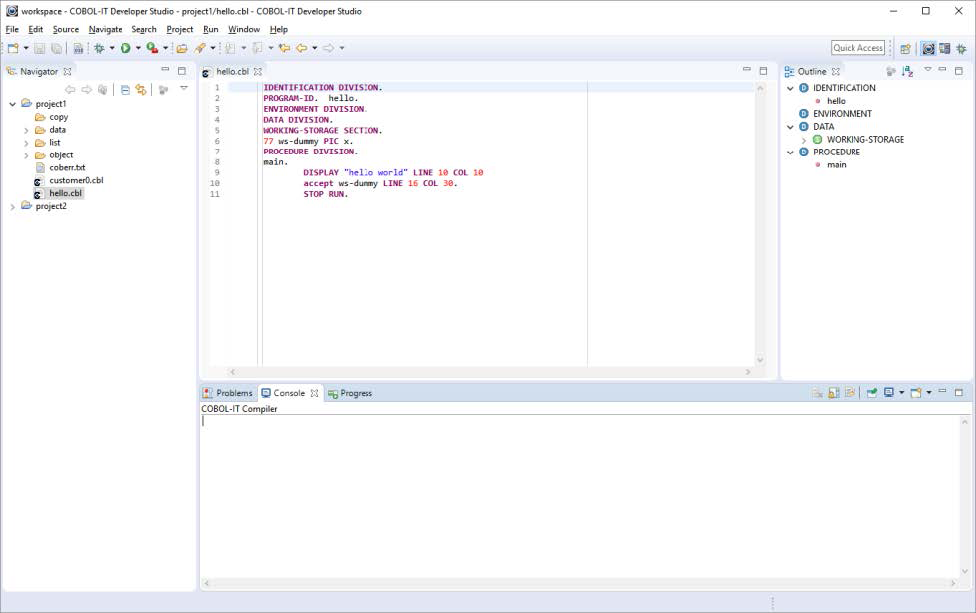
The Eclipse IDE is divided into a number of tabbed interfaces called Views. These Views can be Minimized/Maximized, Opened/Closed, Detached/Attached, Repositioned with Drag and Drop.
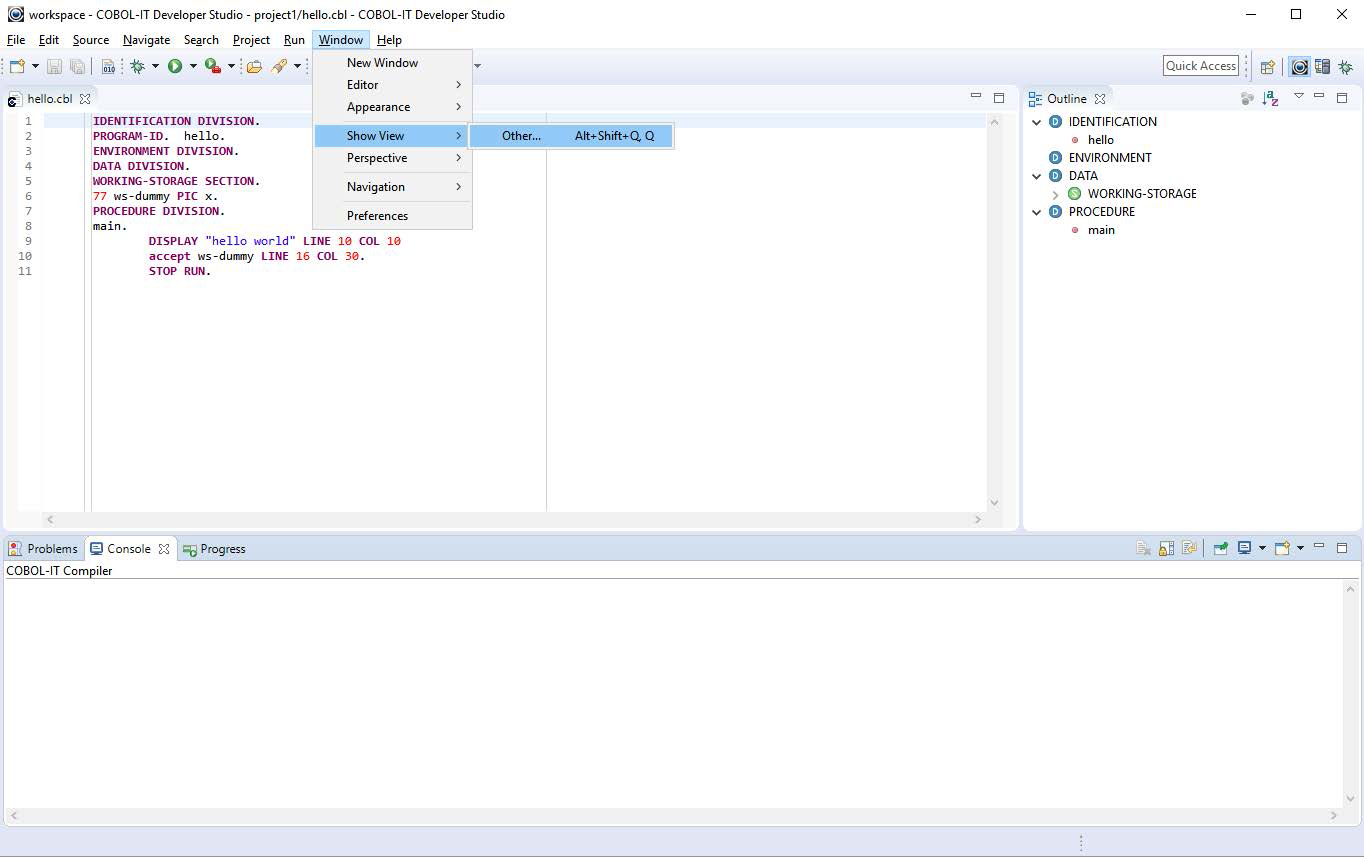
Lets consider an example: In the graphic below, the tabbed interfaces are titled Navigator, hello.cbl, Outline, Problems, Console, and Progress. These are referred to, respectively, as the Navigator View, Code Editor View, Outline View, Problems View, Console View, and Progress View.

Minimize/Restore a View
Minimize/Maximize buttons are located in the upper right-hand corner of each of the Views on your Developer Studio IDE.
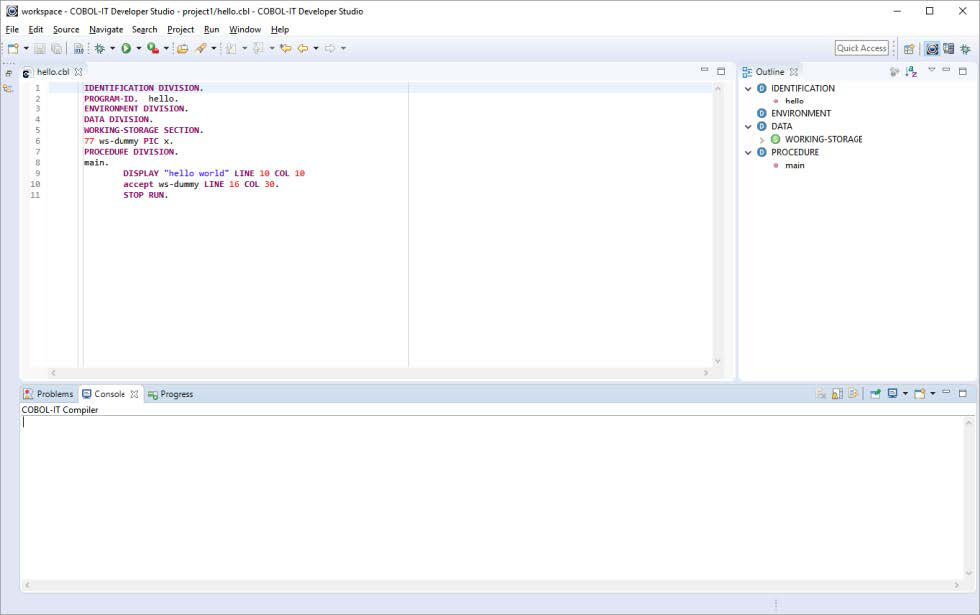
To Minimize the Navigator View, click on the Minimize button ![]() in the upper right-hand corner of the Navigator View. The Navigator View minimizes to the left-hand side of the Developer Studio, and is shown by the icon
in the upper right-hand corner of the Navigator View. The Navigator View minimizes to the left-hand side of the Developer Studio, and is shown by the icon ![]() .
.
To restore the Navigator Window to its original position, click on the Restore icon ![]() positioned directly above the Navigator icon.
positioned directly above the Navigator icon.
Maximize/Restore a View
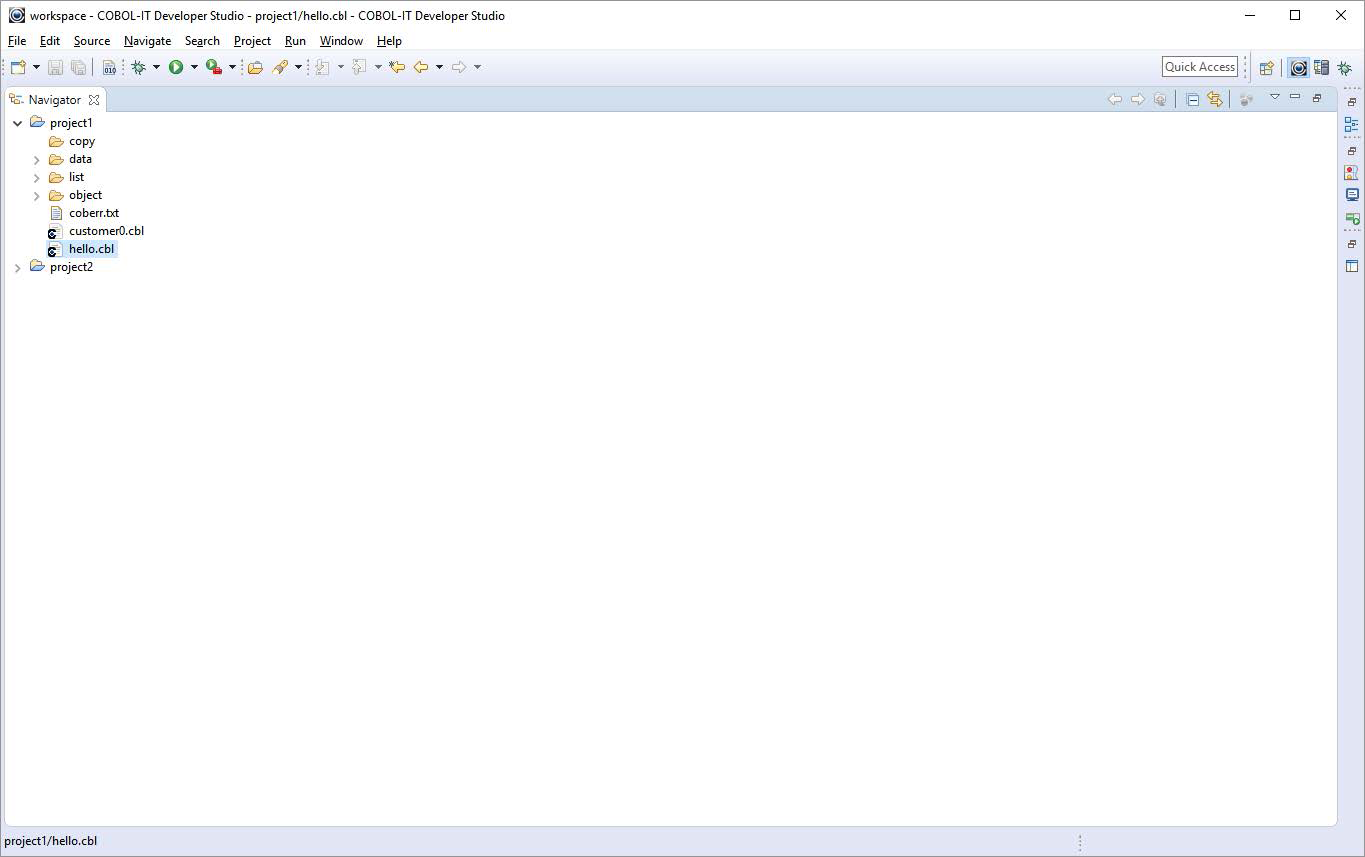
To Maximize the Navigator View, click on the Maximize button ![]() in the upper right-hand corner of the Navigator View. The Navigator View occupies the entire screen, and all other Views are minimized.
in the upper right-hand corner of the Navigator View. The Navigator View occupies the entire screen, and all other Views are minimized.
Note that the Toolbar for the maximized Navigator View now has a Restore button on it, where the Maximize button was formerly placed. Clicking on this Restore button restores the desktop.
Note also that the other views that were open have been minimized, and are shown minimized as icons on the right hand side of the Developer Studio, along with Restore buttons. The desktop can be partially or fully restored by clicking on these icons.
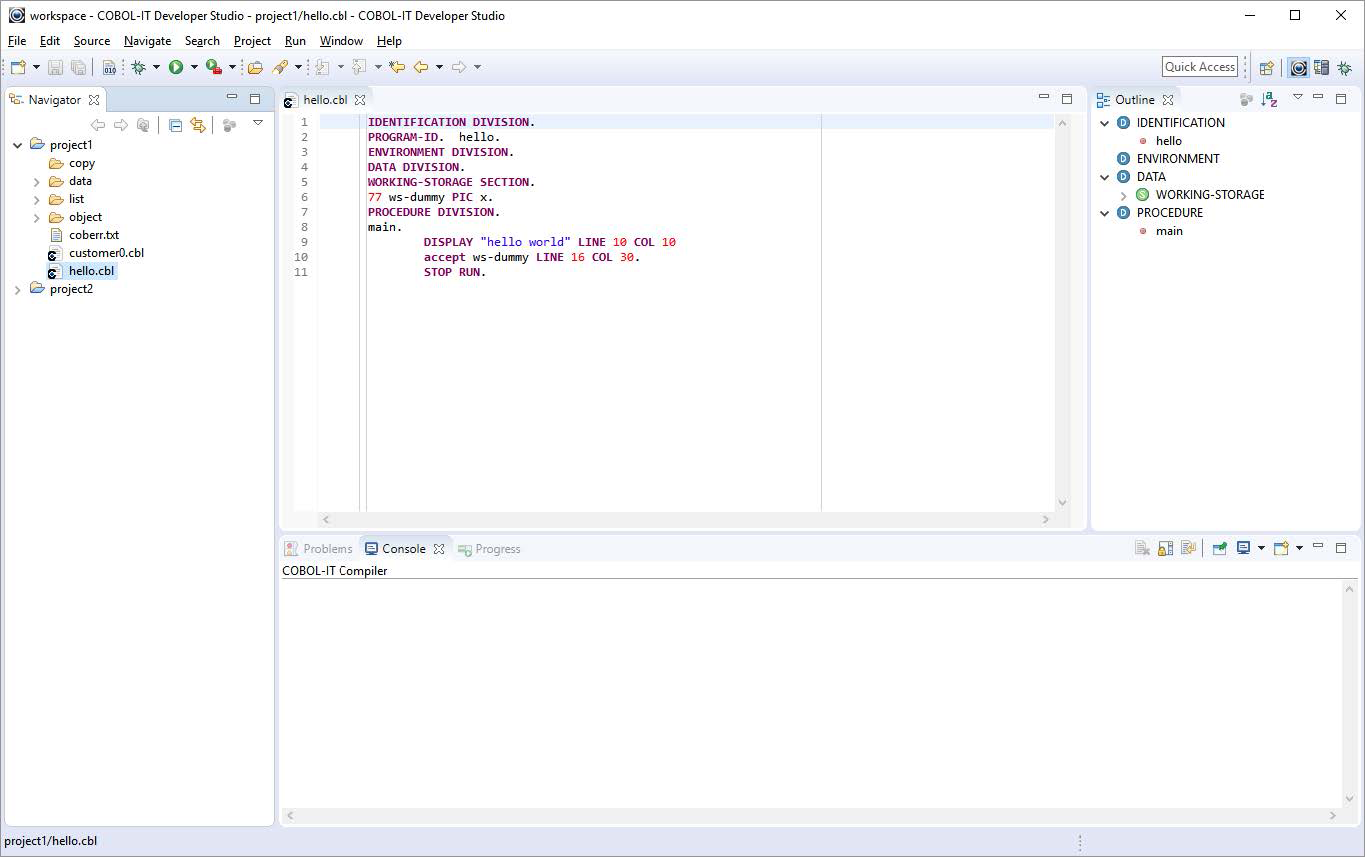
Clicking on the Restore icon above the Code Editor icon restores the Code Editor.
Clicking on the Restore icon above the Outline view icon restores the entire desktop to the way it was before maximizing the Navigator View.
Clicking on the Restore icon at the bottom of the screen restores the entire desktop.
Clicking on any of the minimized view icons restores that view.
Close/Open a View
To close the Navigator View, click on the Close icon in the right-hand portion of the tab title for the view. When you close a view, it is removed from the Developer Studio Desktop.
To Open a View
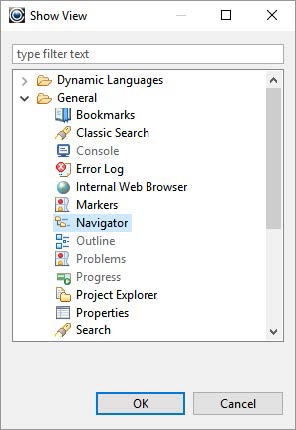
In the graphic below, the Navigator View has been closed. To open the Navigator Window, select Window>Show View>Other. Then, in the Show View dialog screen, select General>Navigator, and click Ok.
Managing Multiple Source Folders
Key Concepts
To set the compiler flags for a Source Folder, right click on the Source Folder, and select Properties>COBOL Properties>Enable Source Settings. Note that when following this set of functions, the Window title for the COBOL Properties dialog window reflects the name of the Source Folder. In the example below, this window title is: Properties for src1.
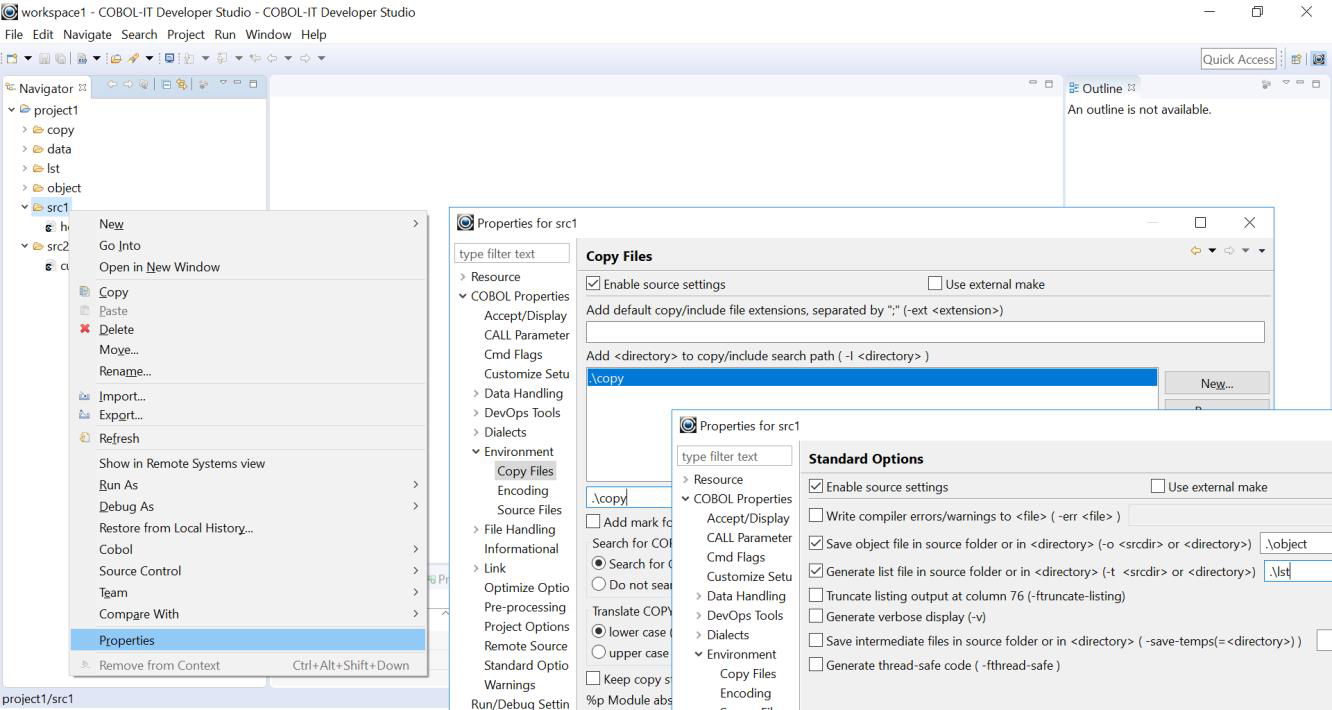
- Compiler flag and Environment settings, such as the
–Isetting in the example above, may use relative notations. Where you see relative notations, the “.” refers to the root directory of the Project, not the Source directory. - In the Workspace we have created for these Getting Started exercises, we have set a compiler flag of
–o .\objectat the Workspace level. This will cause the object files to be created in the object directory located under the Project directory. This behavior is the same as we saw when the source files were contained in the root Project directory. - If there were no
–ocompiler flag setting, the Developer Studio would create the object files in the Source Directory.