The File Records Area
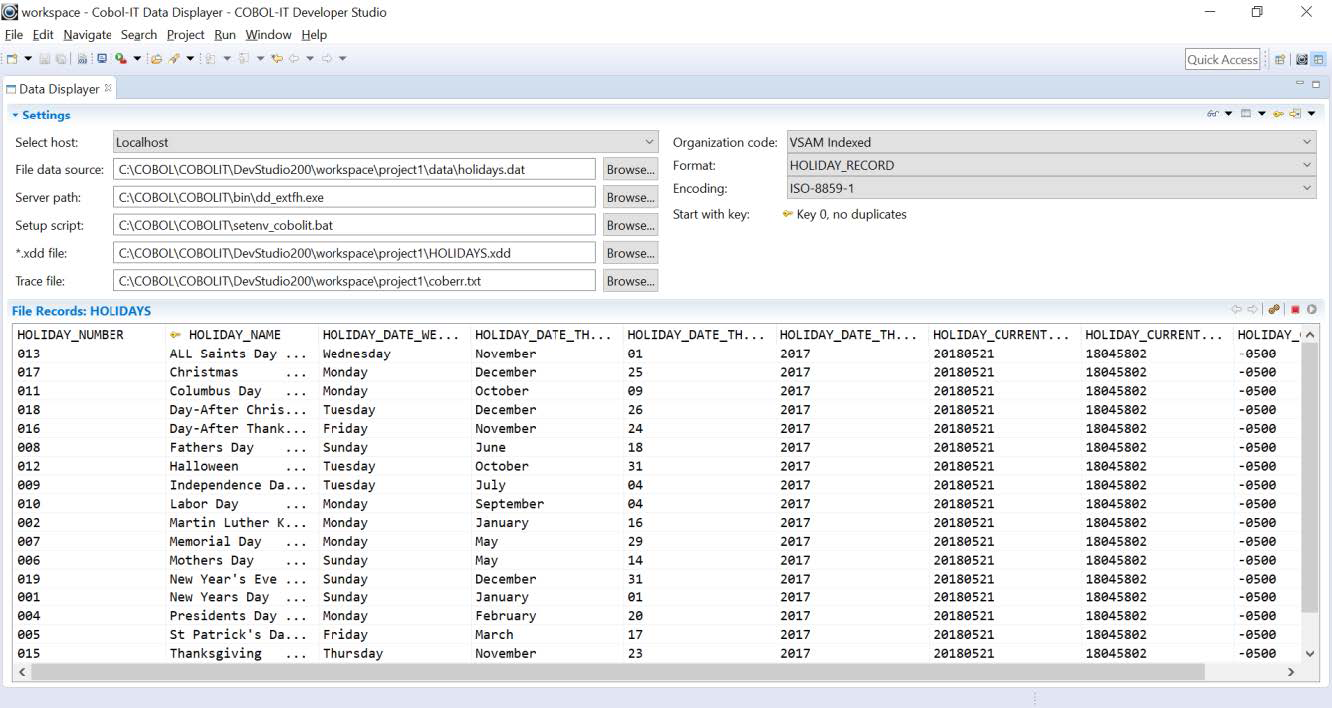
Records Displayed in Tabular Form
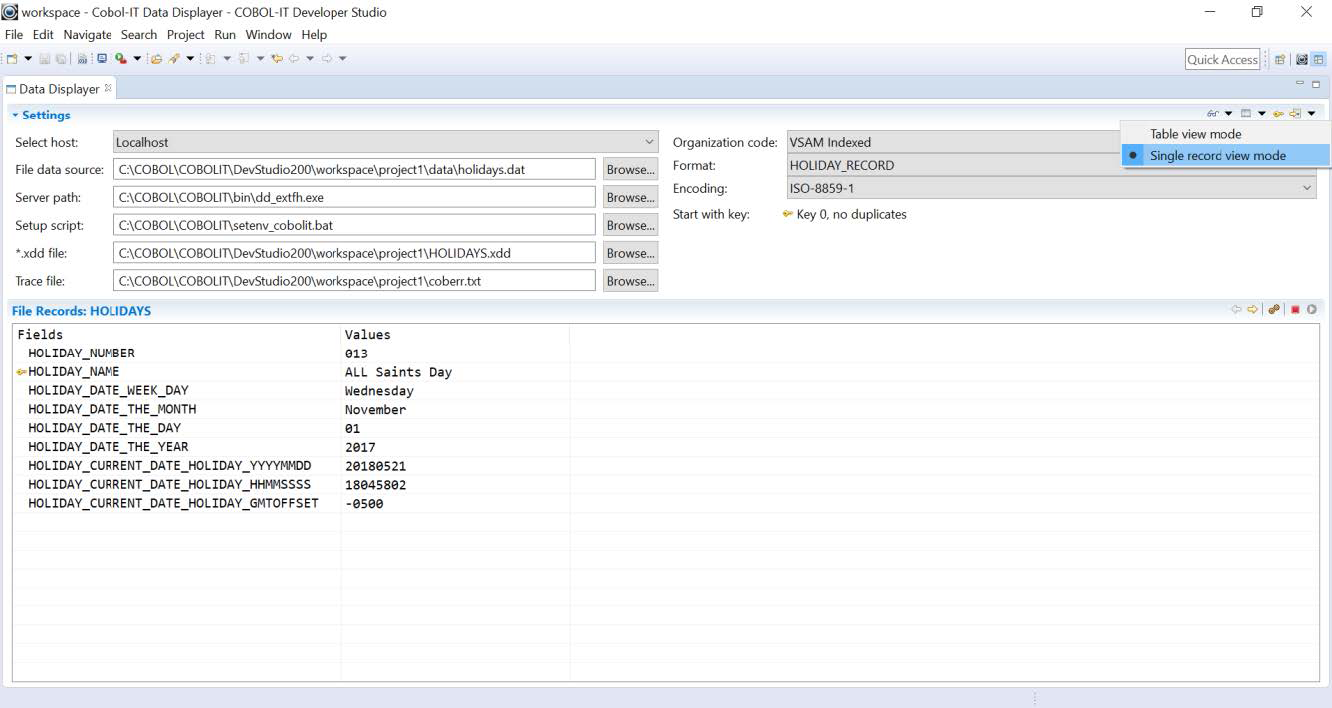
Record Displayed in Single Record View Mode
In the Single Record View Mode, there are only two columns. The field names of the record are listed vertically in the first column, and their corresponding values are listed vertically in the second column. Single record display is very useful when you are interested in modifying the data in a single record. It can also be a simpler way to view data in records that have large numbers of fields.
The File Records Area Toolbar- Read Only Mode
The File Records Area Toolbar for Indexed Files:

The File Records Area Toolbar contains the following functions:
| Toolbar Icon | Function |
|---|---|
| Read Previous (Disabled in Table view mode) | |
| Read Next (Disabled in Table view mode) | |
| Configure Columns | |
| Close File | |
| Re-open File |
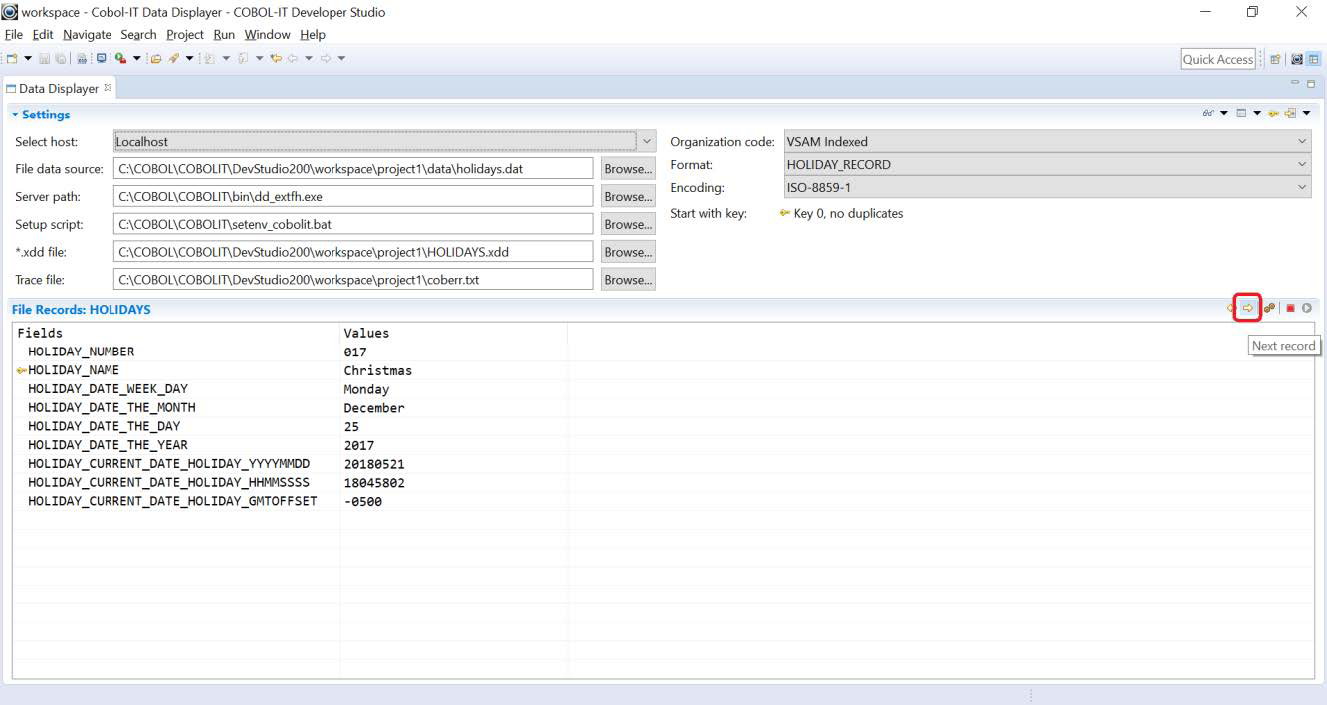
Read Previous/Read Next
When an Indexed File is open in Single record View Mode, the Read Previous and Read Next functions are enabled. Selecting Read Previous performs a Read Previous operation using the selected Start Key, and displays the previous record. Selecting Read Next performs a Read Next operation using the selected Start Key and displays the next record.
For the case where one of these operations could not successfully be performed, the operation is disabled. As an example, a Read Previous could not successfully be performed after opening the File, and doing a First Record read using the selected Start Key. In this case, the Read Previous button is disabled.
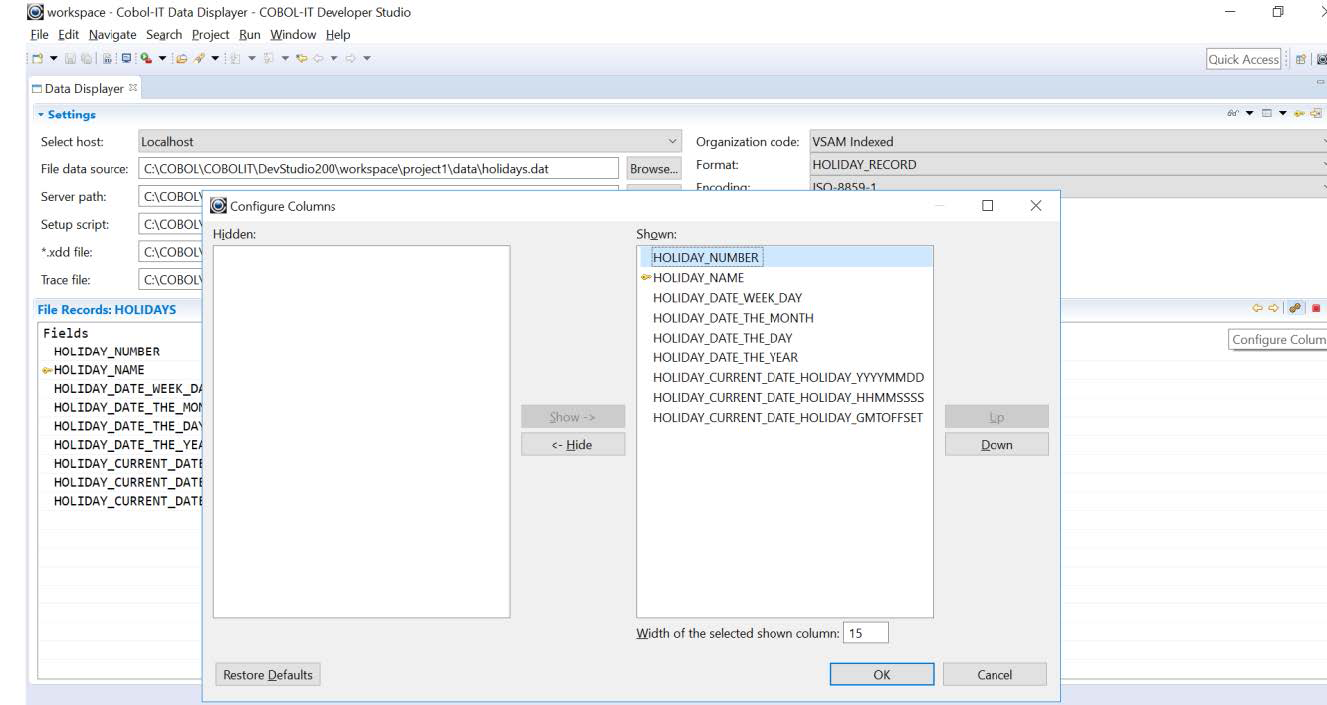
Configure Columns
When records are being displayed in Table Mode, the field names of the record are stored horizontally in contiguous columns. When there are more column that can fit on a page, a horizontal scroll bar allows you to scroll to the right and reveal the additional columns.
Because of the way data it displayed in Table Mode, it can be useful to use the Configure Columns feature, which allows you reduce the number of columns displayed, by Hiding certain columns, or to change the order in which the columns are displayed, so that the columns that you are interested in browsing and potentially editing appear on the initial display screen.
To hide a column, open the Configure Columns interface, select a column name in the Shown list, and click on the Hide button in the center of the window. The selected column will display in the Hidden list, on the left side of the screen. Click OK to return to the tabular display, and you will see that the Hidden column is no longer displayed.
To show a column, open the Configure Columns interface, select a column name in the Hidden list, and click on the Show button in the center of the window. The selected column will display in the Shown list, on the right side of the screen. Click OK.
To set the width of a column, select a column and enter a number in the Width of the selected shown column entry-field. Select Holiday Current Date Holiday GMT Offset column and select 15. The Holiday GMT Offset field displays with a width of 15 characters.
To change the position of the column in the display, use the Up and Down on the right side of the screen to change the order in which the columns are displayed. Moving a field Down causes it to move to the right in the sequence of columns displayed. Moving a field Up causes it to move to the left in the sequence of columns displayed.
Close File
Click on the Close button on the File Records Toolbar to close the file and clear the screen. After closing the file, you can open another file.
Note
When a file is open in the Data Displayer, it will appear to be open to COBOL programs running in your project. That is, if you leave a file open in the Data Displayer, and return to the Developer Studio, and run a program which opens the file, the open file function will fail. The solution to this problem is to close the file in the Data Displayer.
Re-open File
Any time you change the Open mode, the View mode, the Key of reference, or the START function, you must click on the Re-open File button to re-display your data. When switching between READ and READ-WRITE mode, the Re-open File function will first close, then re-open the file.
Using Read/Write Mode
Use the Open Mode button on the Data Displayer Toolbar to toggle to Read-Write Mode, and then use the Re-open File function. Re-open File causes the file open in Read-Write Mode to be closed, and then re-opened in Read-Write mode.
In Read-Write mode, you will have access to all of the editing functions of the Data Displayer, which include Add Record, Delete Record, Modify Record (ASCII) and Modify Record (Hex).
The File Records Area Toolbar- Read-Write Mode
The File Records Area Toolbar for Indexed Files:

The File Records Area Toolbar contains the following functions:
| Toolbar Icon | Function |
|---|---|
| Read Previous | |
| Read Next | |
| Add a Record | |
| Delete a Record | |
| Save Changes | |
| Close File | |
| Re-open File |
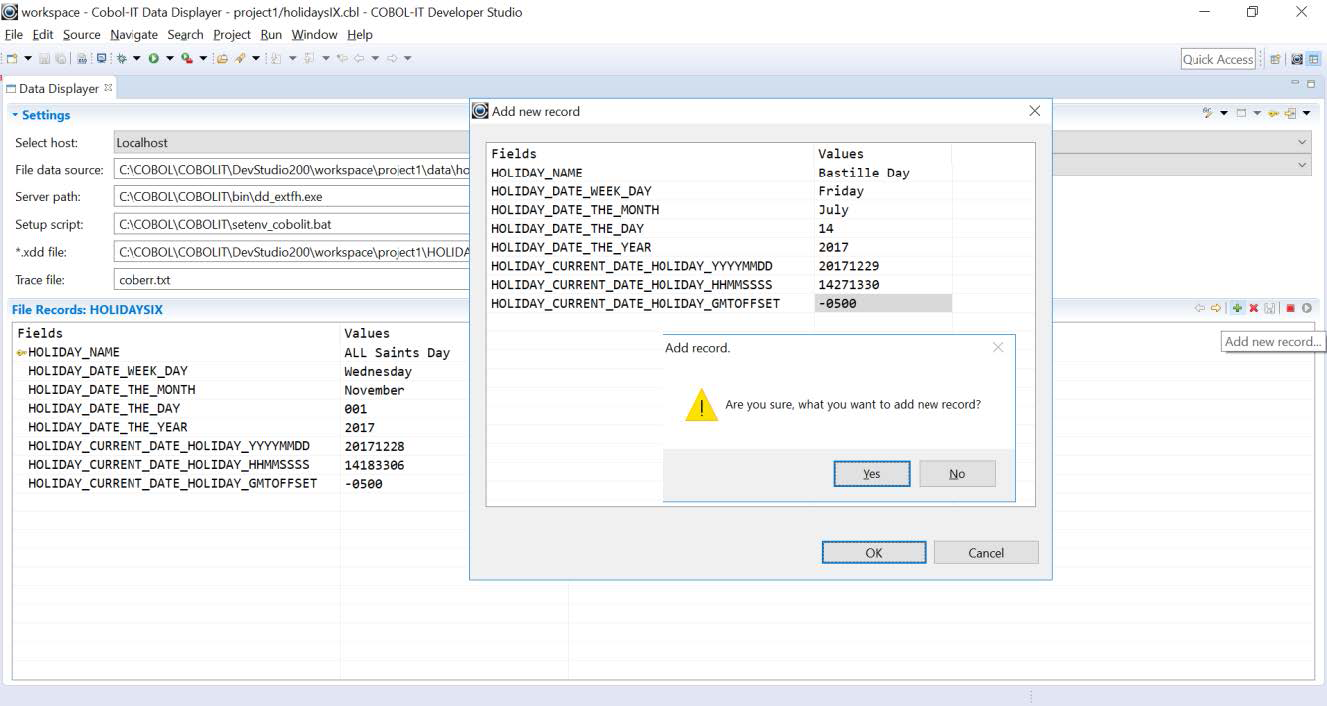
Add a Record
To add a record, click on the Add button on the File Record toolbar. In the Add new record dialog box, the field names are listed in the column on the left. Values are empty in the column on the right. Primary key fields are required. Click OK then verify that you wish to add the record.
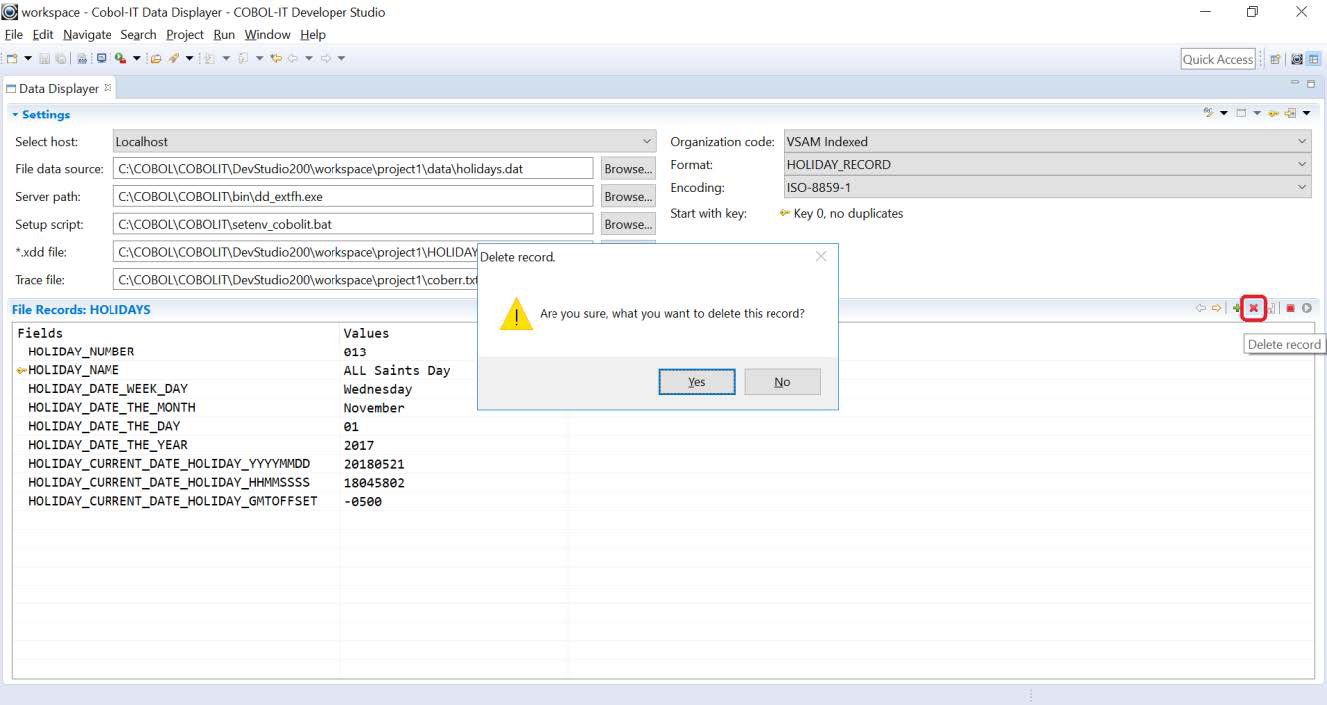
Delete a Record
Select the Delete button on the File Records toolbar, followed by Yes on the Are you sure dialog box.
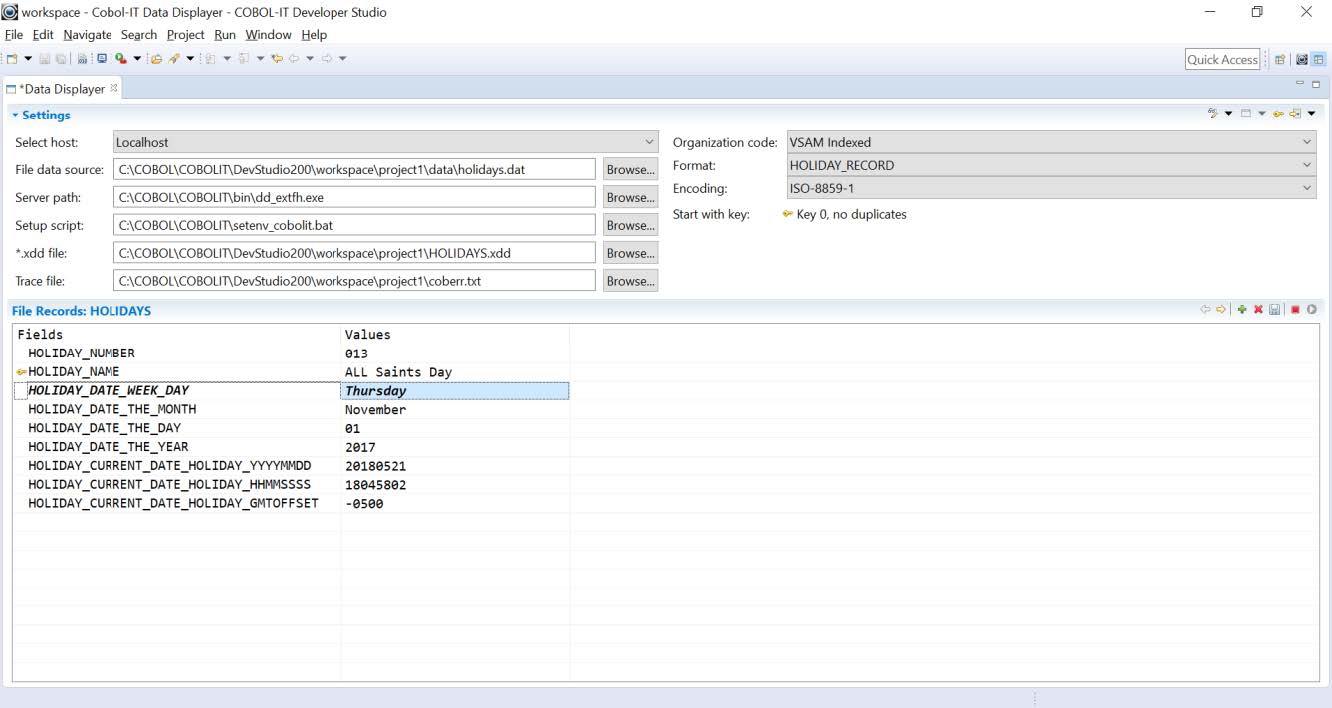
Modify a Record (ASCII)
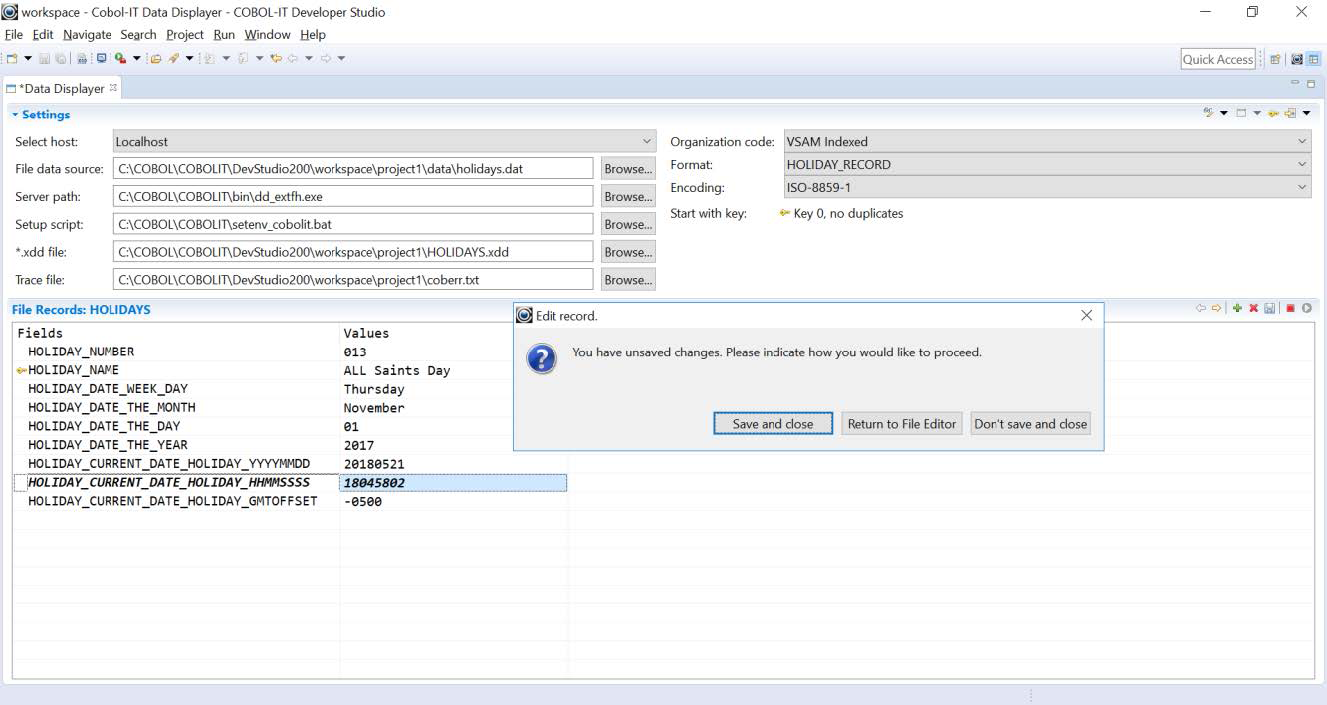
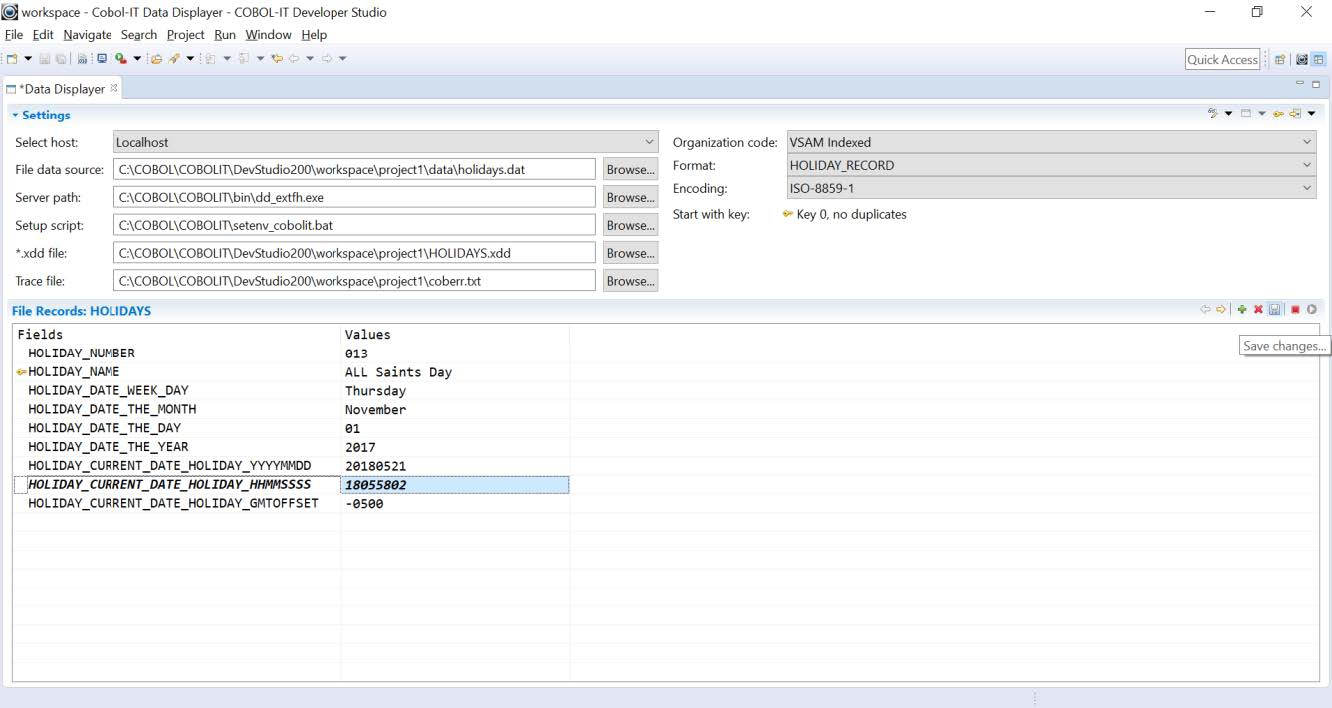
Double-click on a data element in a record. The selected record is highlighted with a blue background. Single-click in this cell to activate the cursor with the cell displaying the data element. With your cursor active within the cell, you can modify the contents of the cell, typing from your keyboard. Unsaved changes are indicated with an asterisk (*) next to the Data Displayer tab title.
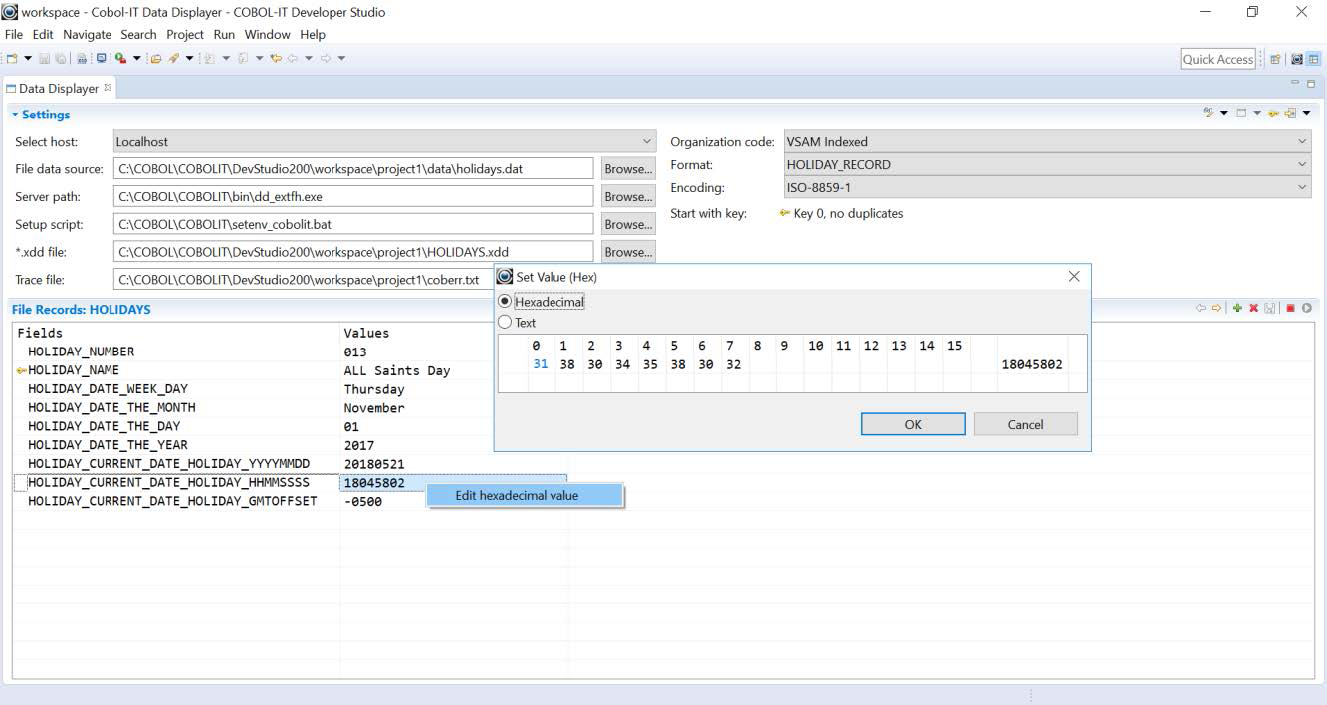
Modify a Data Element (Hex)
Single-click on a data element in a record. Right-click and select the Edit hexadecimal value button. In the Set Value (Hex) window, modify the hexadecimal value by overtyping the two-digit number. Unsaved changes are indicated with an asterisk (*) next to the Data Displayer tab title.
Save Changes
Click on Save changes to save your modifications. The field is no longer rendered in bold italics. The asterisk (*) next to the Data Displayer title has been cleared.
Close File
If you try to close a file with unsaved changes, you will be asked if you wish to save your changes.