Installing
This document describes how to install and how to use the COBOL-IT Developer Studio. COBOL-IT Developer Studio is a COBOL development workshop based on the Eclipse environment.
This IDE includes a project manager and a full screen editor dedicated to COBOL language with colorized syntax and an interface to the COBOL debugger. It may be customized according to the specific needs of each company. The Eclipse environment offers great flexibility through its wide range of plug-ins.
The Developer Studio is the Eclipse-based COBOL-IT Development Environment , providing a framework for using the Compiler, Runtime and Debugger in a Development environment with a feature-rich COBOL Code Editor.
COBOL-IT Developer Studio enables COBOL developers to more easily maintain and enhance their applications by offering them the entire range of possibilities and power of Eclipse.
This chapter guides the user through a practical exercise that includes installing the Developer Studio, and launching a workspace.
Installing Developer Studio (Windows)
COBOL-IT Developer Studio Windows distributions are provided in a zipped folder file format. Distributions are provided for the Kepler Version of Eclipse (Java 6, 7) , as well as for the Neon version of Eclipse (Java 8).
Downloadable distributions for the Developer Studio version 2.0.0 are available in both 32- and 64-bit formats for Windows and Linux operating environments, with builds done with both the Kepler and Neon versions of Eclipse. Linux distributions are provided in gzipped tar formats. Windows distributions are provided in zipped formats.
The COBOL-IT Developer Studio is downloadable from COBOL-IT Online, with access provided by your Sales Representative. Your login and password will give you access to the Downloads Screen on COBOL-IT Online.
In the Active Authorizations Window of the Downloads screen, select Cobol IT Developer Studio. Active Authorizations are the Products you are currently authorized to Download. Selecting COBOL-IT Developer Studio displays a list of the Products you may download.
From the list, select IDE Windows with jre. After selecting IDE Windows with jre, you will advance to the COBOL-IT Developer Studio Download Screen.
For Windows Distributions
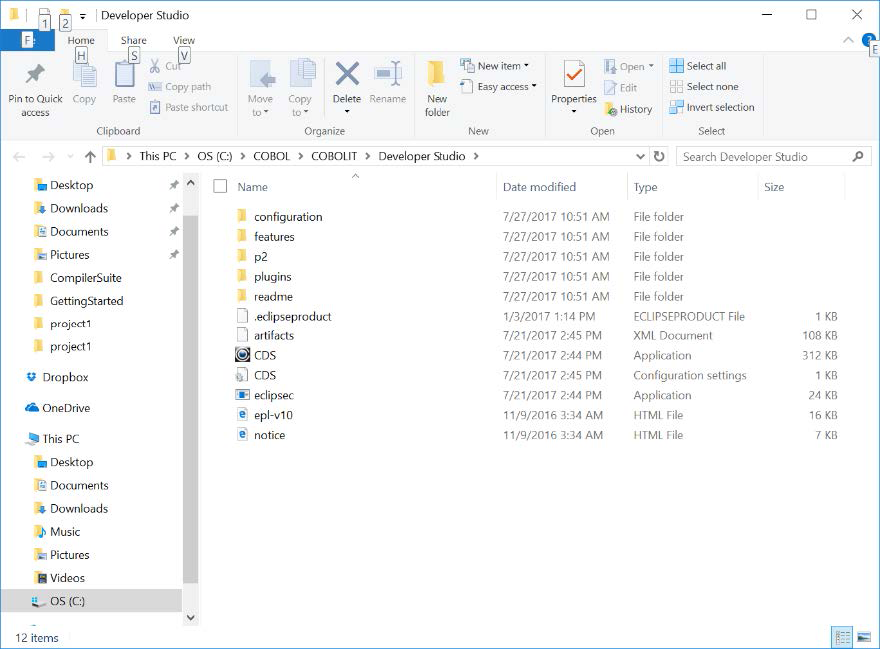
Right-click on the COBOL-IT Developer Studio zipped archive and select Unzip to…. Then browse to the folder in which you wish to install your Developer Studio.
The COBOL-IT Developer Studio is an application called CDS.exe. Double-click on CDS to launch the Developer Studio.
For Linux Distributions
From the command line, unzip/untar the distribution archive, and install it in a directory on your Linux Server.
>tar zxpf devstudio-neon-2.0.0-linux.gtk.x86_64.tar.gz -C /home/cobolit/devstudio
The Linux-based COBOL-IT Developer Studio is an application called CDS. Run CDS to launch the Developer Studio.
The Developer Studio is licensed with the COBOL-IT Developer Studio license file which is located by default in your COBOL-IT installation directory. Licenses are product and platform specific. In addition to the Developer Studio license, usage of the Developer Studio requires a license for the COBOL-IT Compiler Suite for all platforms on which you wish to compile and run COBOL programs.
The Developer Studio Distribution
Validate the Installation, by checking the license.
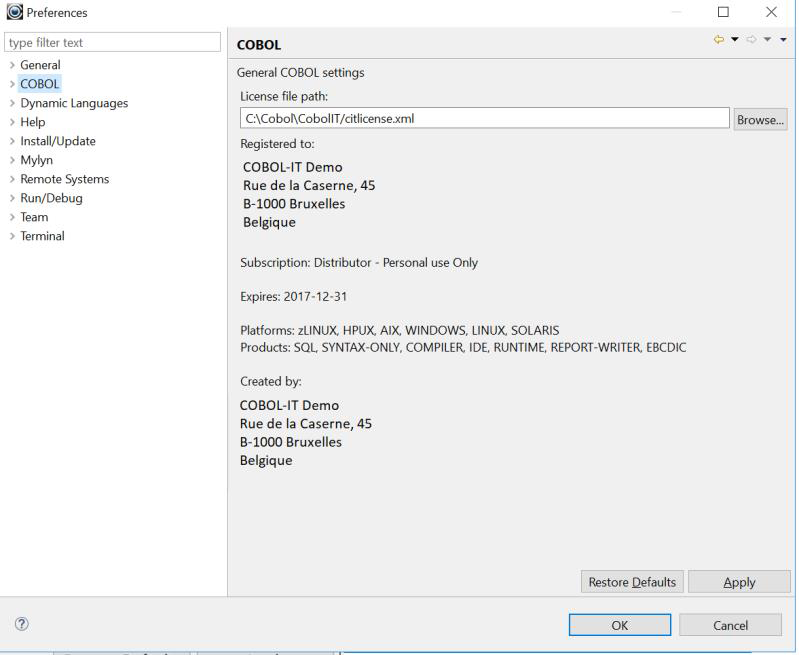
To validate the install, select Window, from the Main Menu bar, and then select Preference from the dropdown menu. In the Preferences dialog screen, select COBOL from the panel on the left. You will now need to browse to locate your COBOL-IT license file. The Developer Studio will attempt to validate licenses located in the installation directory with a name of citlicense.xml, or a name beginning with citlicense- and with the .xml suffix.
As an example, click on the Browse... button, navigate to the installation directory, and select citlicense.xml. The expiration date of your license, and the products and platforms supported will be displayed. Verify that the Compiler Suite and Developer Studio are licensed on your platform.
Click OK to return to the Developer Studio.
Installing Updates to the Developer Studio
Note
Administrator privileges required in some situations
In Windows, if the Developer Studio is installed under either the C:\Program Files or C:\Program Files (x86) folders on your Windows system, then you must have Administrator privileges in order to perform Developer Studio updates. This is because Windows considers the C:\Program Files and C:\Program Files (x86) folders to be restricted directories.
To install an update to the Developer Studio
Select Help>Check for Updates from the Main Menu bar.

Eclipse is programmed to check the plug-ins you have installed for updates.
On the Available Updates dialog screen, click Select All, and then click on the Next> button to continue.
Review and confirm the updates.
If any updates are downloaded, you will be required to review and accept the terms of the Eclipse license agreement.
Select the radio button titled I accept the terms of the license agreement. Click on the Finish button to begin the download and install the updates.
Wait, while your software updates. You may receive a Security Warning that the software contains unsigned content. Click OK. When you are prompted to restart Eclipse, click Restart Now. To verify that your update has been installed, select Help>Installation Details in the dropdown menu.
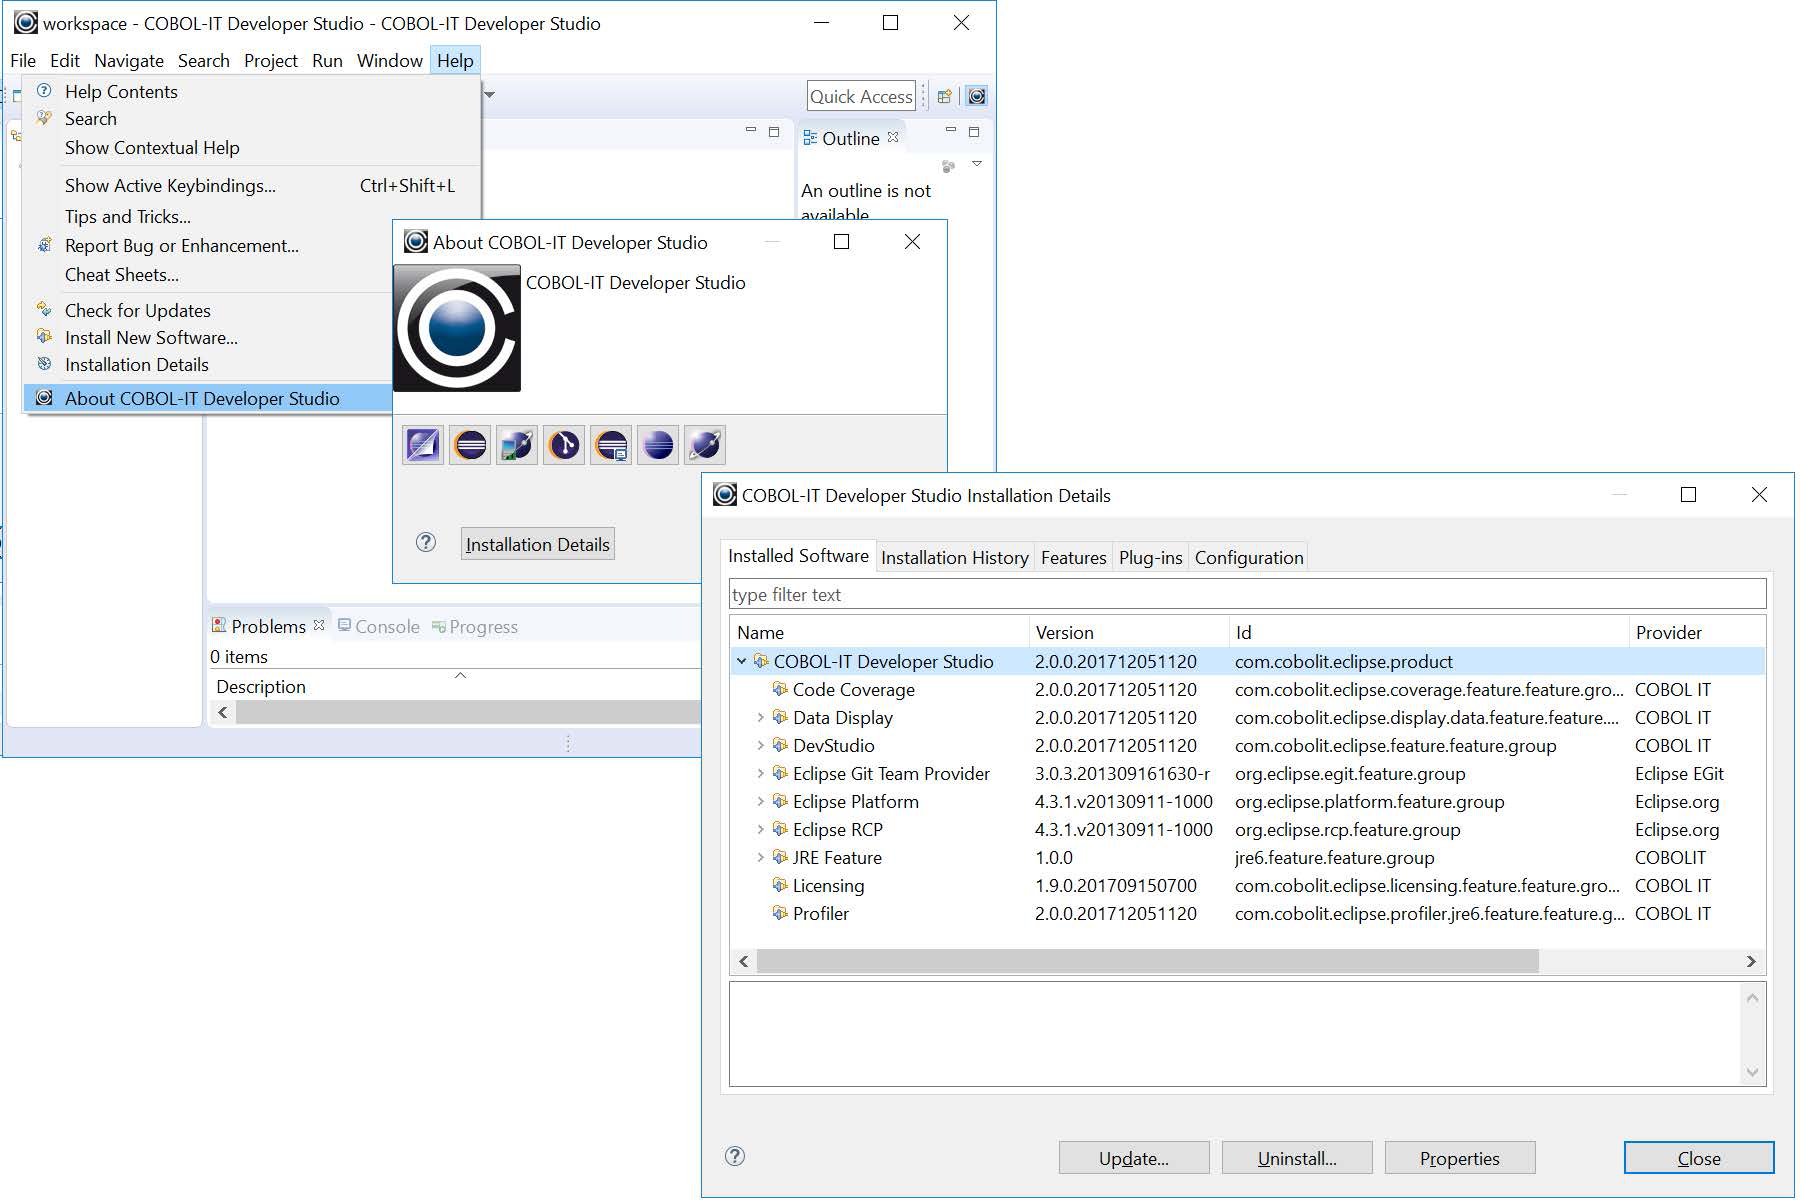
The COBOL-IT Developer Studio Installation Details Window contains Version Information about COBOL-IT Developer Studio, and its dependencies in the Eclipse environment.
The Eclipse Platform
Key Concepts
The Eclipse Platform stores your projects in a folder called a workspace.
When opened, Eclipse prompts the user to indicate where they wish to launch their workspace.
Eclipse guides the user from the Workspace Launcher screen through the Welcome screen, to the Developer Studio IDE.
Users of the Developer Studio IDE should begin by de-selecting Build Automatically on the dropdown menu under the Project button on the main menu bar.
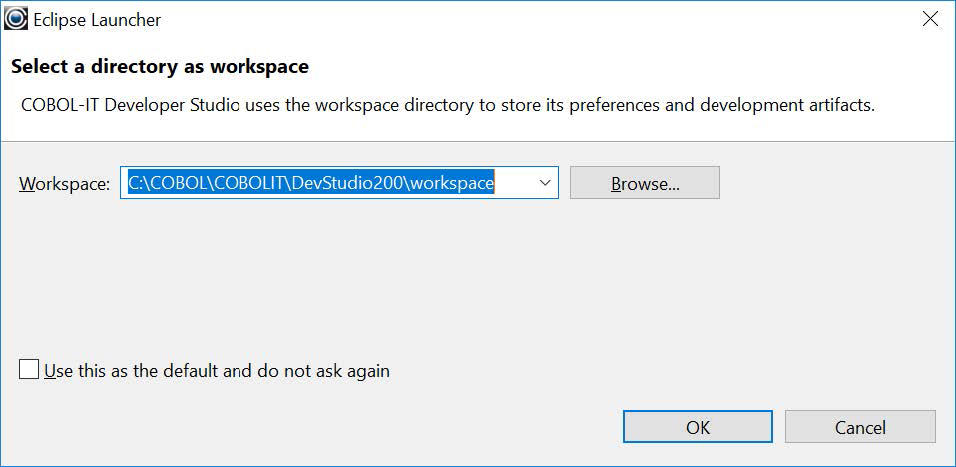
The Workspace Launcher
Enter a path for the Workspace, and click OK.