Using Links
Links connect separate activities that are contained within a Flow activity and control the order in which the activities execute. Links are important when creating processes that contain parallel activities.
A link can include a condition which can further control when or if an activity executes. The condition is an XPath expression and can be written using the XPath Editor.
All links defined within one Flow must have unique names. You can change the name on the Description tab of the link's Properties view.
Activities can have multiple incoming links. An activity only runs when at least one of its incoming links evaluate to true.
An example:
In a typical trip reservation example, there is a set of three activities that will execute in parallel; this means that their corresponding Web services will be invoked concurrently. These activities are checking the flight availability (checkFlight), verifying the availability of the hotel (checkHotel), and reserving a rental car (checkRentalCar). All three activities will start at the same time the Flow activity starts.
Let's say you want to add another activity, booking the flight (bookFlight). You could just add this activity to the Flow where it would also execute in parallel, but it doesn't make much sense to book a flight before you verify that a flight is available. To make sure these activities execute sensibly, you can add a link between these two activities. The activity which is the target of the link will only execute if the activity that is the source of the link has completed.
This example is further described in the 3.4.4.Parallel Processing section of the WS-BPEL Specification.

To add a link:
- In the BPEL Editor, with a Flow activity already in place, drag an activity inside the Flow.
-
Drag an additional activity to the same Flow.
During execution, without a link, each path is executed concurrently and the activities on each are executed in the order in which they appear.
-
Right-click on the parent activity, select Add Link.
Place the end of the line at the link's destination. Click to fasten.
-
In the Properties view, you can set any necessary transition conditions, add a description, and personalize the name of the link.
Using Transition Conditions
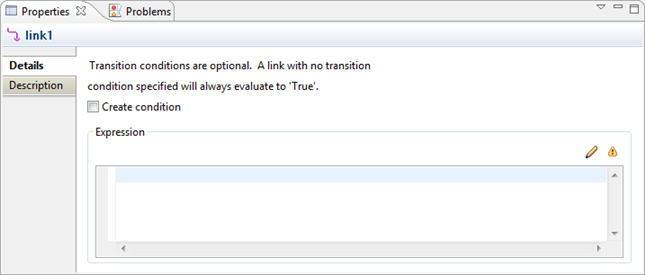
When an activity completes, it evalutes any condition on the outgoing link. If you do not define a condition, and the activity has completed normally, then all conditions automatically evalute to true so that the next activity can start. You can set transition conditions which further defines how the links execute.
- With a link selected in the BPEL Editor, on the Properties view, select Create condition.
- Write the condition in the Expression field or click
 on the toolbar to open the XPath Expression Editor.
Links and Join Behavior
Along with transition conditions, you can set join conditions on the activity which puts more constraints on execution. When the activities are the source of a link, the condition of the link and the join condition of the activity must be evaluated. If the link conditions that lead to an activity conflict with those of its join condition, then a fault is thrown on that activity.
More Information