Step 2: Open the Design Studio and Create a Project
The Welcome screen is the first thing you see when you open the Design Studio. From this screen you can check out the interactive tutorials, view the online help, or just start working.
- Select Overview to open the online help window. From within the Process Design Studio, user assistance is available through the Help menu. You can browse, search, bookmark, and print help documentation.
- Select Tutorials to walk-through the tutorials, in PDF format, to learn how to use Verastream Process Designer. These tutorials build on each other and leverage what you learn in the first tutorials in subsequent ones.
- Select Start to begin working immediately. This option opens the studio and lets you begin interacting directly with the product
The Process Design Studio opens and Process Server starts automatically when you install the Process Designer.
Creating a Project
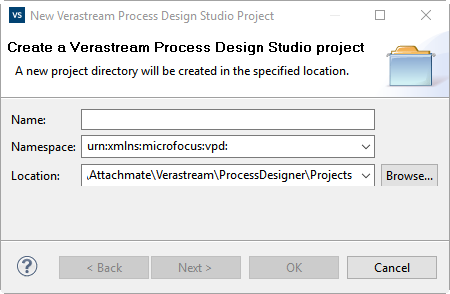
- Business processes are created within a project.
- Project names must adhere to the XML NCName convention. This means they can only consist of letters, digits, underscores, periods, or dashes. They cannot contain spaces and must start with a letter or underscore.
- Each project folder is stored in a workspace directory (Documents on Windows 7 and Windows 10), under the path
Micro Focus\Verastream\ProcessDesigner\Projectsdirectory. This folder contains the files necessary to run the process. - After you create the new project, the Design Studio opens with an initial template to help you start building your new process.
More Information